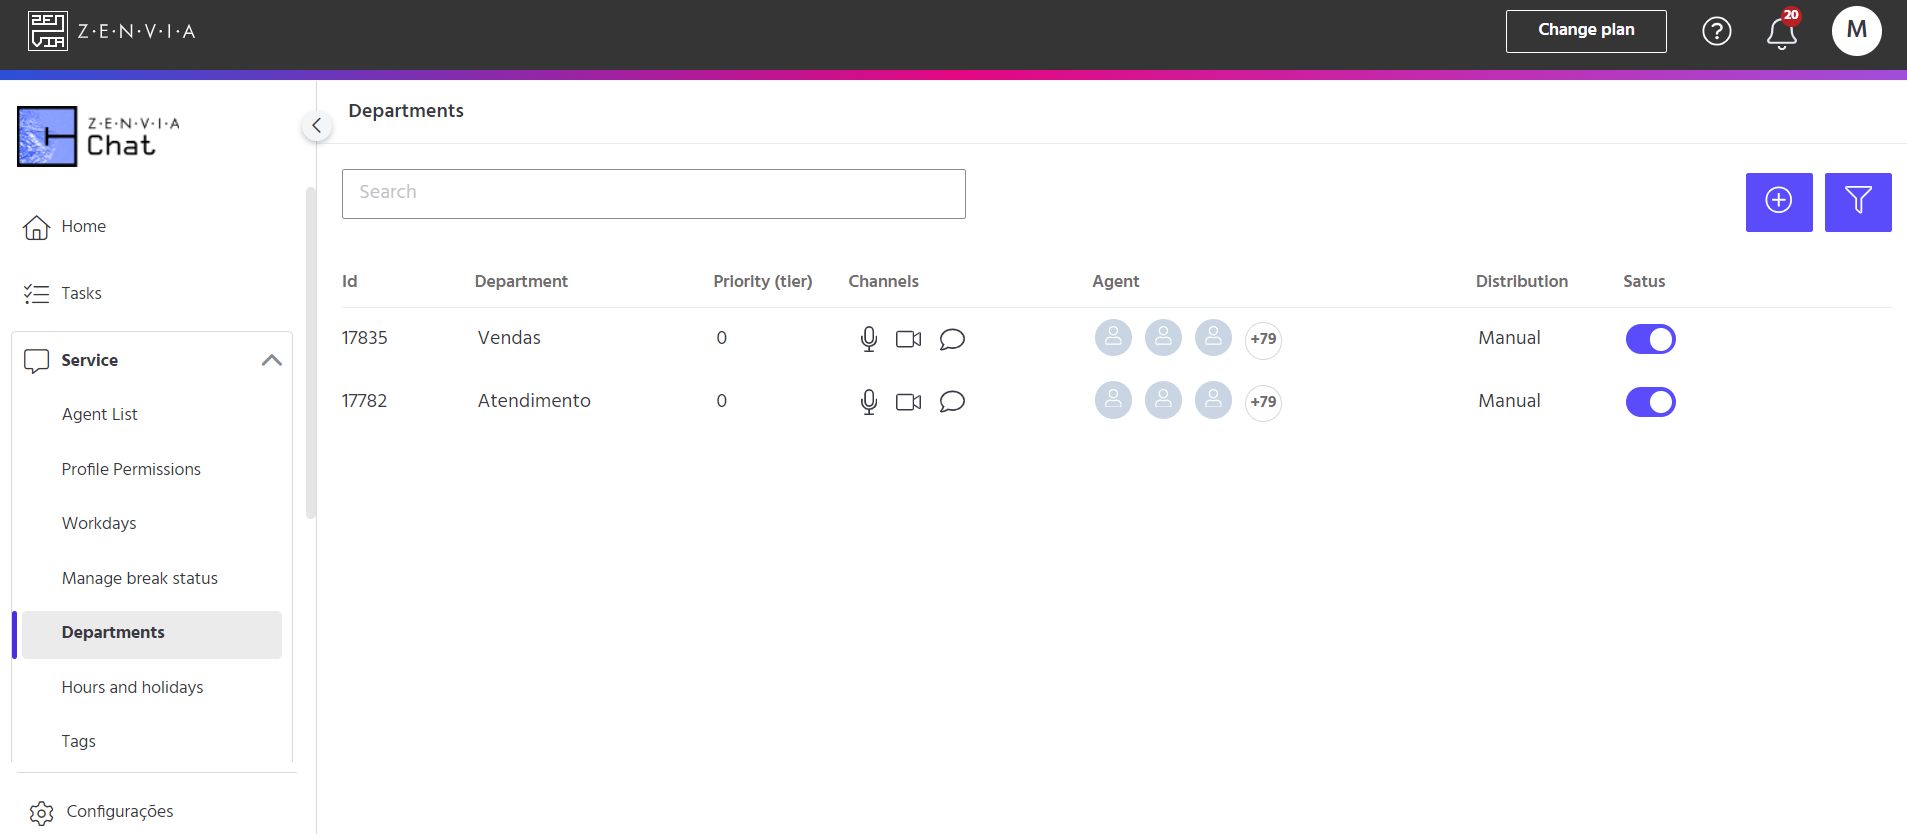
Departments are specific areas within a company that determine how employees divide their tasks. In Zenvia Chat, you can create or edit departments to allocate agents to different departments according to their role, such as: support, sales, finance, legal, etc.
In this article you'll see how to access and create Departments, how to do automatic reassignment and how to use Priority service.
To access this functionality, go to Zenvia Chat - Administration profile > Service > Departments.
By default, the first department created is the customer service department, which you can edit according to your company's needs.
On the main screen, you can see the following information:
-
ID: department identification code;
- Department: area of the company;
- Priority (tier): priority of the department;
-
Service channel: service communication channels. The Facebook Messenger, Telegram and Mercado Libre channels are displayed in the Channels menu, so they don't appear here;
-
Agent: the agents associated with the department;
-
Service distribution: automatic or manual;
-
Status: active or inactive.
You can search for a particular department by its name, or filter by active or inactive departments, as shown in the image below.
To create new departments, simply click on the + icon. A screen will then appear for you to fill in the data.
As well as defining the name of the department, the channels and the agents, it is also possible to create a new department.
In addition to defining the name of the department, the channels and the agents, you can also make some settings.
Queue position: Informs customers of their position in the service queue. By selecting the Queue position notification option, your customers will be updated on their position every 5 minutes if their position changes.
Distribution of calls: Defines how calls will fall into Zenvia Chat. There are two possibilities:
-
Manual distribution: In this case, customer calls are directed to the queue, and the agent has to go there to “pick up” the call, i.e. it's up to the agent to initiate the call.
-
Automatic distribution: In this case, the call “rings” directly into the in-progress conversation box for the agent who is online to start the call, without queuing. There is a random distribution of calls between agents. You can also configure the time the call will ring for the department and the time it will ring for each agent.
💡 Tip: Departments must not have the same name.
Automatic reassignment
The Automatic Redistribution feature is configurable by department and consists of a time limit that a conversation can remain without response activity by an agent, before being redistributed to another agent in the operation to be answered, also influenced by the prioritization rules by the SLAs (First Response, Service and Hold). If the agent has no response activity within the time defined by the admin, they will be automatically redistributed to another agent, already assigned automatically (according to the department's configuration).
The configuration takes place at department level and can be configured and/or edited in the Service > Departments menu in the Admin panel, next to the Distribution section.
There are two possible redistribution modes:
-
Redistribution before the first response;
-
Redistribution after the first response.
Item I considers an agent inactivity timeout before the agent gives the first response to the user. Item II, on the other hand, considers an agent inactivity timeout after the first response by the agent has already been given, counting the inactivity time from the last response from the end client.
⚠️ Attention: Available for both the First response scenario and the In service scenario.
Service Priority
Service Priority is a feature that allows the account administrator and/or any other customized profile that can manage the operation to enable weights from zero to ten for registered departments. With this, it is possible to know which conversations need to be attended to first and how to prioritize the distribution of conversations that arrive at Zenvia Chat to the departments that have different weights.
Please note that this functionality is only available for Advanced plans.
This functionality is presented in the Service > Departments menu, just after the SLA Rules.
To find out more about SLA Rules, see the documentation here.
In the Weight field, choose a weight from zero to ten, with ten being the highest weight and considered the highest priority available to be selected. If more than one department has the same weight score, i.e. two conversations with a weight of ten, for example, the priority rule will consider the conversation that entered the queue first.
Below are examples of situations in which you can use Service Priority:
1) An operation that segregates departments by service channel, with one department handling Whatsapp calls and another handling Webchat calls. In this scenario, the agents registered in the account are all dealing with both departments, but they always have to prioritize the calls that come in via Webchat, because they know that there is a greater chance of abandonment in the event of a delay in responding to the operation.
This way, the administrator can place a greater weight on the Webchat queue and the application will always prioritize the distribution of conversations coming from this department, speeding up service on this more urgent channel.
2) An operation that has the same agents registered in five departments, where there are two departments with SLAs pre-defined by the company's compliance team. In this case, it is important that the agents do not allow the SLA to expire, but at the same time, due to the high volume of incoming calls, they can't easily manage the queue.
Here, the ideal would be to be able to keep the three departments that don't have an SLA at zero priority, and set two other priority levels for the other departments according to the SLA time, with the highest weight going to the department with the shortest SLA time.
That's it! Now you know how to use Service Priority.

