Zenvia Attraction is a mass messaging platform for marketing campaigns across channels such as SMS, Email, WhatsApp, and RCS. And Zenvia Conversion is a solution to simplify communication and conversion for your sales strategies.
Integration with Zenvia Conversion allows you to unify the processes of attracting your target audience with targeted campaigns and tracking leads from the initial contact to the customer's purchase decision.
⚠️ Attention: To enable this integration, it is necessary to subscribe to both Zenvia Conversion and Zenvia Attraction.
Discover the main functionalities of the integration
This integration enables your messages sent through Zenvia Attraction to be replied to by your consultants in Zenvia Conversion. In this way, you provide a complete and centralized journey for your leads, while also increasing your sales.
Example: Send a promotional offer via WhatsApp through Zenvia Attraction. Respond to questions, doubts, or send payment links through Zenvia Conversion.
In other words, whenever a lead responds to a notification sent through WhatsApp, it will automatically open a conversation for your consultants in Zenvia Conversion.
⚠️ Attention: Currently, this integration is only available for the WhatsApp channel.
How to activate Zenvia Conversion + Zenvia Attraction integration
The process to activate this integration is straightforward and consists of just two steps:
1. You need to have one of the Zenvia Attraction plans subscribed to since it is through this platform that you will send notifications and manage your campaigns. To learn about the available plans and subscribe, visit the product page on the platform.
2. During the configuration of your account, you need to use the same WhatsApp number that you have registered in Zenvia Conversion. This way, any response obtained from a Zenvia Attraction message will be automatically directed to Zenvia Conversion.
Once the Zenvia Attraction account is activated, your consultants will be able to interact quickly with your clients and leads in the Chats tab in Zenvia Conversion.
The origin of the contact will appear with the name and content of the campaign triggered via Zenvia Attraction.
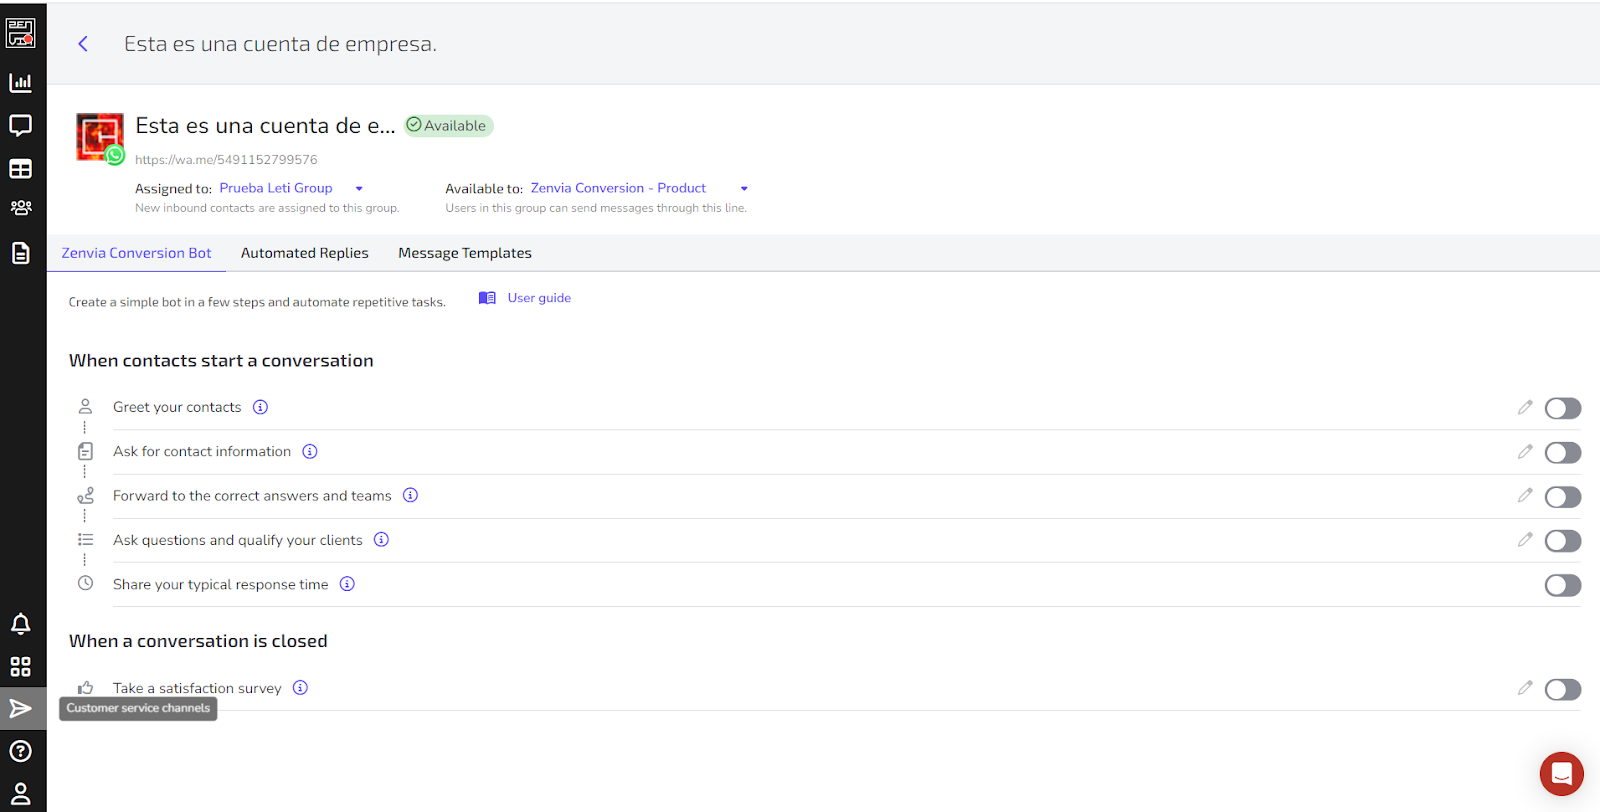
How to enable or disable Zenvia Conversion Bots
Zenvia Conversion Bots is a native chatbot in Zenvia Conversion that allows you to automate messages and forward your customers' responses to your consultants.
After activating the integration between the platforms, you can choose whether you want Zenvia Conversion Bots to automatically respond to messages received as a response to a WhatsApp message from Zenvia Attraction.
To enable or disable Zenvia Conversion Bots, follow these steps:
1. Access the Customer service channels page in Zenvia Conversion.
2. Select the channel that has the same line connected to Zenvia Attraction for WhatsApp messages.
3. In the Zenvia Conversion Bots tab, enable or disable the Set up replies for Zenvia Attraction option.
And that's it! Now, Zenvia Conversion Bot will automatically respond to (or not) messages received through Zenvia Attraction campaigns.
Chat Assignment of Zenvia Attraction campaigns in Zenvia Conversion
The Chat Assignment is a new functionality of the Zenvia Attraction integration with Zenvia Conversion that allows you to select which Group or Agent the Zenvia Attraction campaigns will be transferred to.
Additionally, it's also a way to identify all your Zenvia Attraction campaigns within your conversations in Zenvia Conversion.
How to configure the Chat Assignment in Zenvia Conversion
Follow the step-by-step guide to configure it:
1. Access Customer service channels.
2. Select the WhatsApp channel that has the same line registered in Zenvia Attraction.
3. Click on Chat Assignment.

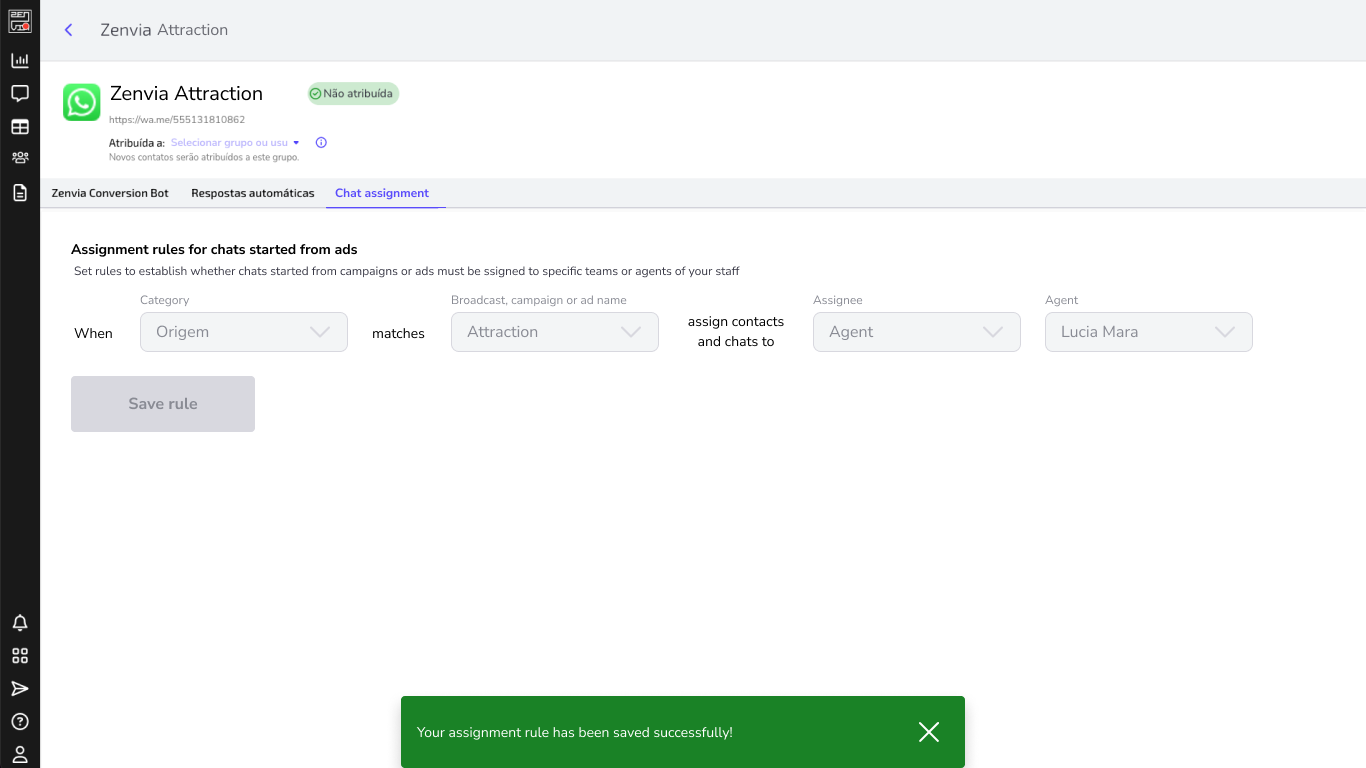
4. To set up the rule, whether to assign it to a Group or an Agent, click on Choose an Assignee, located on the right side of the screen.
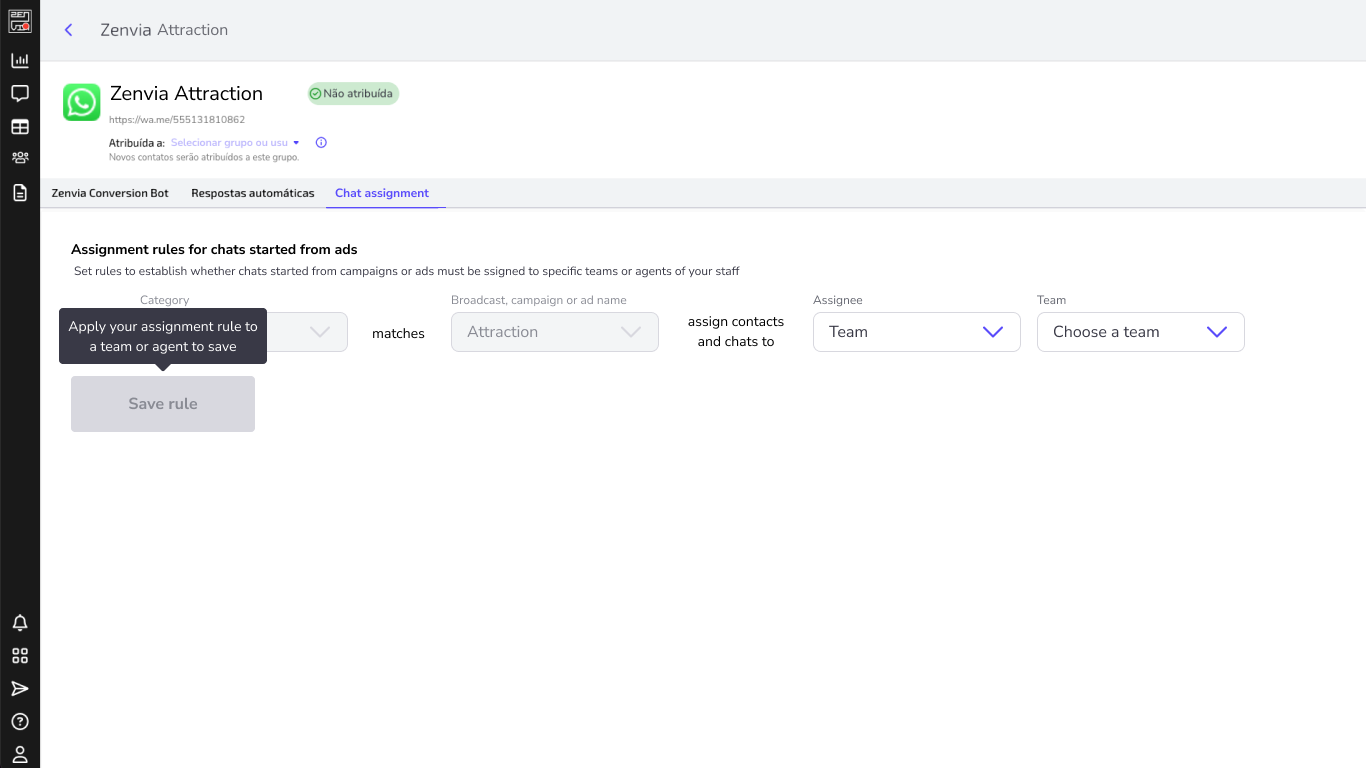
5. After selecting, click on Save rule.
Editing an Chat Assignment
If you want to change or edit an Chat Assignment, click on the pencil icon, located on the right side of the screen, to make the desired configuration changes.
After that, click on Save rule.
Done! Now, all messages received through campaigns triggered by Zenvia Attraction will be answered by the chosen Group or Agent in the Chat Assignment.
⚠️ Attention: With the default Chat Assignment active and configured, Zenvia Conversion Bot will be disabled, as one replaces the other.
How to access Zenvia Attraction through Zenvia Conversion
Now, your access is simpler—just click on the Zenvia Attraction logo located in the left sidebar of Zenvia Conversion. After clicking on the image, you will be redirected to Zenvia Attraction.

How to import my contacts from Zenvia Conversion into Zenvia Attraction
Learn how to export and import your Conversion contact base to Attraction.
To send a bulk WhatsApp notification via Zenvia Attraction to your Zenvia Conversion contact base, just follow the steps below:
Exporting contacts from Zenvia Conversion
1 - First access your Zenvia Conversion account;
2 - Go to the contacts page, using the side menu;
3- Segment the contacts you would like to extract using the available filter;
4- As you are going to use the contacts for a campaign via WhatsApp, it is necessary to include the “Telephone” column if it is not already visible in the panel. You can also add other information according to your template variables (WhatsApp notification).
Click on the columns icon at the top right of the screen > activate the “Phone” option;
5- Now that you have segmented the desired contacts and included the necessary columns, you can download your contact list by clicking on the “Download list” button and choose between downloading the current selection (to download only the visible contacts) or all your contacts (to export the complete contact base).
Once this is done, the file will be downloaded automatically, already in .csv format.
Important: The accepted file format in Zenvia Attraction is .csv, so it is advisable to check the file and save it in csv before importing it in Attraction.
Importing contacts in Zenvia Attraction
Now let's go step by step to import the list of contacts downloaded into Zenvia Attraction:
1- Access Zenvia Attraction through the Products menu at app.zenvia.com, using the same Zenvia Conversion login and password;
2- In the side menu, click on the option Import contacts > New import;
3- Upload the desired .csv file and select the list(s) in which these contacts should be added > Click continue.
If you don't have a list created yet, you can create it now.
⚠️ Attention: It is only possible to import one file at a time due to the way it is processed and the arrangement of the file columns.
💡 Tip: The file needs to be in .csv format.
4- Mapping the fields according to the necessary variables and the columns of the imported file using the “Contact manager field” session;
If necessary, you can create an extra field to store information that does not fit any field already created in the system.
1- click on “Create extra field”;
2- Insert the name of the new field > confirm;
3 - Define the field type.
⚠️ Attention: Creating extra fields is available only contacts added via file import. The limit for creating extra fields is 100 per organization and each of them can be used in other imports.
In the Import column, it is possible to select the fields to be enabled, that is, which ones will be used by the list. If a column is disabled, the system will not upload the data and it will be ignored during the import.
💡 Tip: Know that the default import behavior is to overwrite. For example: If an equal telephone number is found in the selected list, the system will overwrite the other data using the file as a base.
After finishing field mapping, click Confirm to start the import and follow the status on the Import Contacts page.
That's it, now your Zenvia Conversion contacts are in Zenvia Attraction so you can send mass messages, integrated with Conversion.