Send bulk emails, personalize content based on recipient interests, and use ready-made templates to optimize creation time.
Before you start
To send email messages in Zenvia Customer Cloud, you need to:
- Integrate the email channel: Integration is done in Settings > Channels, where you register the sender that will be used for the mailings.
- Register and configure an email domain: This configuration is mandatory to ensure correct message delivery and authentication.
Rules and definitions
- Maximum message size: The email body has a 32 KB limit, considering all inserted content. If this limit is exceeded, the sending will be blocked with the error "Limit exceeded".
- Attachments: You can add up to 5 files, with a total limit of 30 MB per sending.
- Subject, message body, and attachments can contain variables in the format {{variable}}.
Configure the email
- To start, go to Message sending > Email.
- Choose whether you want to use an existing template or build the email from scratch.
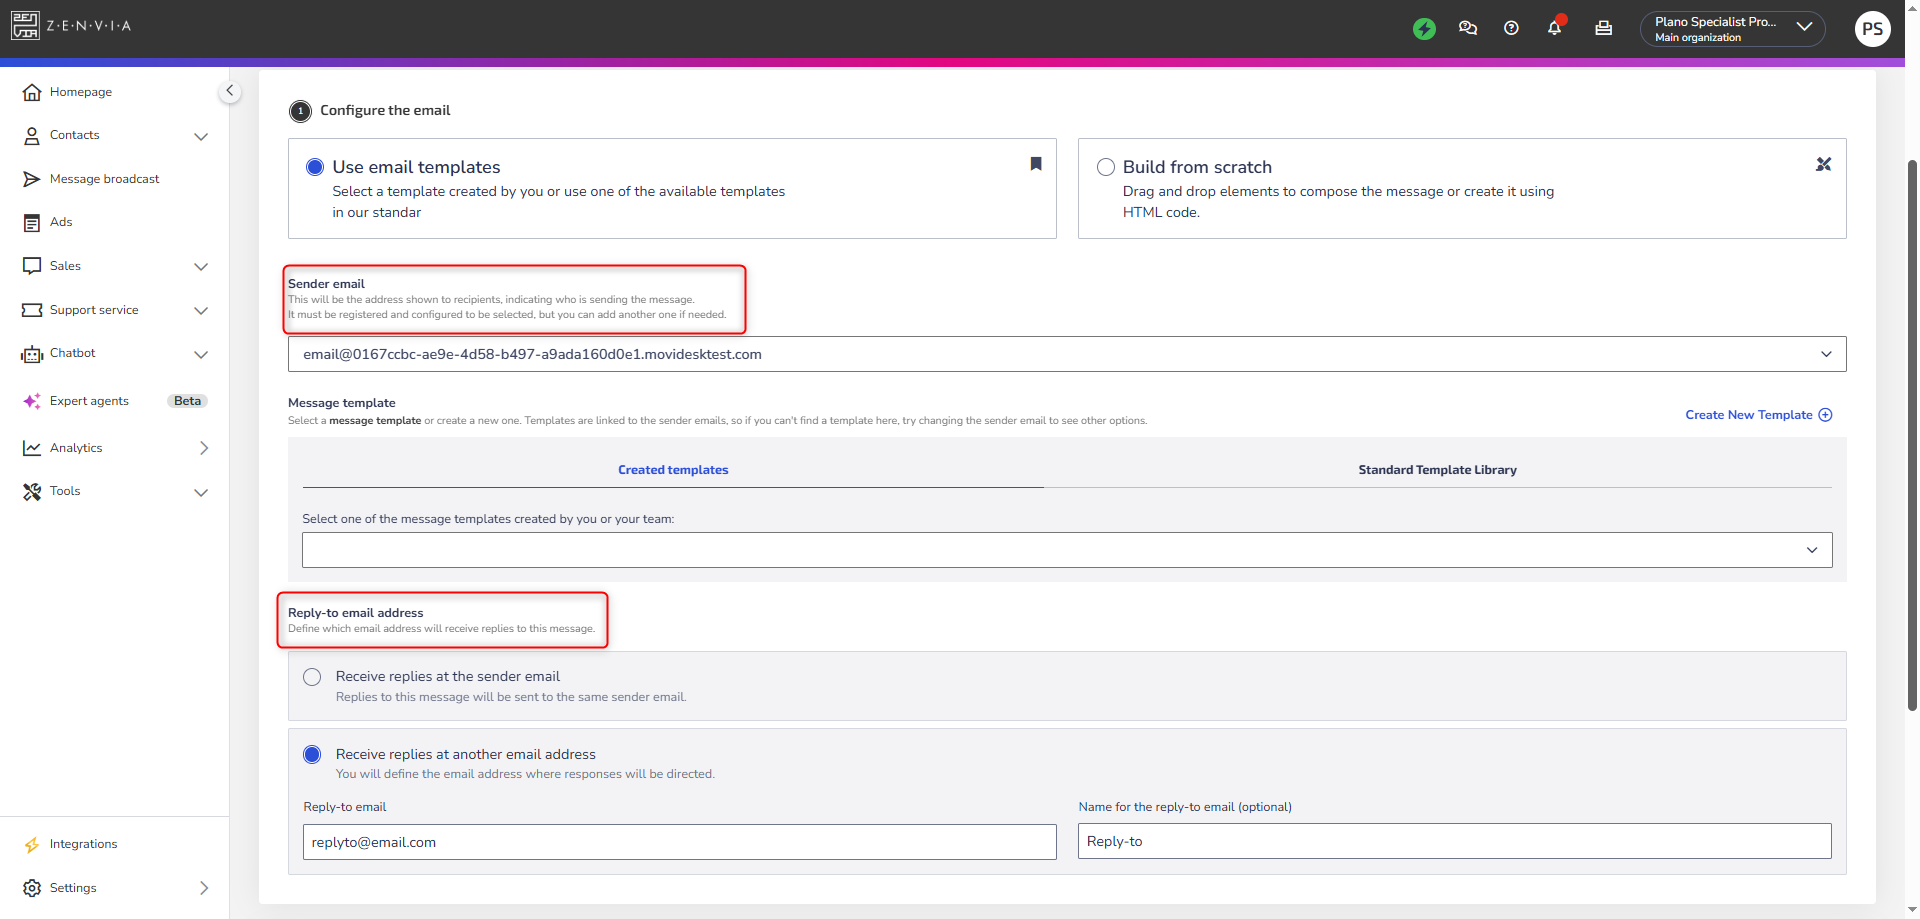
- Select the email address that will be displayed to the recipient. It must be previously registered in Settings > Channels. If the desired address is not available, add a new sender.
- Choose an email to receive replies. By default, contact replies are forwarded to the same sender email. If you prefer to centralize replies to another address, check the option Receive reply via a different email, enter the new address, and, if desired, define a display name.
About email templates
You can choose between two types of templates:
- Created templates: These are customized templates saved in Settings > Message templates > Email. They will only appear if the chosen sender email has templates linked.
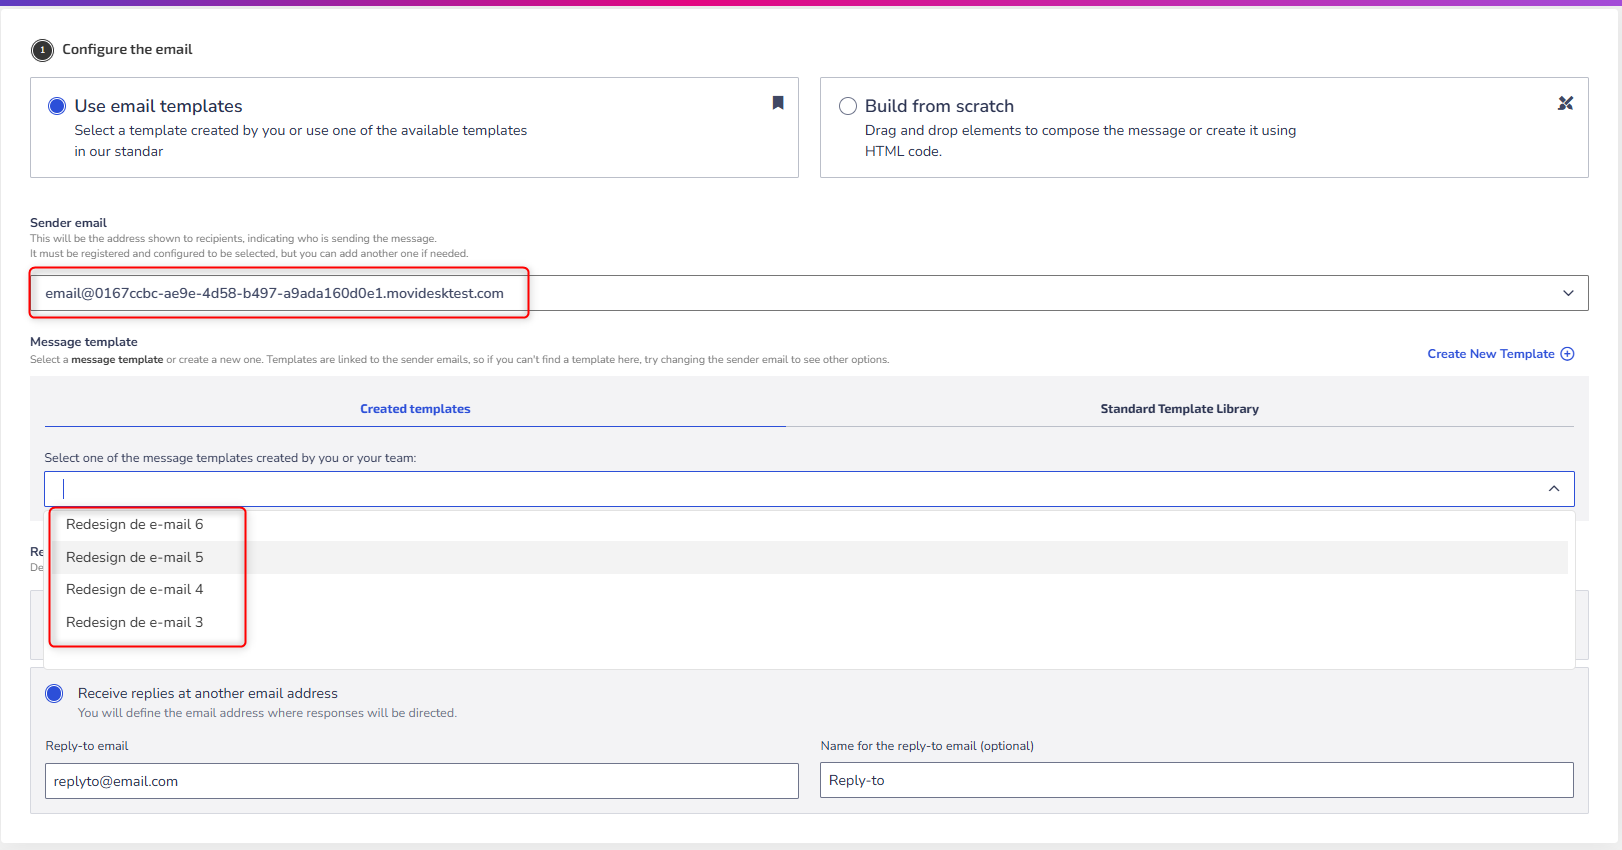
- Standard template library: Includes visual templates created by Zenvia, which can be edited according to your company's objective and identity.
Configure email content
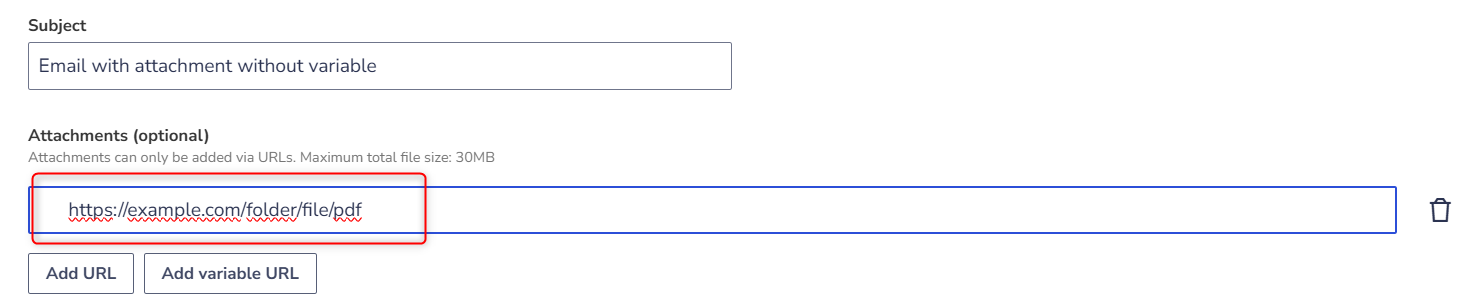
Subject
Type the email subject. It is the main information the recipient will see before opening the message—keep it clear, direct, and attractive.
Attachments
You can send:
Same attachment for all recipients:
- Click on Add URL.
- Enter the file's Public URL (e.g., Google Drive, Dropbox, private server). Example: https://example.com/folder/file.pdf
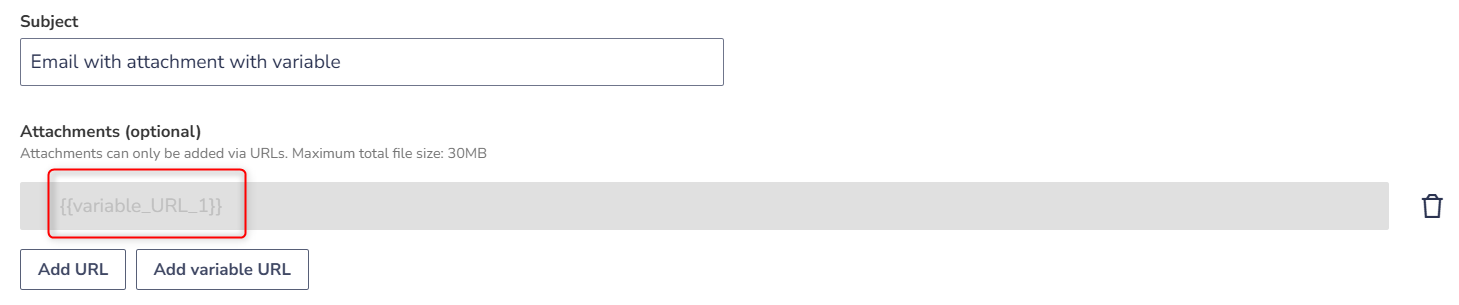
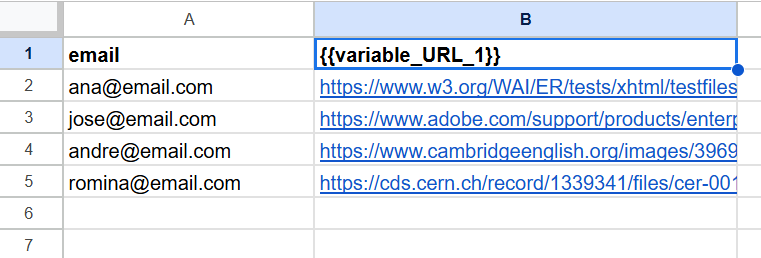
Custom attachments per recipient:
- Click on Add variable URL.
- The system will create a variable in the format {{variable_URL_1}}.
- In the recipient definition step, upload a CSV spreadsheet with the correspondence between the email and the attachment link for each contact.
 |  |
Message body
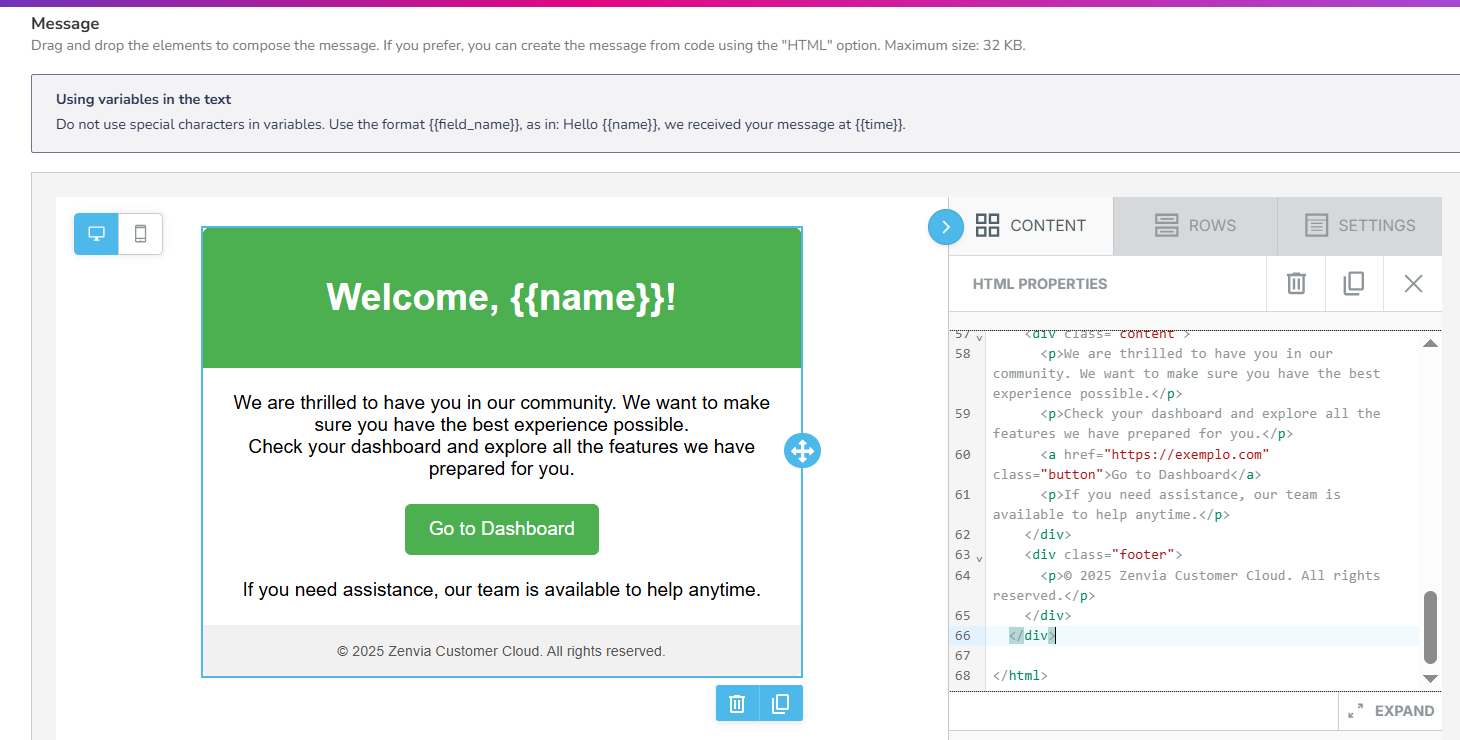
Build the email content using the builder, a visual tool that allows you to drag and drop blocks to compose your message in a practical and customizable way.
You can include text, images, buttons, separators, and other visual elements. If you prefer to use your own layout or code, add the HTML block in the builder and paste the code directly inside it.
See how to use the email builder.
After finishing, click on Continue to review the mailing.
| 💡 Tip: After finalizing the message body and clicking on Continue, you can save the content as a template. If you are using an existing template, you can update it with the changes, save it as a new template (without changing the original), or continue without saving, keeping the changes only for this mailing. If you are creating a template from scratch, you can save it as a new template or continue without saving, according to your needs. |

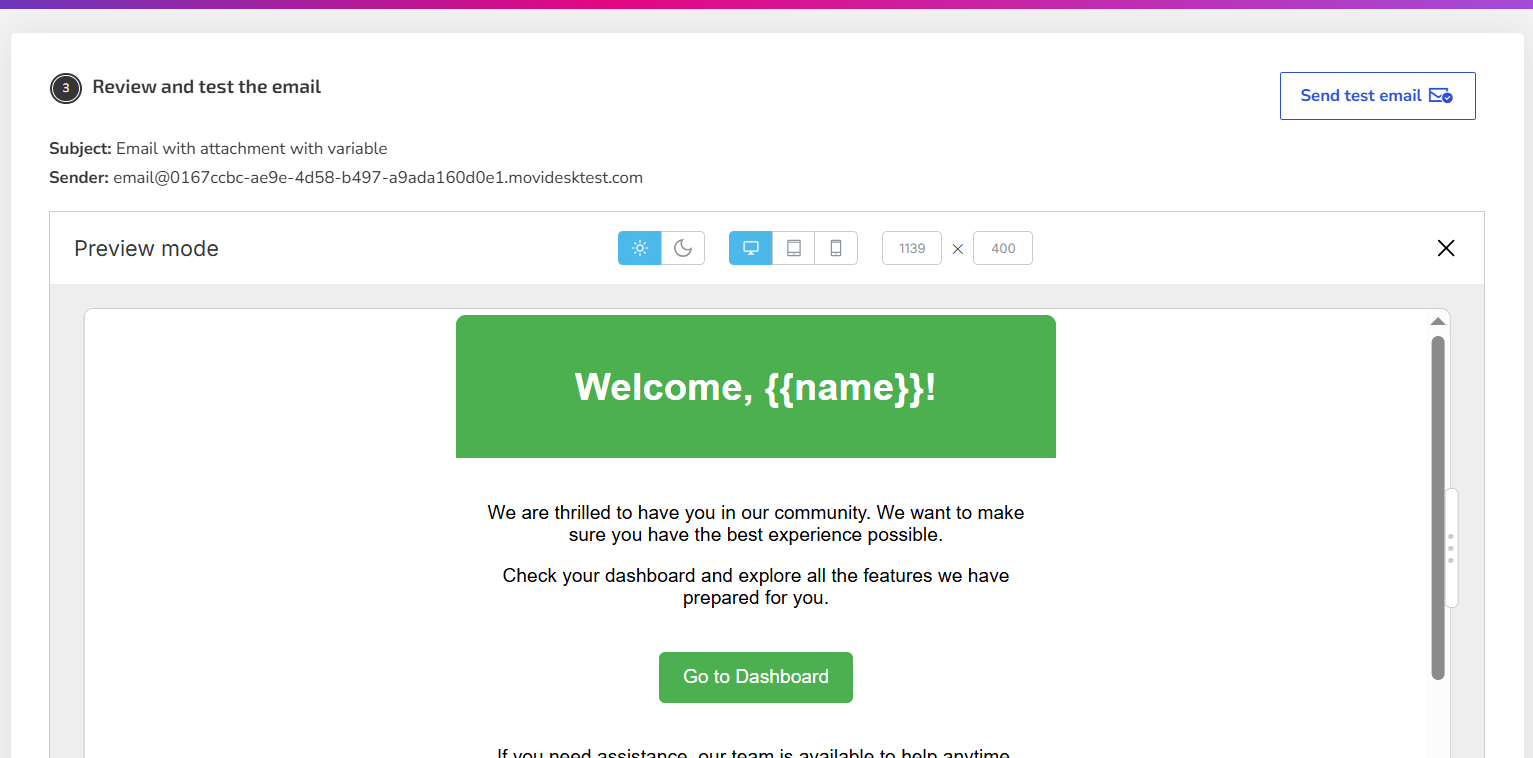
Send a test email
Send a test email to see how your mailing will be displayed in an inbox before it is sent to customers. Besides allowing you to preview the email's appearance, sending a test version is an opportunity to review possible typos, content errors, and check if links and buttons are working correctly.
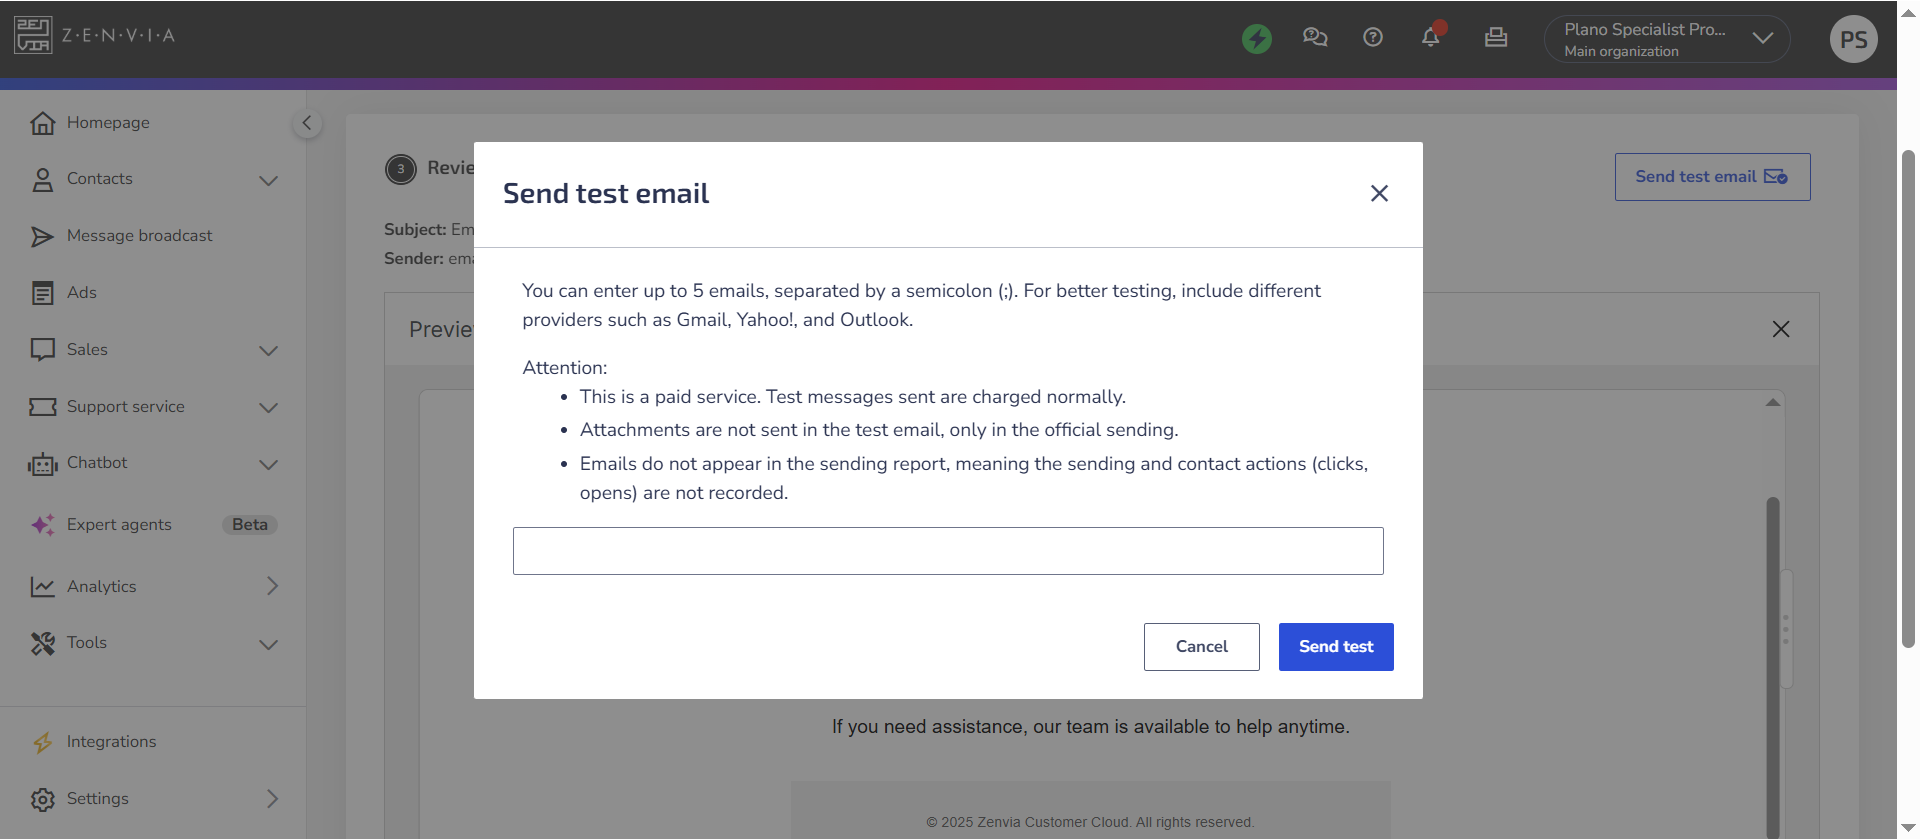
⚠️ Attention: Before sending the test, please note that:
|
To send a test email, follow these steps:
- Click on Send test email;
- Type the email address you want to send the test to. To send multiple emails, separate the addresses with a semicolon ( ; ). For example: [email protected]; [email protected]
- When finished, click on Send test.
Configure recipients
Define the message recipients. You can send to contacts from your database, imported from a .csv file, or added manually.
Select from the contact database
To send to contacts from your database, you need to select the contact list, specific contacts, or segmentation rules already added to the platform to receive this mailing. Once done:
- Click on Select contacts;
- Select the contact list(s), specific contacts, or segmentation rules.

Messages with variables require the corresponding values to be registered in each contact's profile.
This means that for each contact who receives the message, the variable must have an assigned value in the contact's record—otherwise, the sending may fail or the variable will be blank. Learn more in How to use variables to send messages.
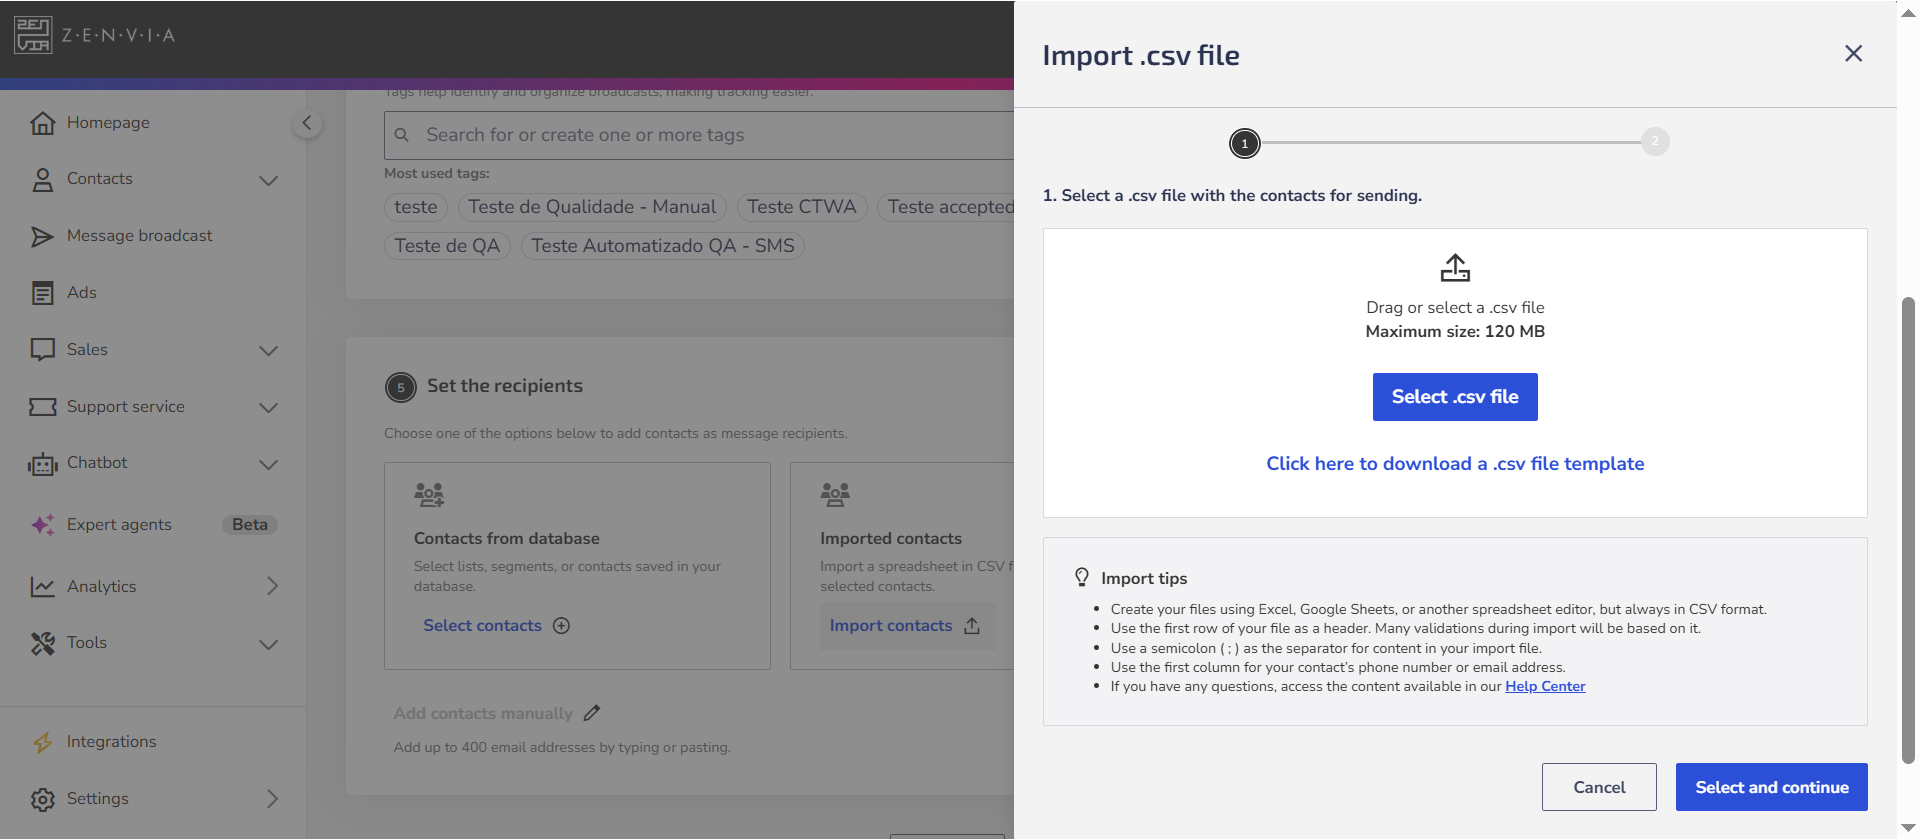
Import contacts file
To send to contacts imported from a .csv file, you need to upload a file in .csv format.
The file must meet the following standards:
- Be in .csv format and UTF-8 encoding;
- Contain email addresses, obligatorily, in the first column - always in column A of the spreadsheet;
- The first line of the file must be the header. Enter the name of the variables used in your message and use a comma (,) or semicolon (;) to separate each field.
- Separate one email address per line of the file;
- Contain up to 120 MB.

With the correctly configured file:
- Click on Import contacts;
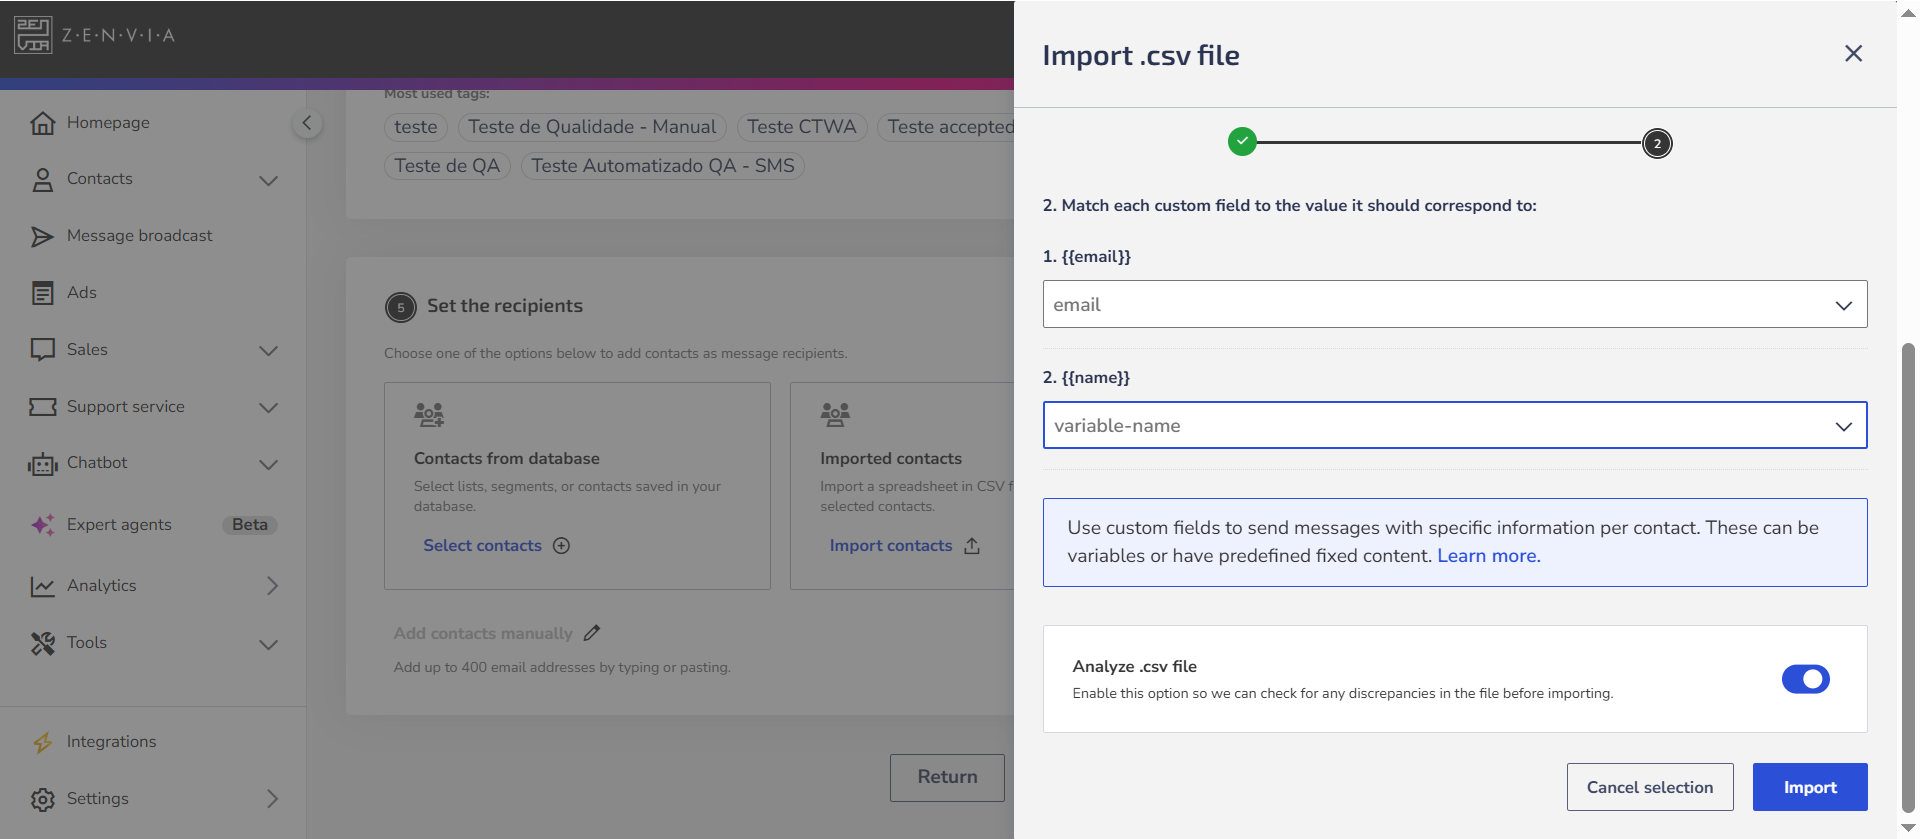
- Drag and drop the file or click on Select .csv file;
- The next step is to associate the variable fields with the corresponding value, i.e., what each field in the table represents;
- If you want to review your file and check if it is ready for use, enable the option Analyze .csv file.
- Click on Import.
Add contacts manually
To send to manually added contacts, you need to add the recipients' email addresses using a semicolon (;) to separate the emails. To do this:
- Click on Add contacts manually;
- Enter the email addresses in the format [email protected];
- Click on Add contacts to complete the action.
The limit is 400 email addresses. Above this quantity, the sending must be done by importing files.
This option is not available for messages containing variables, as personalized data cannot be manually associated with the inserted contacts.
Sending methods
Upon completing the email configuration, choose the sending time by clicking on Send or Schedule. Choose between:
- Send now;
- Schedule sending;
- Send with AI.
If you do not want to send the messages to all recipients at once, you can divide the message sending into batches.
💡 Tip: To ensure the efficient and secure delivery of your messages, check email sending best practices.
Message Queuing
Message queuing is a mechanism used to manage the sending and processing of messages. It happens when the system places messages in a queue, processing them in the order they arrive.
Generally, it is a way for the system to deal with overload situations, where the number of messages sent is greater than the system can process simultaneously. This mechanism helps maintain order and consistency in message sending.
How it works
- Message queue: Messages are organized in a queue, awaiting the moment to be processed.
- Ordered processing: Messages are processed sequentially, in the order they were received.
- Capacity adjustments: In times of high demand, the system can temporarily adjust its capacity to process queued messages faster.
What to do during queuing
During queuing, there may be a small delay in message processing. In this case, we ask that you wait a little longer until all messages are sent. The sending process continues in an orderly manner and messages will be delivered as soon as possible.
Done! Now you know how to create and configure an email mailing in Zenvia Customer Cloud.