Use Tokens & Webhooks to generate authentication credentials and configure URLs to receive automatic event notifications, facilitating the integration of Zenvia Customer Cloud with other systems.
Both are used to integrate and interact via APIs, ensuring secure communication between systems.
💡 To configure and use the APIs, we recommend the support of a developer. The complete documentation is available in Zenvia APIs.
How to access
The Tokens and Webhooks screen allows you to use the multichannel APIs.
To access it, follow the instructions:
In the side menu, click on Settings > Tokens and Webhooks.
Create new token
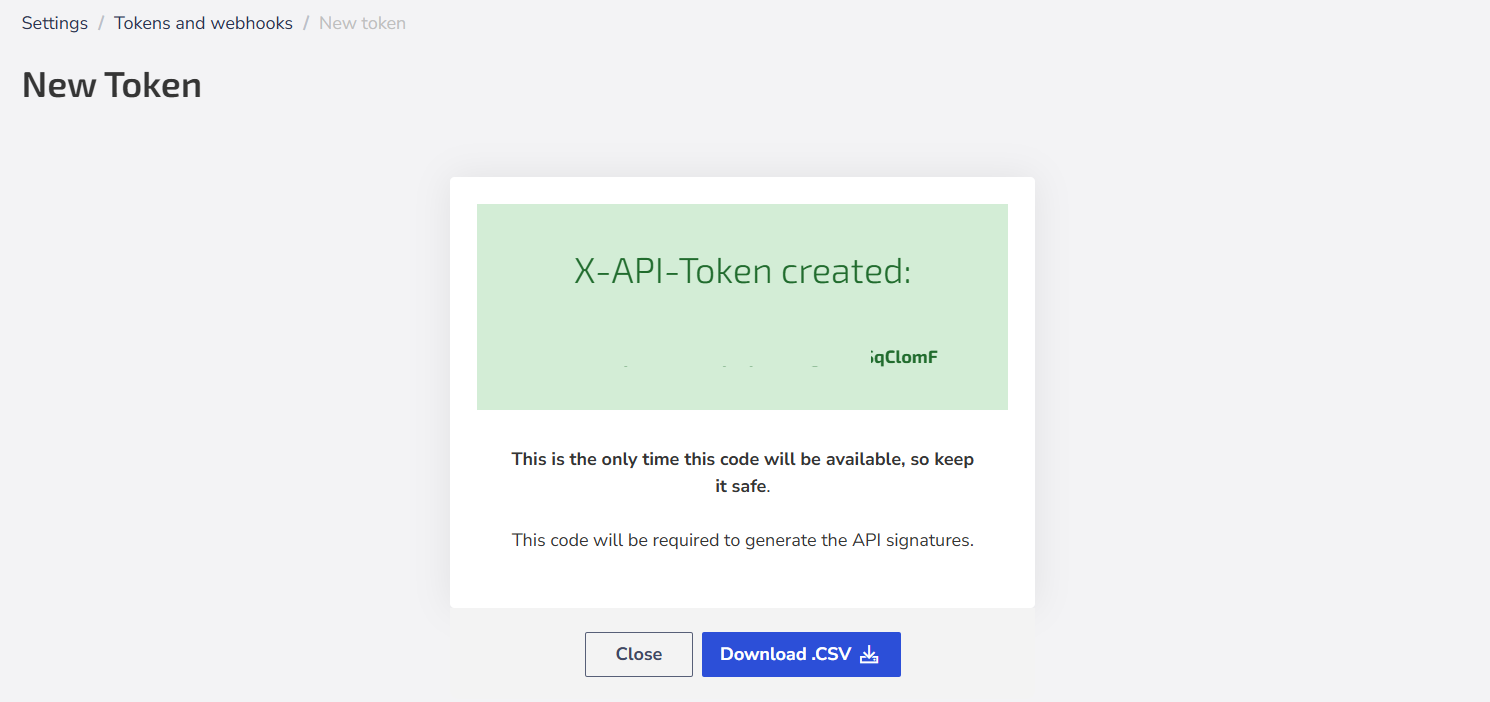
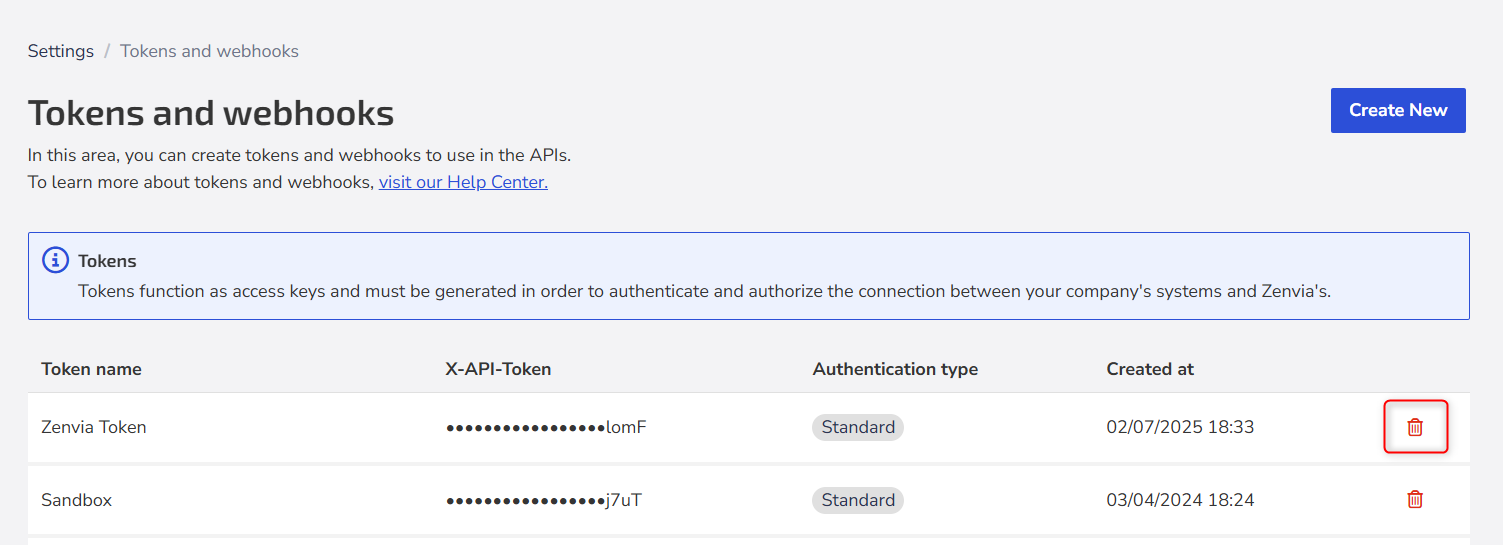
A Token is an authentication key used with our APIs. You will use it to perform integrations and other requests. To create one, follow these steps on the Tokens and Webhooks screen:
- Click on the Create New option under Tokens;
- Enter a Name for identification;
- Choose the authentication type:
- Standard: Uses only the token to validate the connection between systems.
- With signature: Adds a digital signature to the token, providing an extra layer of security.
- Finish by clicking Save.

💡 Tip: If you prefer, click the Download .CSV button to save the file containing the key.

Create New Webhook
Webhooks are optional and allow you to receive events at the configured URL to get the desired information.
Follow the instructions on the Tokens & Webhooks screen:
1. Click on the Create New Webhook option.
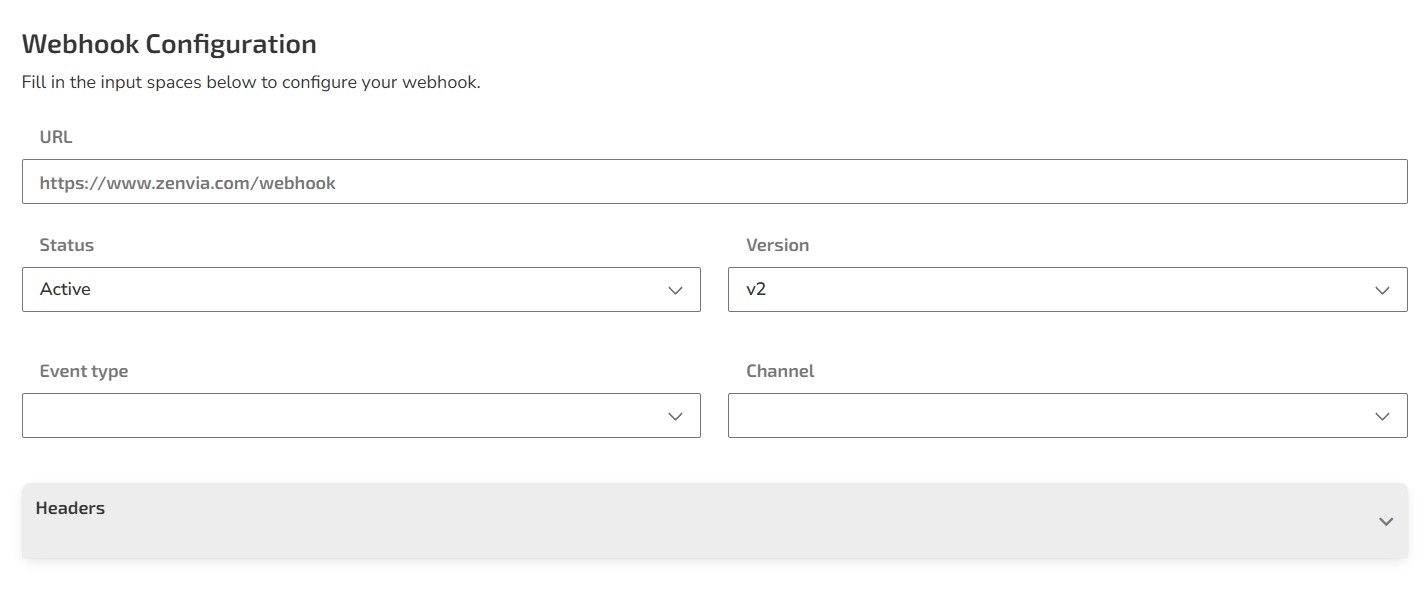
2. Fill in the following information:
| Field | Description |
|---|---|
| URL | Enter the valid URL where the automatic notifications will be sent. |
| Status | Choose between Active or Inactive - only active webhooks receive events. |
| Version | Indicates the iteration of the webhook structure (used for updates and compatibility). |
| Event type | Select the type of event you wish to receive (detailed below). |
| Channel | Choose the channel to receive notifications only for events related to it. |
| Headers | Add Key: Value pairs, such as Content-Type: application/json. Use according to the destination's authentication requirements. |
3. If you prefer, you can save the Webhook immediately after filling in the basic information, without configuring OAuth2 authentication. OAuth2 configuration is optional and can be done later to add greater security to event reception.
Available Event Types
Webhooks can be configured for different event types, according to the desired context.
| Event Type | Description |
|---|---|
| Message | Notifies the content of messages sent or received. |
| Message Status | Sends updates about the message status, such as sending, delivery, or reading. |
| Conversation | Notifies events related to the start, update, or closing of conversations. |
| Conversation Message | Sends notifications about messages exchanged within specific conversations. |
| Support Expert Agent | Notifies executions of support expert agents configured with the Webhook action. This event type is used when a support expert agent is executed and has the action of sending a webhook to a specific URL. How it works:
To understand how to configure and use this action, consult the articles on Support Expert Agents: what they are and how to create them and Actions of the support expert agents. |
Webhooks with OAuth2
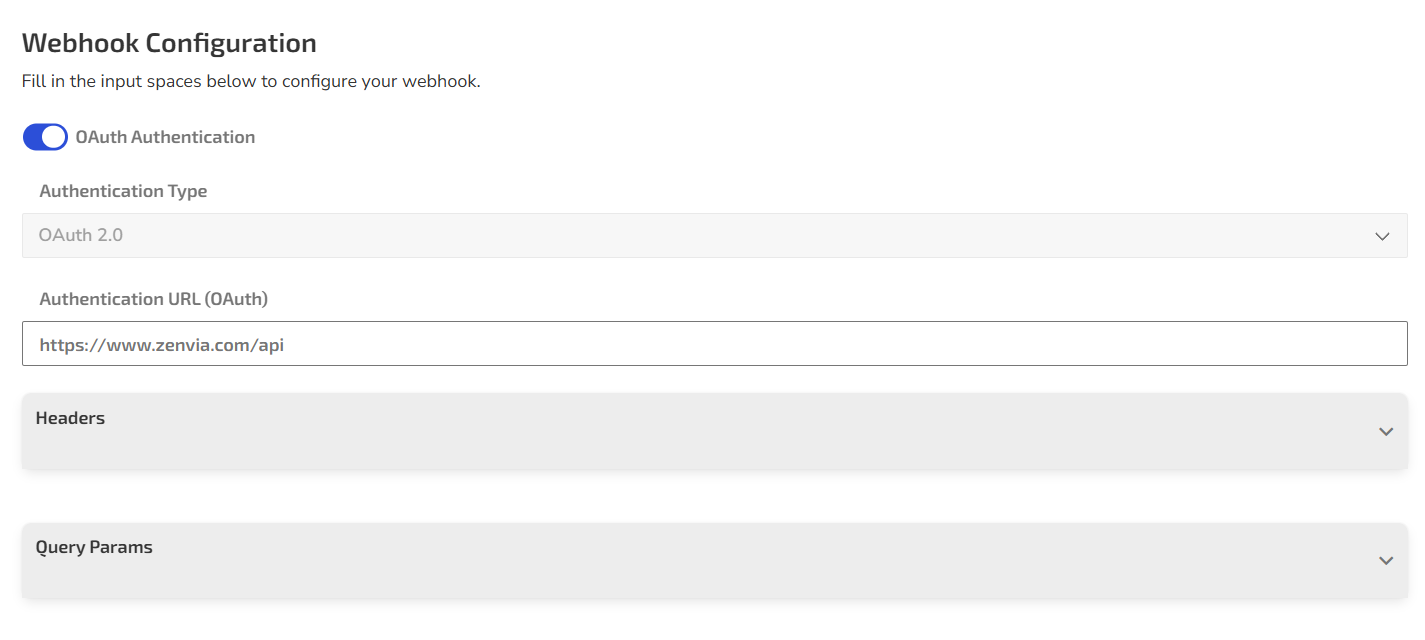
To ensure greater security when sending notifications, use OAuth2 authentication. With it, Zenvia automatically obtains a valid access token before sending each webhook, protecting your system from unauthorized access.
- When creating or editing a Webhook, enable the OAuth Authentication option.
- Fill in the following authentication fields:
- Authentication Type: Provide the URL where the OAuth2 request will be made to obtain the access token.
- Headers: Add key-value pairs to be sent with the authentication request, if needed (e.g., Content-Type: application/json).
- Query Params: If your authentication requires additional URL parameters, enter them in the key and value fields.
- Grant type: Fixed field with the value Client Credentials, used for system-to-system authentication.
- Client ID and Client Secret: Credentials provided by the authentication service to validate your integration.
- Refresh token (optional): Fill in this field if your OAuth2 implementation uses a refresh token.
- Expiration time in seconds (optional): If needed, define the token's validity duration. Enter a number in seconds (e.g., 3600 = 1 hour).
After filling out the OAuth2 fields, make sure the main Webhook fields have already been configured (such as channel, event type, delivery URL, and HTTP headers). If not, complete that information before clicking Save.
If you want to delete a Webhook, go back to the Tokens & Webhooks screen and click on the Delete option.
How webhook delivery works
To ensure stability and performance, the system automatically monitors the response time of the URLs receiving webhooks. If there are consistent issues, the delivery priority is reduced or deliveries may be stopped.
Operating rules
- Response time: the URL must respond within 5 seconds.
- Timeout (no response within 5 seconds) is equivalent to 10 common errors.
- 1 timeout already places the webhook in a degraded state, with reduced priority.
- 50 consecutive timeouts make the webhook inactive, and deliveries are suspended.
Best practice
Respond to the webhook as quickly as possible, even if the message processing is done afterwards. This helps keep your webhook at high priority and avoids delays or interruptions.


