WebChat allows you to provide support directly on your company's website through a customizable widget that helps you connect with visitors. This channel is ideal for customer support, sales assistance, and chatbot automation.
Why use WebChat?
With the channel enabled, you can:
Automate interactions with chatbots
Create automated flows to answer frequently asked questions, qualify leads, or redirect to a human agent.
Example: A customer accesses your website outside business hours and automatically receives a menu of options to get product information or submit a request.
Provide support service
Assist customers seeking help directly on your website, with speed and organization.
Example: A customer accesses the FAQ page and, after not finding the desired answer, starts a chat with the support team to resolve the issue.
Offer sales assistance
Use WebChat to capture leads and guide them through to conversion.
Example: A customer visits the website interested in buying a product. WebChat starts with a welcome message and offers a “View promotions” button. The customer clicks it, interacts with the chatbot, views the catalog, and is then transferred to a sales agent who completes the purchase.
How to activate and configure WebChat
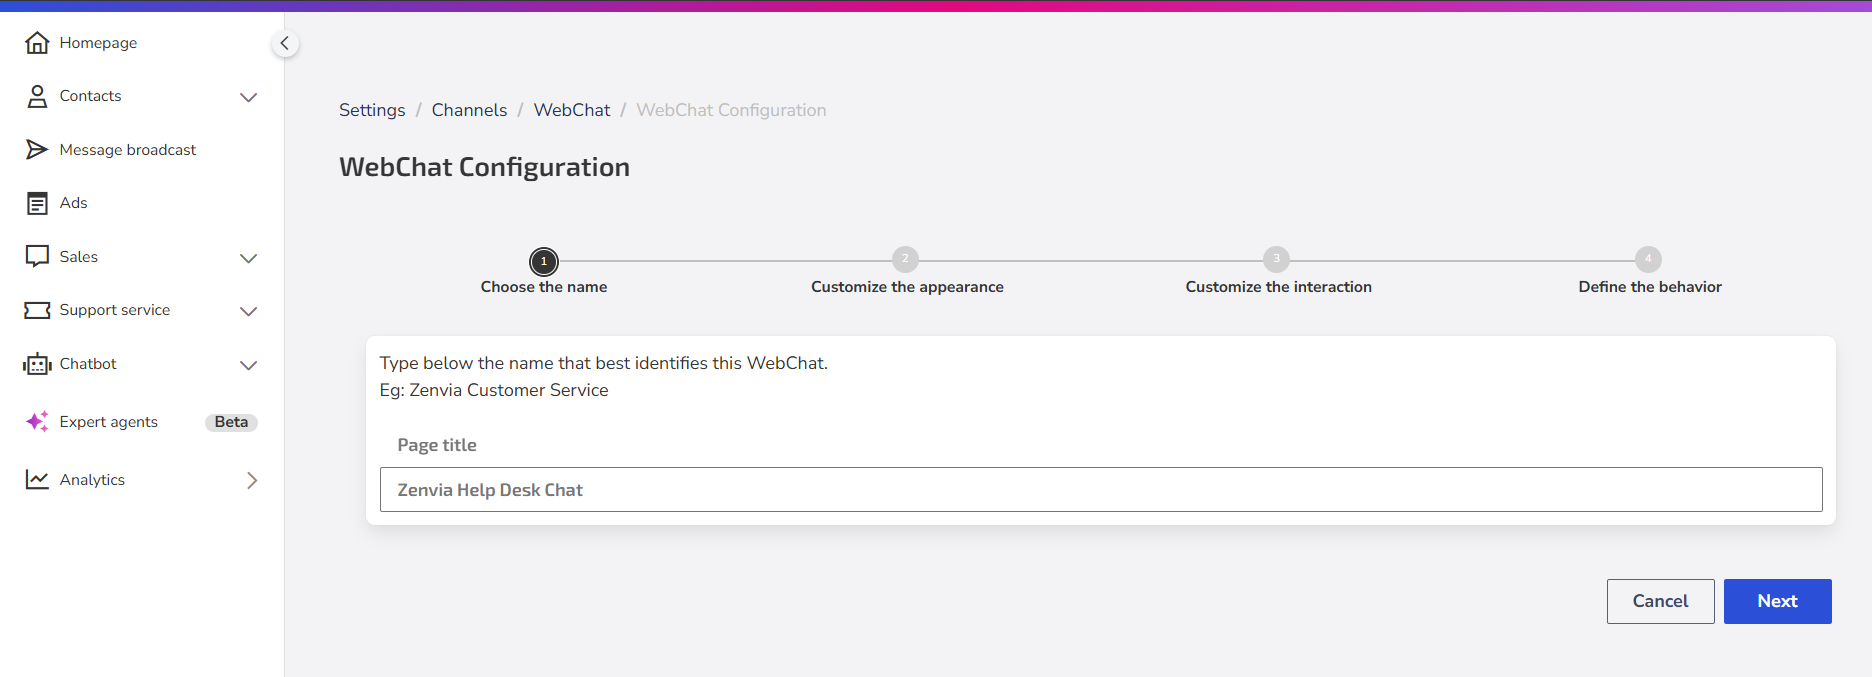
Step 1: Choose an identifier name
Enter an identifier name for the WebChat. It will be used on the channel’s main screen to help manage and organize the various WebChats you create.
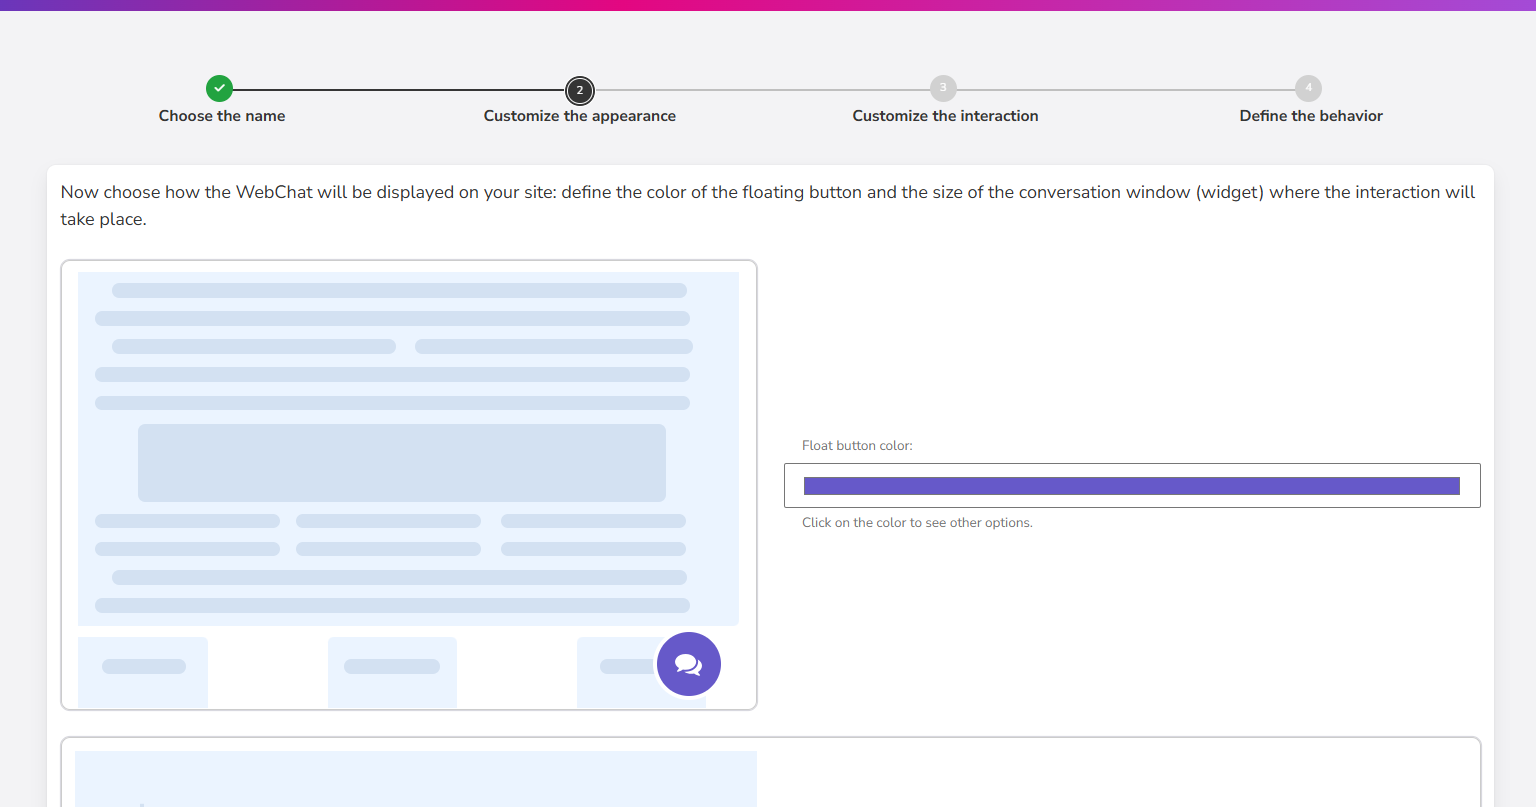
Step 2: Customize appearance
Define how the WebChat will appear on your website:
- Floating button color: choose a color that matches your brand's visual identity.
- Conversation window (widget) size: the recommended size is 400px wide by 567px high to ensure good usability across different devices.
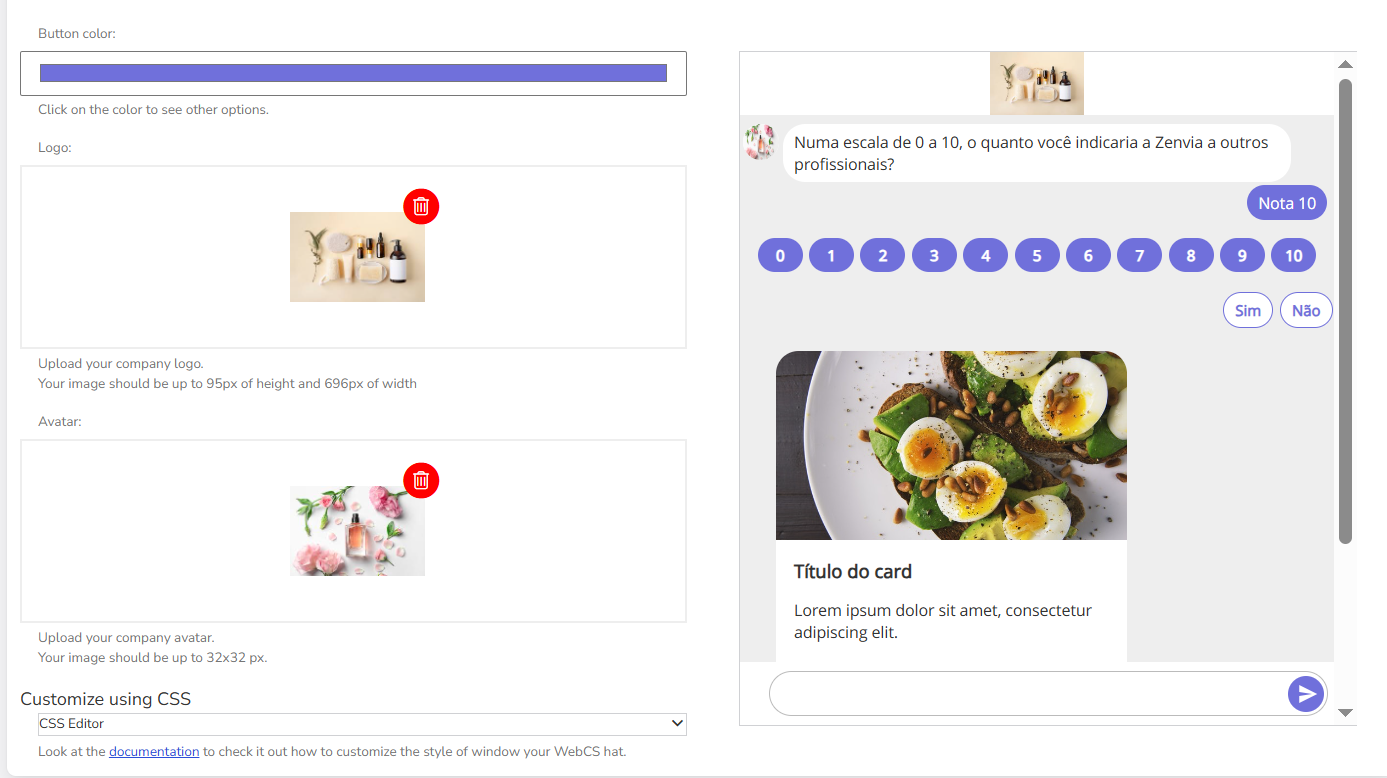
Step 3: Customize interaction
Here, you define the visual identity and user experience within WebChat:
- Conversation button color
- Company logo: image up to 95px high by 69px wide.
- Company avatar: image size 32x32px.
- CSS editor (optional): use custom CSS to adapt WebChat to your visual style.
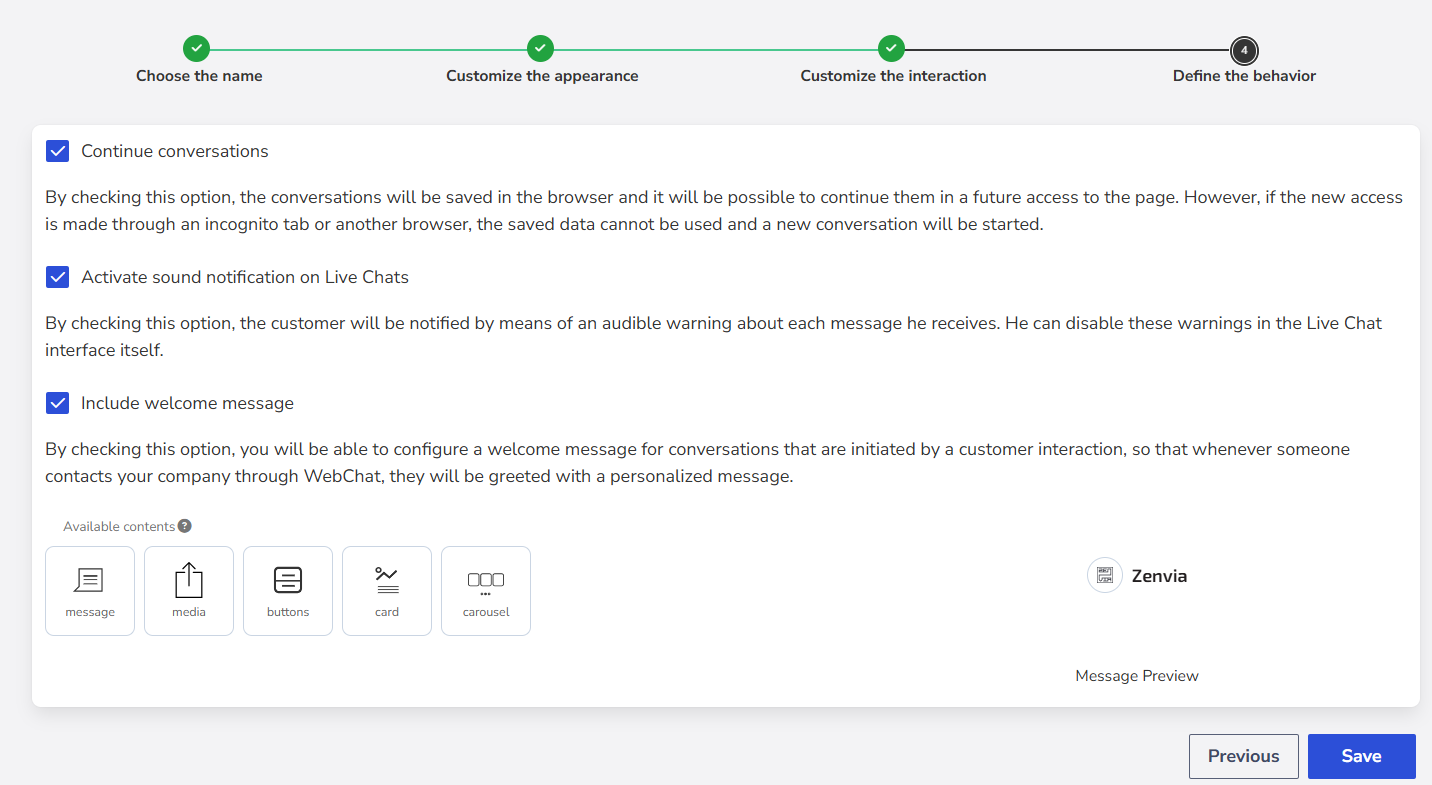
Step 4: Define the behavior
Select the options that best suit your service needs:
- ☑ Continue conversations: allows conversations to be saved in the browser so users can resume them on a future visit (except when using incognito mode or a different browser).
- ☑ Enable sound notifications in Live Chats: activates sound alerts for each new message received.
- ☑ Include welcome message:shows a custom message when the customer starts the conversation. You can use:
- Plain text
- Media (image, video, audio)
- Action buttons
- Cards and carousels with products/services
Finalizing the configuration
After completing all the steps, click Save.
All created WebChats will be saved on the channel's main screen, listed with:
- Page title
- WebChat ID
- Creation date
- Last update
- Assigned support team
- Available actions

Next steps
For Sales: Assign support
Select the agent or group responsible for handling the conversations. All messages coming from WebChat will be directed to this person or team. Learn more at Assign account support.
Configure embed
You can embed WebChat on your website in two ways:
- Snippet: copy the generated code and paste it into your website's HTML.
- Link: copy the direct WebChat URL, useful for opening it in a new tab or redirecting users via a button, for example.
Learn more at How to publish your WebChat flow.