With the Generative AI Chatbot, you can implement a personalized conversational experience on your company's website or on channels like WhatsApp Business, without the need to write complex code.
Whether it's to offer support to your customers, optimize your sales, or collect valuable feedback, the Generative AI Chatbot allows you to build tailored interactions for the specific needs of your business.
In Zenvia Customer Cloud, you have two options to create your AI chatbot:
Manual creation: Allows you to configure every detail of your chatbot.
IAG Configurator: An intuitive tool that simplifies the creation process with the help of AI.
Usage Example
Imagine you own an online electronics store and want to improve customer service. Instead of relying exclusively on human agents, you can create a Generative AI Chatbot to:
Answer frequently asked questions: Information about delivery times, return policies, payment methods, etc.
Assist in product search: Help customers find what they are looking for based on their needs and preferences.
Provide basic technical support: Resolve simple questions about product operation.
Collect contact information: Qualify leads and direct them to the sales team when necessary.
Conduct satisfaction surveys: Obtain customer feedback on the shopping experience.
Below, we present the step-by-step process to create your chatbot using both approaches.
Creating a New Chatbot
To start creating your chatbot, follow these instructions:
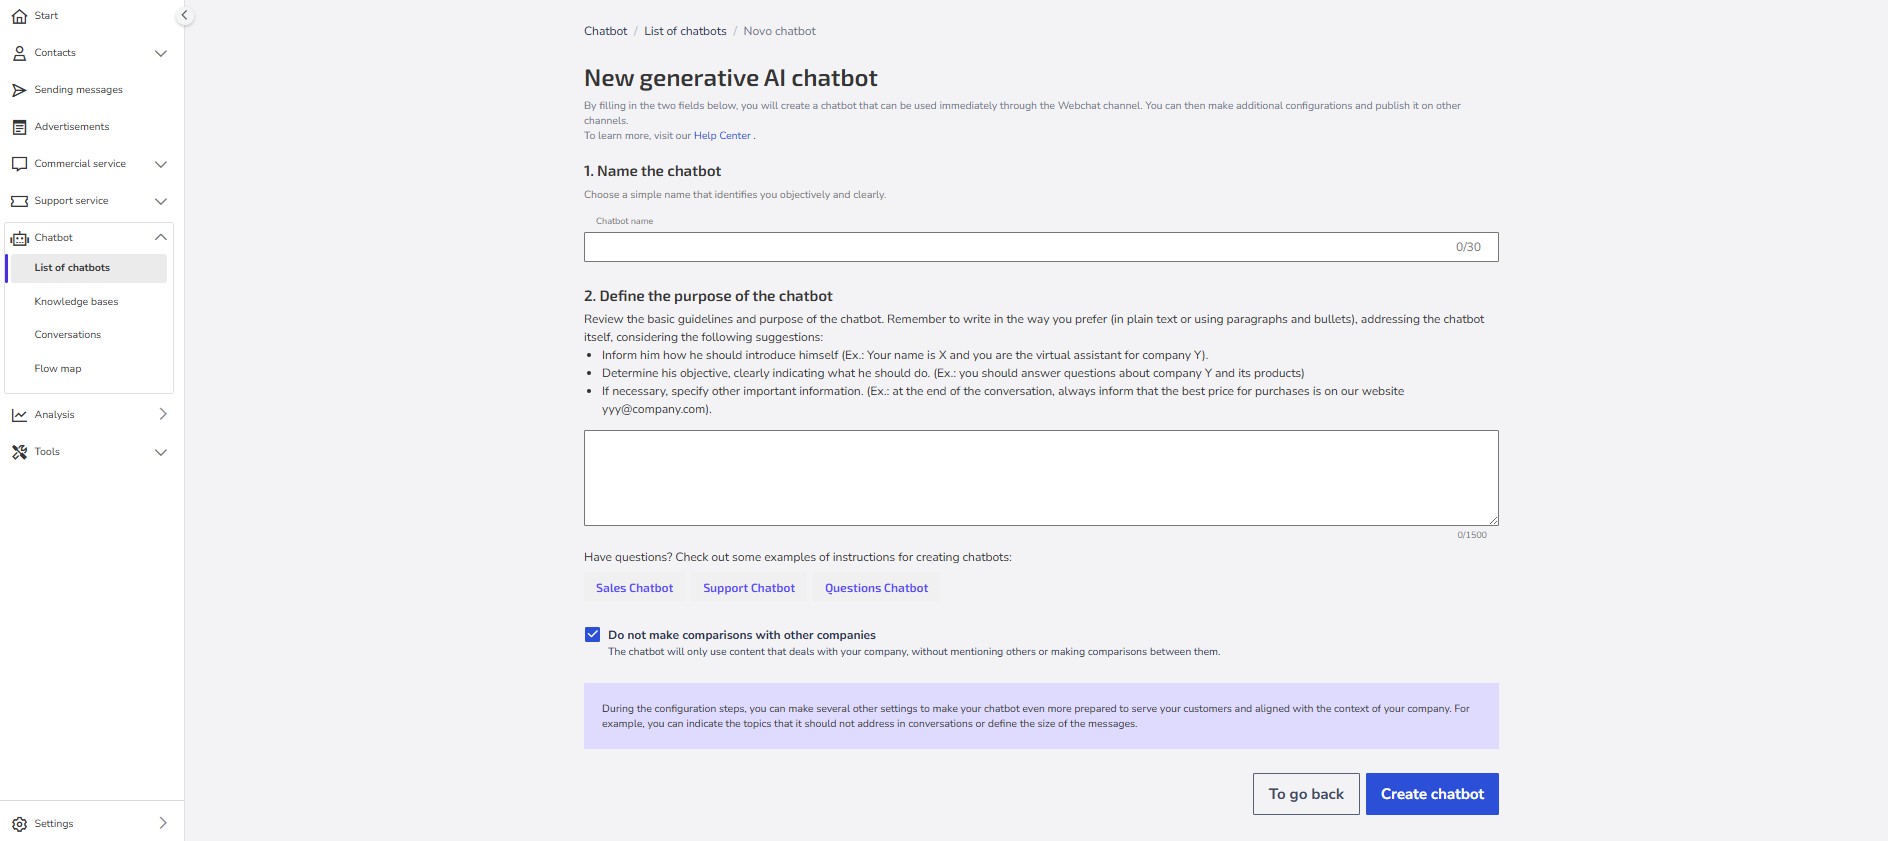
Access the Chatbot module > Chatbot List > Create new chatbot.
At this point, you can choose how you want to create your chatbot: Create a chatbot on your own or Create with AI assistance.
Creating a Chatbot on your own
If you prefer to have complete control over your chatbot's settings, follow the steps below:
Give the chatbot a name: Choose a clear and objective name that easily identifies the purpose of your chatbot (e.g., "Online Store Support," "Sales Assistant").
Define the basic guidelines and purpose of the chatbot: In the description field (guidance prompt), enter the instructions for the chatbot to conduct conversations effectively. Be clear about what you expect it to do and how it should behave.
Tip: Below the description field, you will find examples of predefined prompts for different use cases:
Sales chatbot: Ideal for assisting customers in the purchase process, presenting products and offers.
Support chatbot: Focused on answering questions, solving problems, and providing help information.
FAQ chatbot: Designed to answer general questions about the company, products, or services.
By clicking on one of the templates, the prompt will be displayed. Click Copy example to paste the text into the description field and customize it according to your needs.
Important: If you do not want the chatbot to make comparisons with other companies in your industry, check the option Do not make comparisons with other companies, located above the Create chatbot button. By selecting this option, the chatbot will only use the information provided in the guidance field.
Done! After filling in the desired information, click Create new chatbot.
Personalizing the New Chatbot
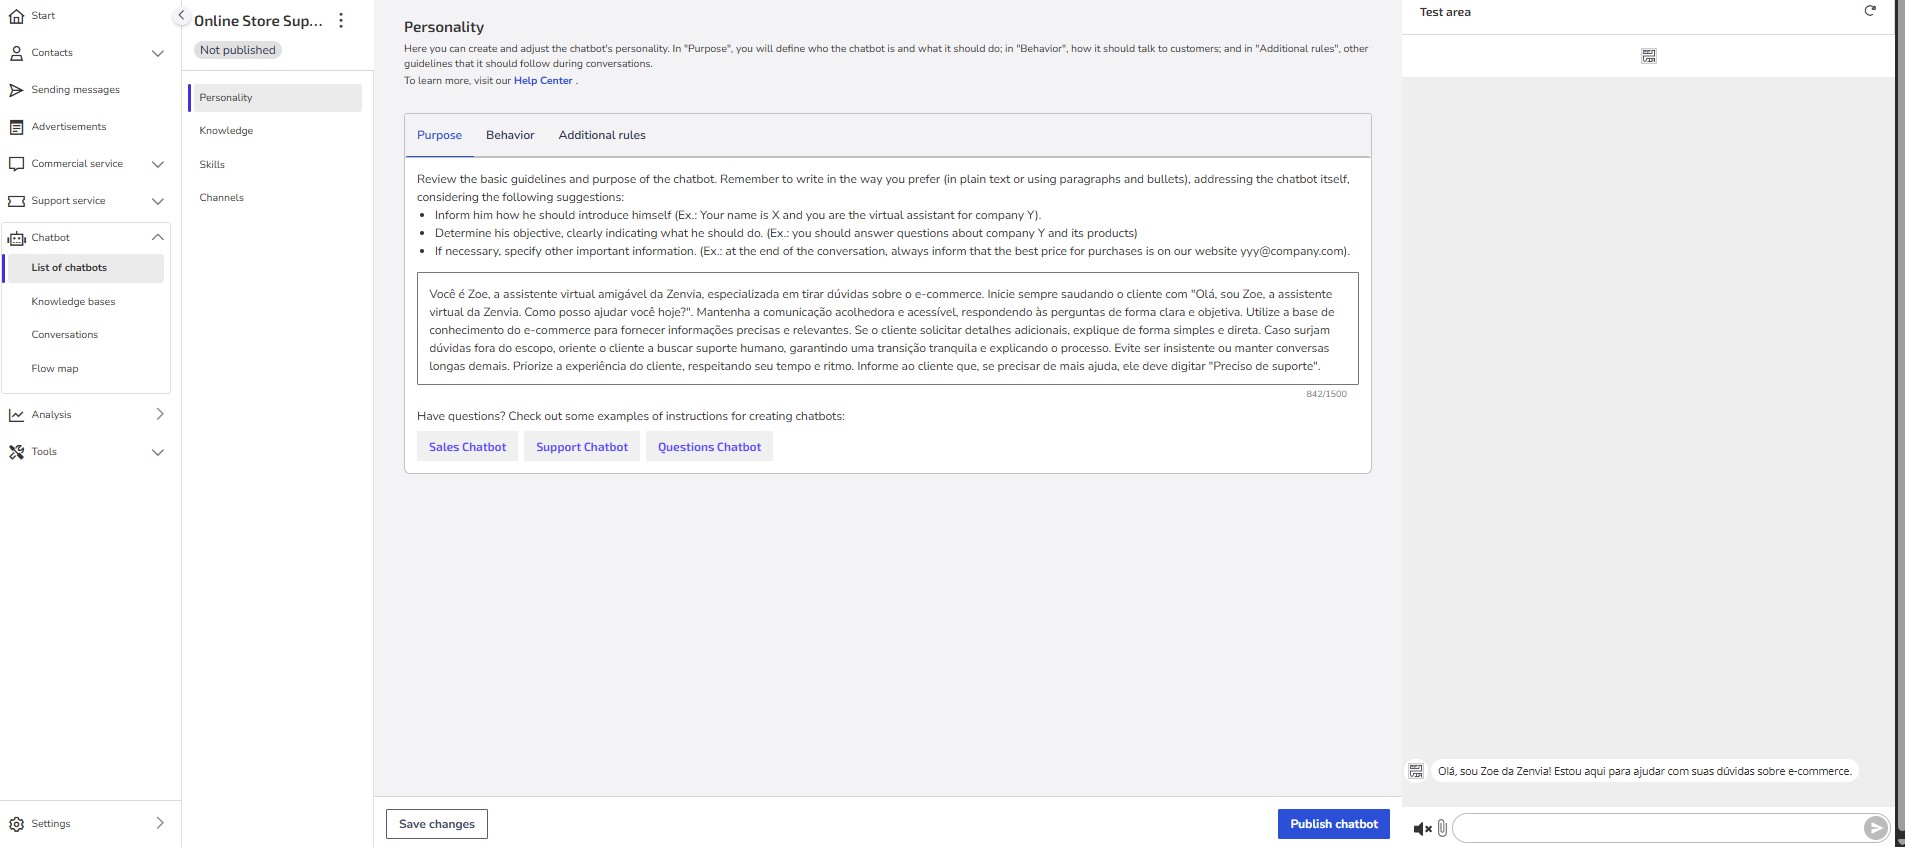
After creating the chatbot, it is essential to personalize it so that it operates effectively and in line with your company's identity.
By configuring the personality, behavior, and skills of your virtual assistant, you ensure that it will provide more relevant and appropriate responses to your users.
The personalization options include:
Create and adjust the Chatbot's Personality: Define the tone of voice, language style, and other characteristics that will shape the chatbot's interaction with users.
Manage Chatbot Content on the Knowledge screen: Add specific knowledge bases so that the chatbot can consult relevant information and provide more accurate answers.
Add Skills to the Chatbot: Integrate extra functionalities, such as the ability to make appointments, collect payment information, or connect to other systems.
Creating a Chatbot with AI Assistance
The Chatbot creation assistant is a tool that simplifies chatbot creation, making the process faster and more intuitive.
After selecting Create with AI assistance on the new chatbot creation screen, you will be directed to an interactive interface.
Proceed by answering the questions with as much detail as possible. Your answers will be used by the AI to create a complete and well-structured prompt, ensuring that the chatbot works according to your business needs.
See the instructions:
1- Enter the name you want to use for the chatbot. This name will be displayed in the chatbot listing.
2- Define the language style you prefer the chatbot to use. Here you choose how the chatbot should communicate, and you can choose between: informal, neutral, or formal.
3- Choose the type of language the chatbot should use, which can be either neutral or technical for communication.
4- Use the slider to choose the maximum size of the responses the chatbot should provide (Between 100 and 999 characters).
5- Define whether the chatbot can quote or compare with other companies. Answer 'yes' if you allow comparisons with other companies, or 'no' if you prefer to avoid them.
6- Answer whether you would like to limit the content covered in the messages. Answer 'yes' if there is any subject you prefer to avoid in communications. In this case, the next screen will allow you to list the subjects to be avoided. Write the themes or topics you prefer not to address in the messages.
7- Indicate whether the chatbot can use emojis in messages. Answer 'yes' if you would like the chatbot to use emojis in messages, or 'no' if you prefer it not to.
8- Define the main objective of the chatbot. Think about the main goal you want to achieve with your chatbot. This could be something like improving customer service, increasing sales, or providing specific information.
9- Write how the chatbot should interact with users. It can have a friendly, formal, technical tone, among others. Choose what best suits your audience and objective.
10- Describe the main functions that the chatbot should perform in the conversation, such as answering questions, suggesting products, or assisting with support.
11- Identify who the chatbot will be directed to, that is, the group of people who will use the chatbot the most, such as customers, students, professionals in a specific area, etc.
12- Write how the chatbot should introduce itself. Think of a name that is easy to remember and that reflects the chatbot's personality. Also, consider how it should introduce itself to users, as in the example: 'Hello, I am Zoe, Zenvia's virtual assistant.'
13- Finally, review the information generated by the AI. All information can be edited after the chatbot is created. If you prefer, restart the assistant. If everything is correct, finalize by clicking Create chatbot.
14- After creating the Chatbot, your screen will automatically update with all the settings ready. Before publishing, perform tests to make sure your chatbot is following and meeting everything you want and have configured.


