SLA Contracts (Service Level Agreement) is a feature that manages response and resolution times for tickets.
With this feature, it is possible to have more control over the service level agreements related to the ticket completion time to manage the support operation. It also complies with commercial contract clauses that require a specific SLA for support service.
There are two types of SLA deadlines in Zenvia Customer Cloud, Solution (time for ticket resolution) and First Response (time from ticket opening to the first action recorded on the ticket).
How it works
In SLA Contracts, view all created contracts, including:
- Contract name;
- Number of SLA rules created for the contract;
- Number of clients added to the same contract;
- User who made the last change;
- Whether it is a standard contract;
- Whether it is active or not in the system.
💡 Tip: In Options, it is possible to create, edit, copy, or delete a contract. Learn how to use these resources:
Create a new SLA contract
1. Access Support Service > Settings > Ticket Settings;
2. In SLA Contracts, click Manage;
3. Click the Create a new contract button;
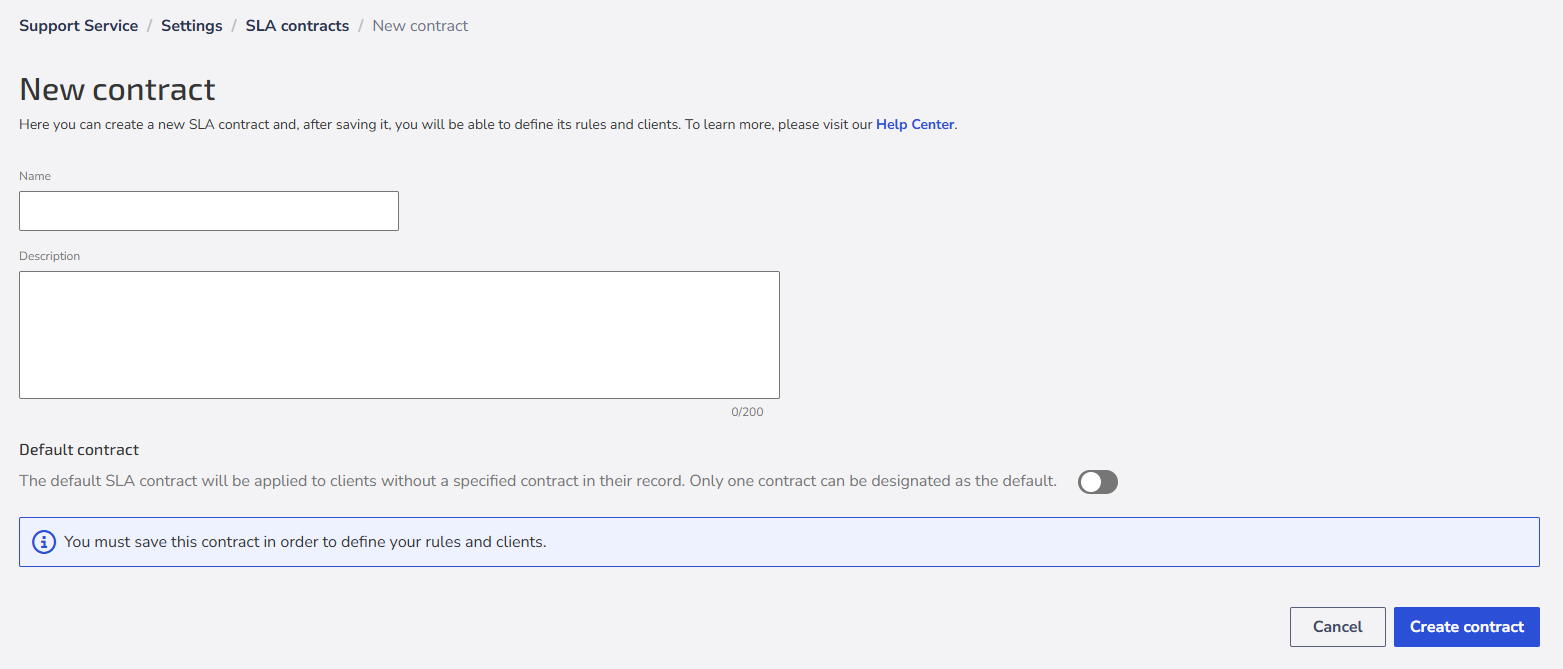
4. Add a name and a description for the new contract. Example:
Name: Premium clients.
Description: SLA rules for clients considered premium.
5. Save the contract.
Done! SLA contract created.
After creation, edit the contract to add rules and clients:
Edit SLA contract
For edits, just choose the desired contract and go to Options > Edit.
You can edit the name and description if necessary and make other changes, such as:
- Define as Standard Contract;
- Add SLA Rules;
- Choose which clients will use this SLA contract;
- Delete contract.
💡 Tip: Only one standard contract can exist. Use it for clients without a specific contract.
Add New Rule
The rules specify the conditions for calculating the SLA of a ticket. If a ticket fits more than one rule, the shortest time rule applies.
To add a new rule, it is necessary to have already created a contract and go to Options > Edit. Then, follow these steps:
1. Click on New Rule;
2. Enter the name of the new rule;
3. Establish the conditions that tickets must meet to follow the rule:
- Combined conditions: The ticket must meet all chosen conditions. Example: If the ticket is reopened.
- Independent conditions: The ticket must meet at least one of the chosen conditions. Example: If the ticket status is changed.
4. In Service Hours, define how the SLA will be calculated:
- Running hours: will be calculated without discounting nighttime or weekend periods.
💡 Tip: If your service is 24x7, check this option.
- Business hours: it will be necessary to define the service calendar, as the SLA will be calculated considering the business hours.
a) Click to set business hours;
b) Choose the time zone, days, and service hours;
c) Save the information.
💡 Tip: If your service is during business hours, check this option. Remember to include lunchtime. Example: From 09:00 to 12:00. From 13:00 to 18:00.
5. In Pause, select if the solution SLA should be paused in certain statuses or specific reasons;
6. In SLA, enable the desired options and set the time deadlines (hours, minutes, and seconds) for the SLA:
- Calculate time for the first response: Choose the time that agents will have (from ticket opening) to record the first action on tickets.
⚠️ Attention: Select one or more ticket sources options to compose the first response SLA calculation.
- Calculate time for ticket solution: Define the time that agents will have to resolve and complete the ticket service.
💡 Tip: The time is calculated from the ticket opening, but it can be paused based on some pre-established criteria.
- Maximum number of agent actions on the ticket: Set the maximum number of actions a ticket can receive from agents.
⚠️ Attention: If this limit is exceeded, the ticket will be considered expired.
7. Click Save.
Done! Rule added.
Now, define which clients will use the SLA contract:
Clients
See below how to define the clients who will use the SLA contract:
1. In the desired contract, go to Options > Edit;
2. In the Clients section, select the clients you want to add;
💡 Tip: Use the search bar and filters to facilitate the search.
3. Click Save.
Done! SLA contract settings successfully completed.
Do I need a new contract or a new SLA rule?
A contract can contain several rules. Each subject can be treated in a different rule with different deadlines. A client can only use one contract, so it must contain all necessary rules.
Create a new contract when there are different deadlines for different clients. For example, if your company handles inquiries with an eight-hour deadline and issues with a four-hour deadline, create a single contract with two rules. If some clients have different deadlines, create a new contract with other rules.
💡 Tip: Indicate in the client registration which SLA contract to use.