If you already have a Shopify store and are looking to optimize communication with your customers throughout the customer journey, transform shoppers into valuable leads, and accelerate sharing product details, integrate with Zenvia Customer Cloud. In this article, learn how to integrate and use the Shopify application within the sales inbox.
What does the Shopify integration allow?
The integration facilitates communication and lead management for your store, offering two main features:
- Automatic post-purchase messages: Automatically send a message via WhatsApp to every customer who completes a purchase, facilitating contact and notifying them about the channel's availability for support.
- Sending product details: Quickly share the name, details, price, and link of a product from your store directly in the service conversation, using the SKU code.
⚠️ Attention:
|
Prerequisite: Making the phone number mandatory on Shopify
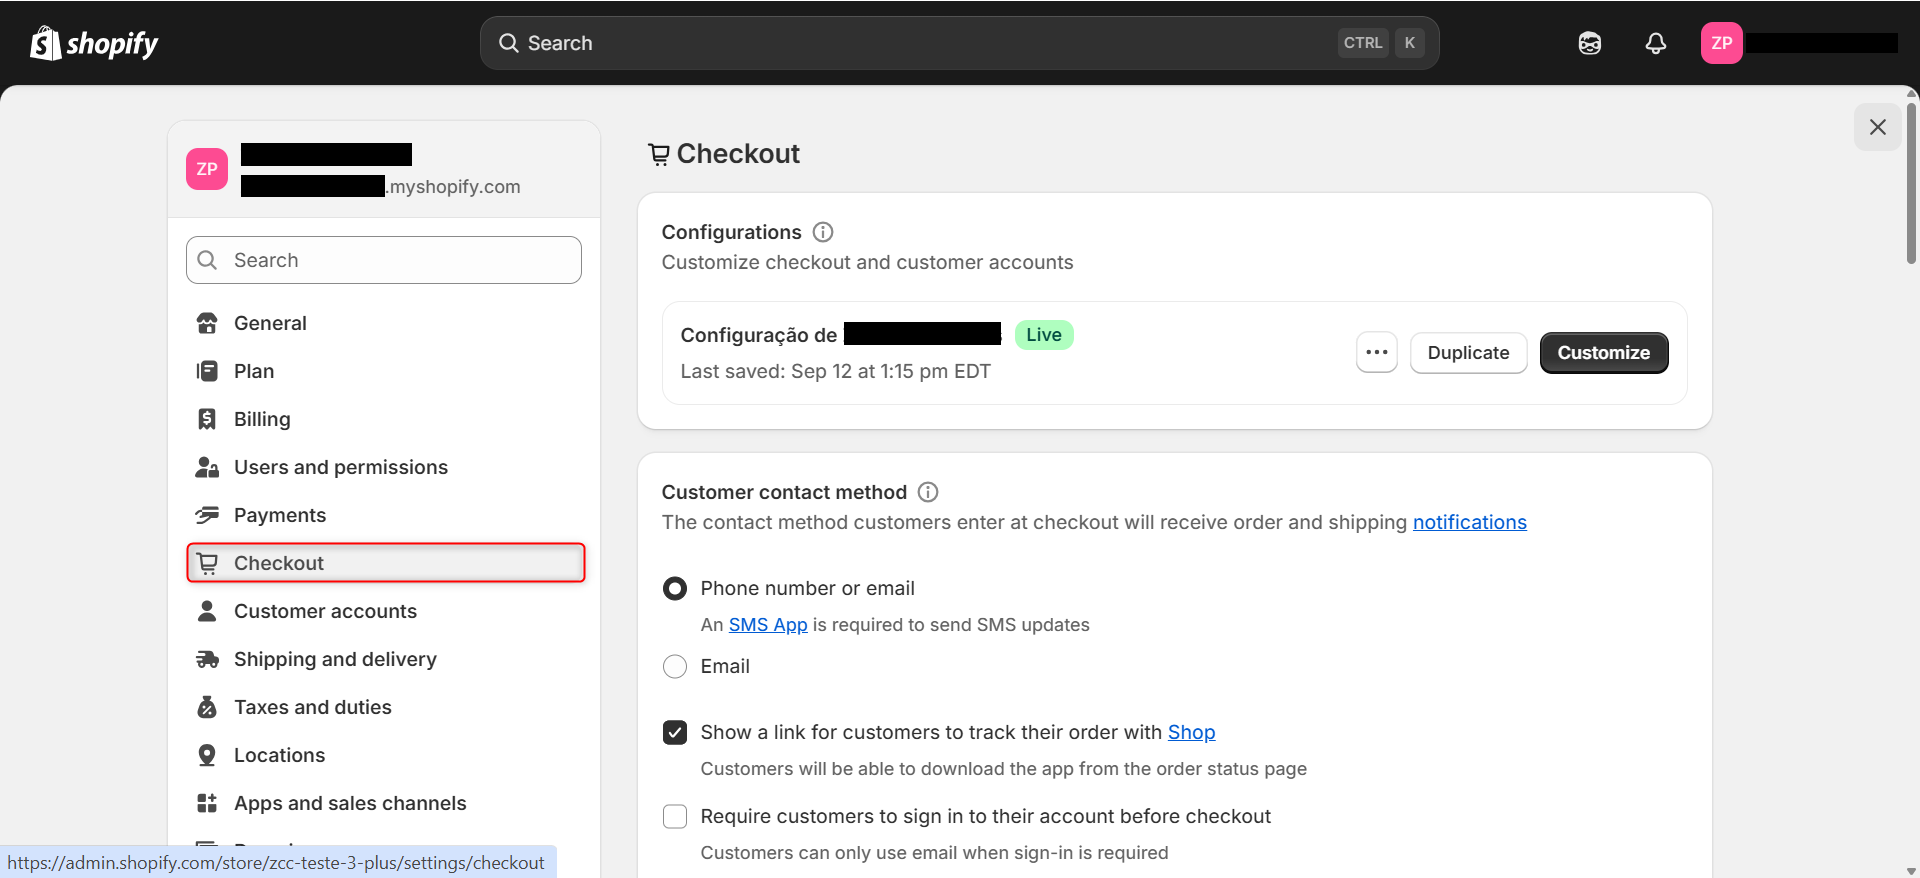
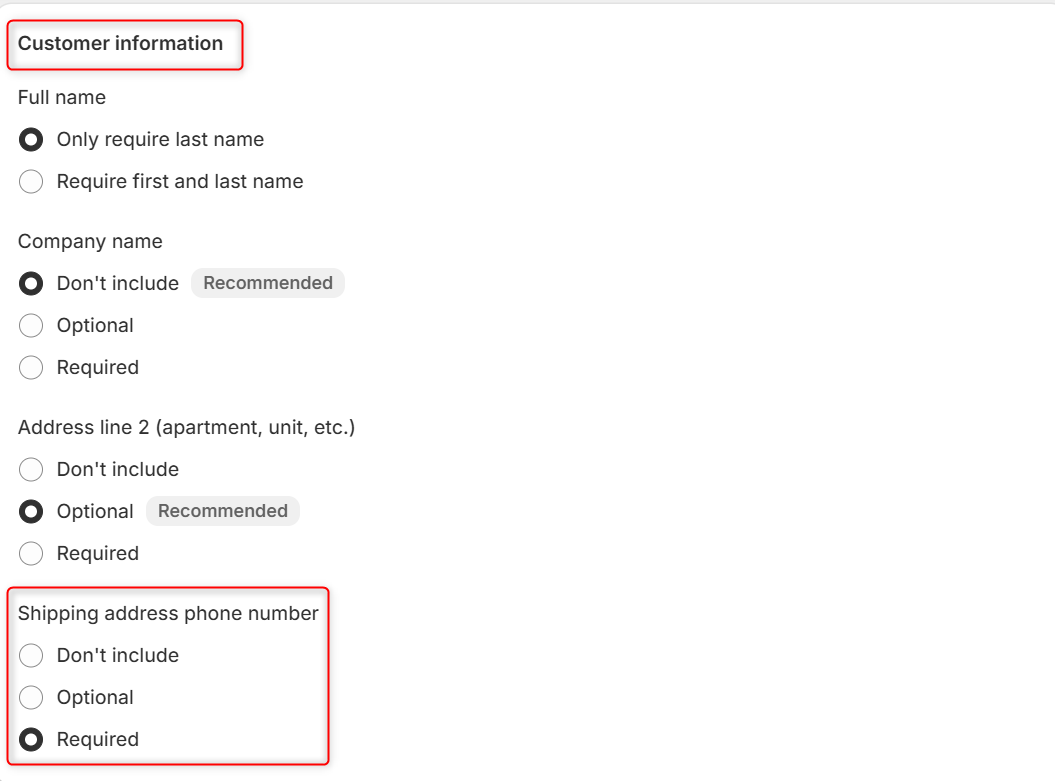
To ensure contact information is collected via WhatsApp, the phone field must be mandatory on the Shopify checkout:
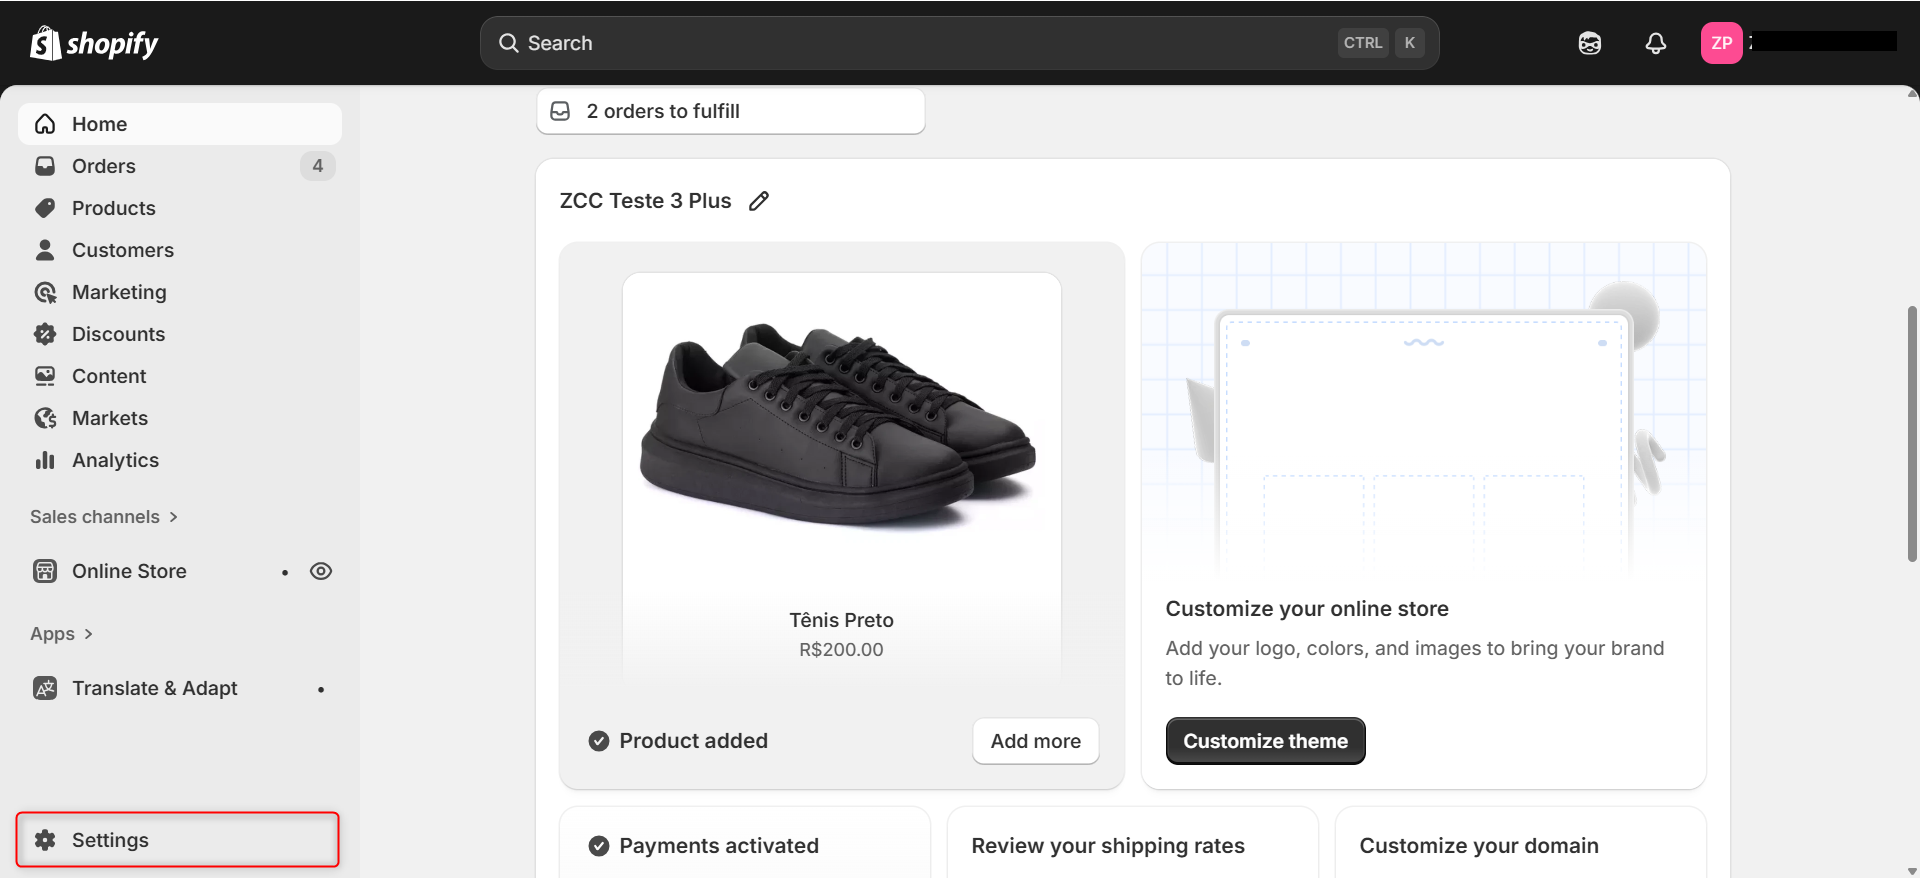
1. Access your Shopify and navigate to Settings.
4. Save the change.
How to install Shopify in Zenvia Customer Cloud
The next step is to connect your store to Zenvia Customer Cloud:
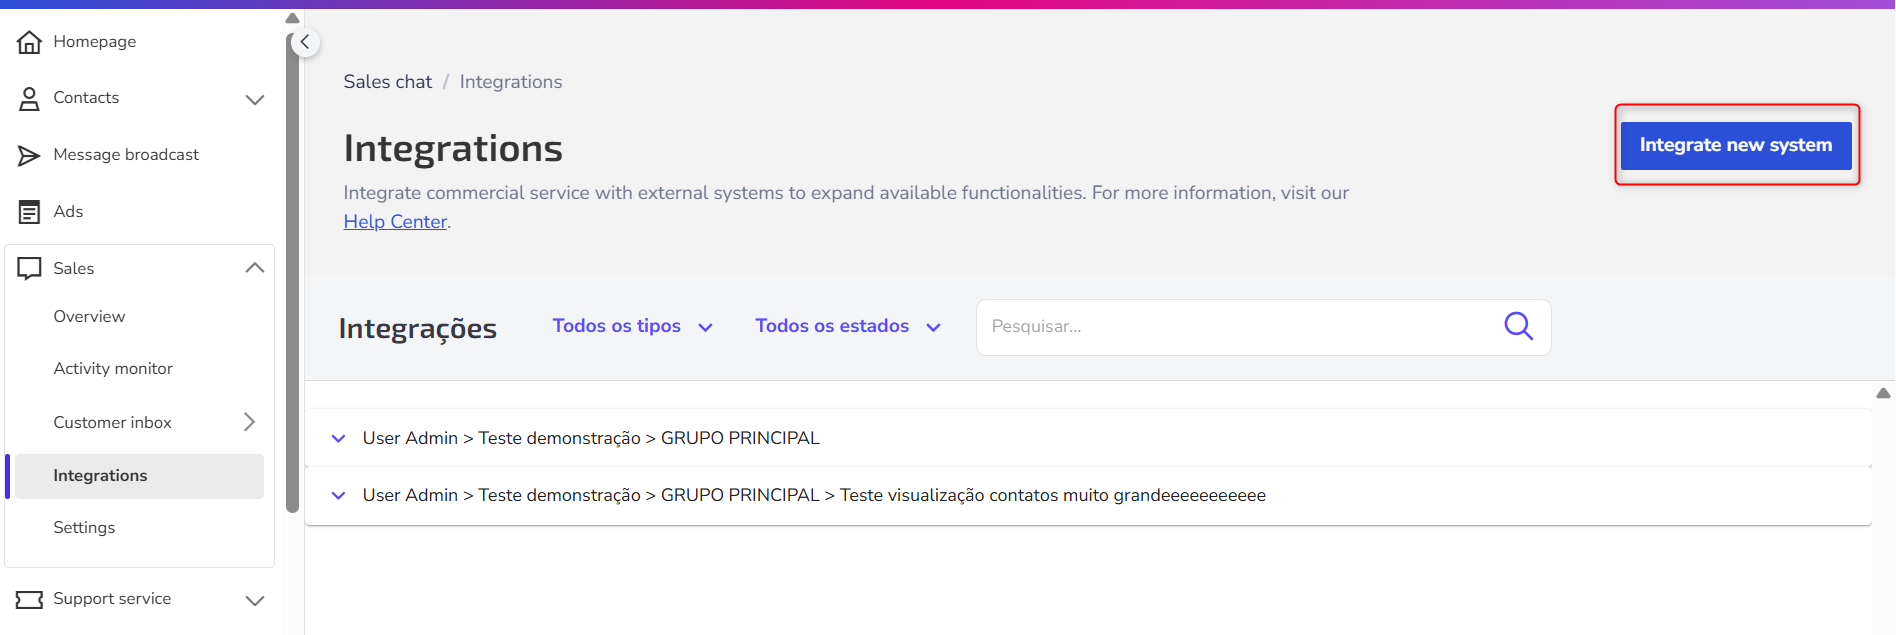
1. In the side menu of Zenvia Customer Cloud, go to Sales > Integrations.
2. Click Integrate new system (bottom right corner).
4. Choose a group to assign the application.
💡 Why choose a group? The selected group will be responsible for serving all new contacts (leads) generated from a purchase on Shopify. Only agents who are part of this group will be able to view and interact with these leads in the service inbox, and use the functionalities of the Shopify app within conversations.
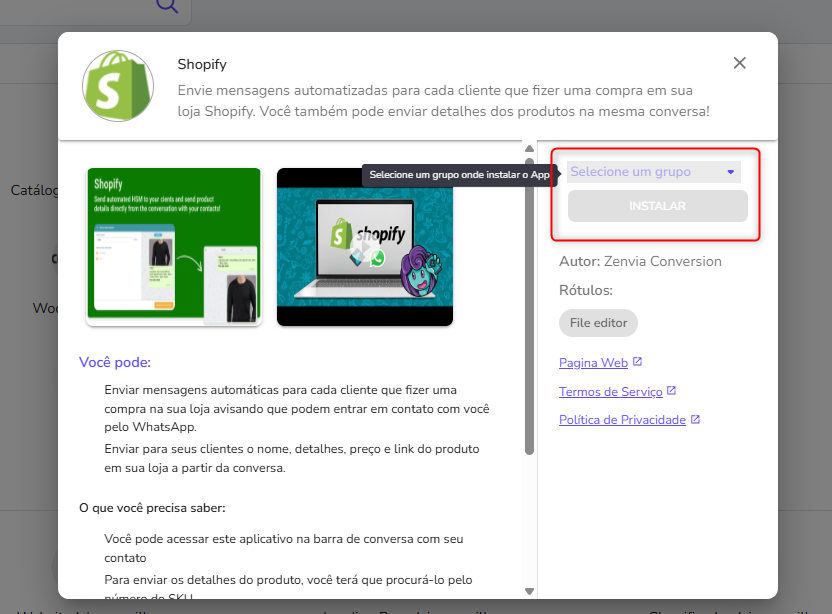
5. Click Install.
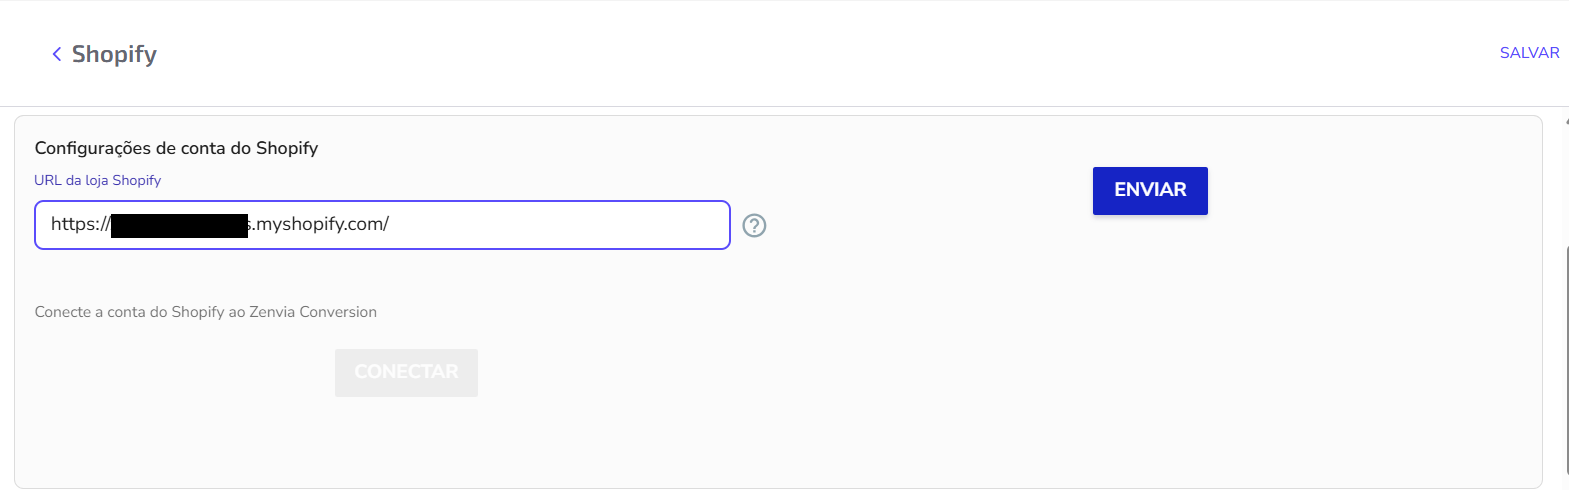
6. Enter the URL of your store in the indicated field and click Send.
- It may be necessary to reload the page and open the next tab to grant permissions.
8. Back in Zenvia Customer Cloud, click Connect.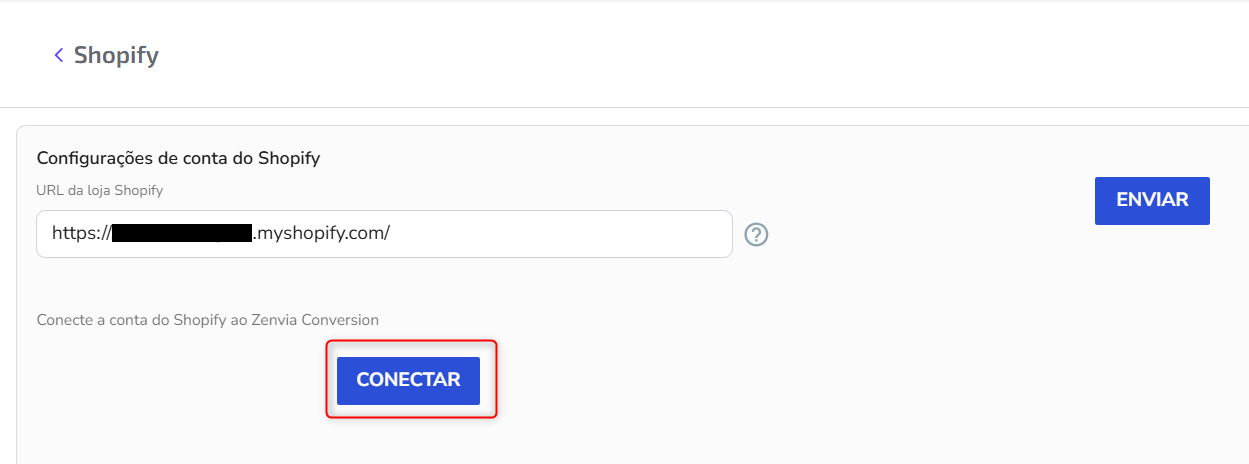
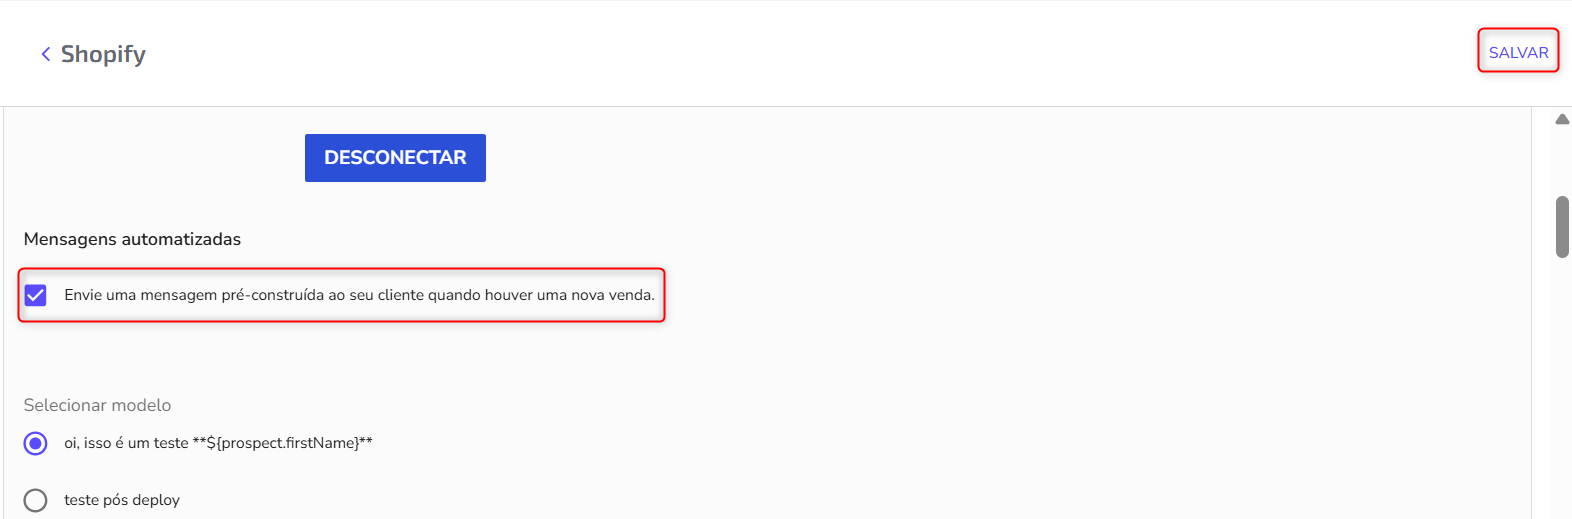
10. Click Save to finalize.

➕ Advanced Settings (Optional)
Before saving the integration, you can configure advanced aspects of lead management:
Overwrite source: Replaces the source name of leads in Zenvia Customer Cloud. The original source will be lost. It can also be applied to existing leads.
Priority: Defines the priority of the leads. Leads with higher priority (1 being the highest) will be served first by agents.
Distribution rules: Allows creating rules to distribute leads among groups or consultants, based on specific conditions. Example: "Assign to group X using rule Y".

How to use Shopify in the Sales customer inbox
→ Automatic attention for purchase leads
If automatic message sending was enabled during installation:
- Trigger: Every time a customer completes payment for a product on Shopify, a contact is automatically created in Zenvia Customer Cloud.
- Action: An automatic message is sent to the customer via WhatsApp - this is the model (template) that was selected and enabled during the integration.
1. Access Sales > Customer inbox.
2. The new contact will appear in the inbox with the Origin: Shopify.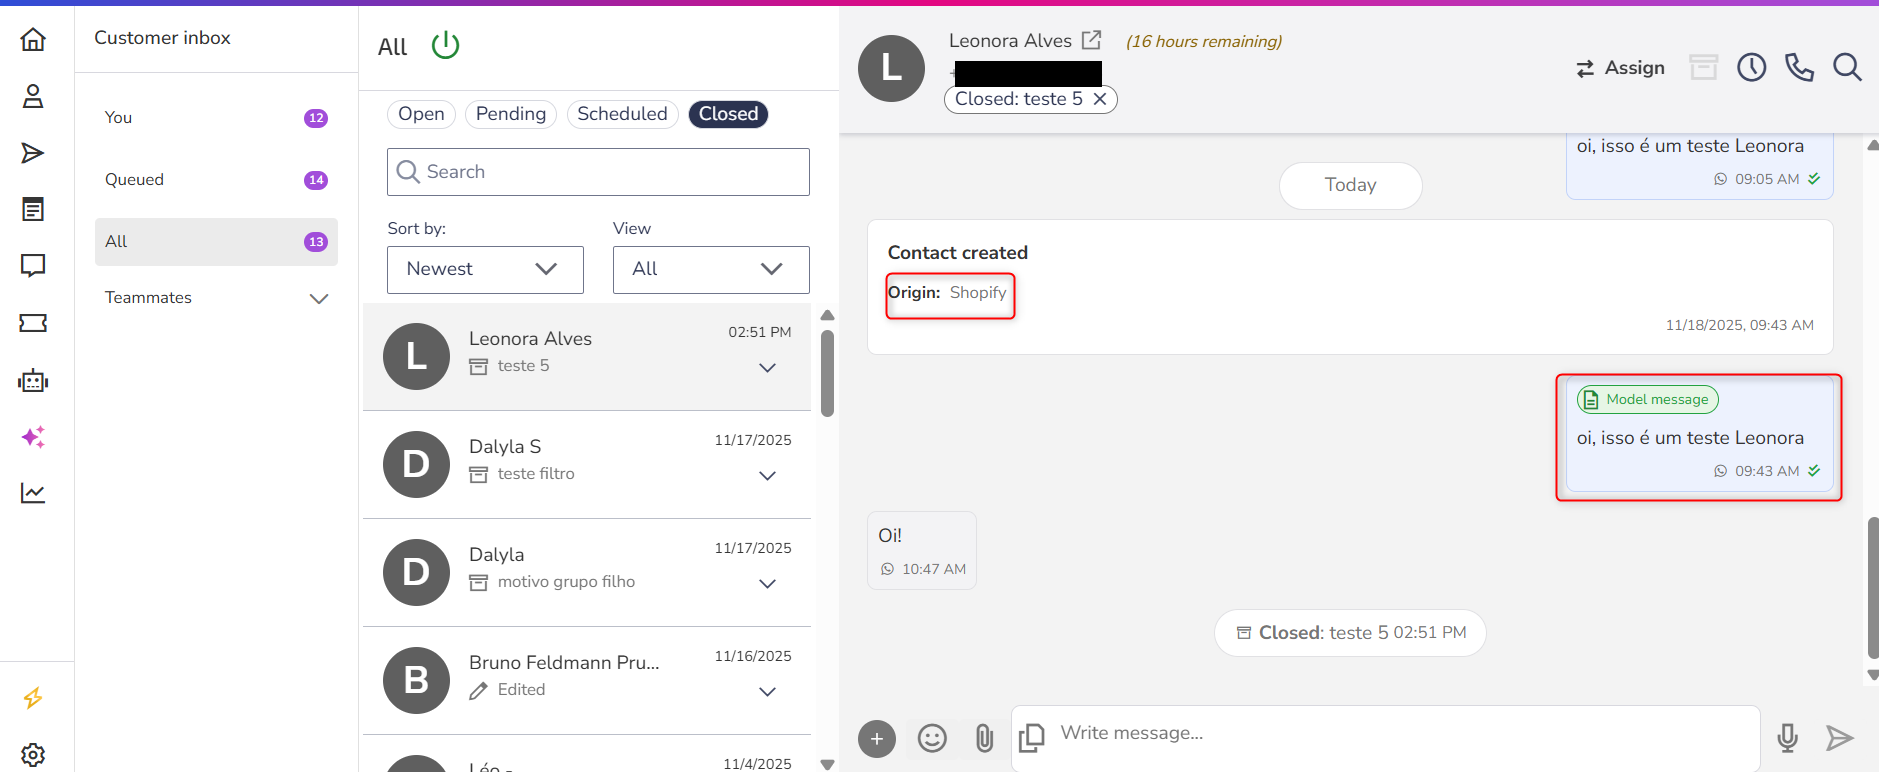
→ Sending product details in the conversation
You can also quickly send product information to the customer during a service session:
1. Access the desired conversation in Sales > Customer inbox.
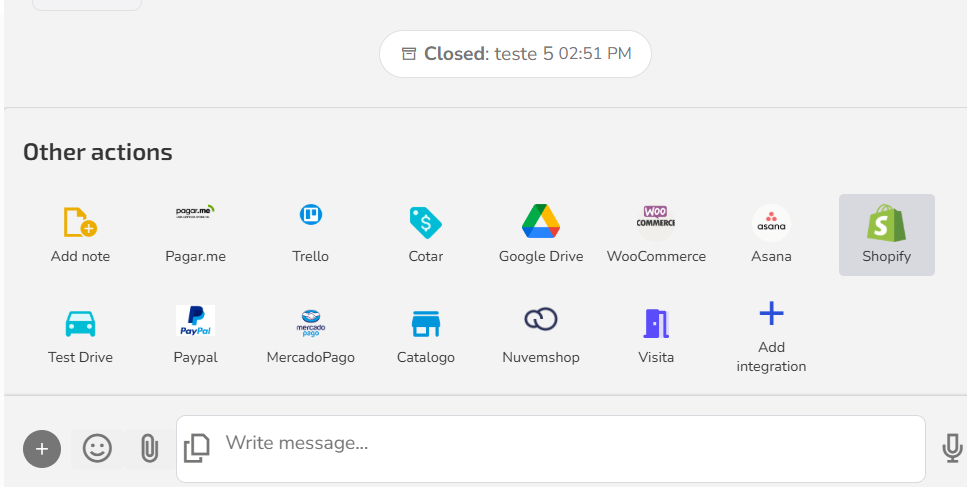
2. Click the other actions button (located to the left of the typing area) and select the Shopify icon. A new screen will open.
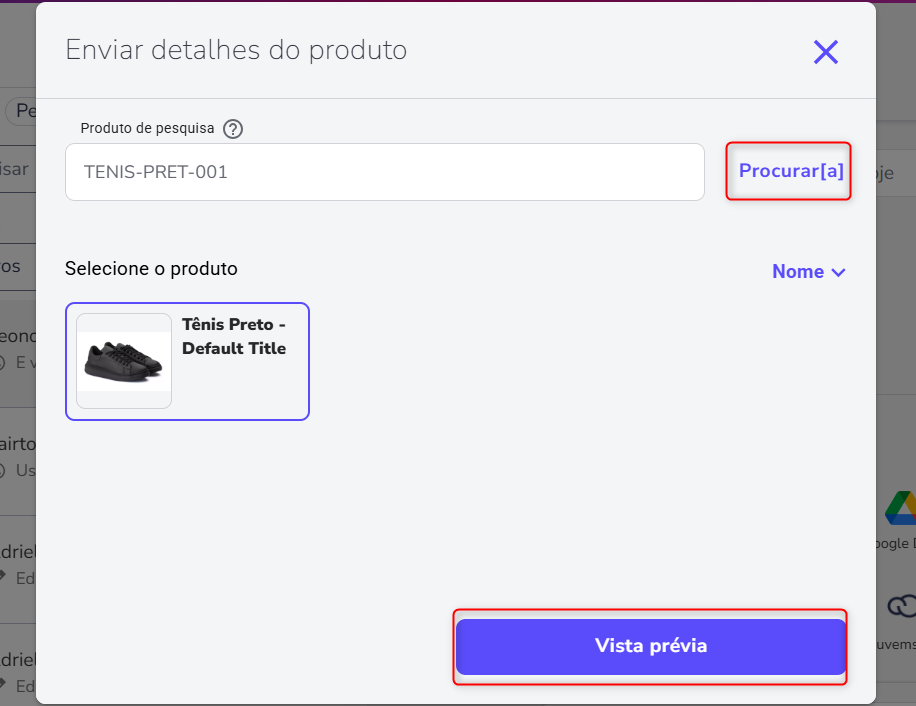
5. Then, select the product and proceed to view the message preview.
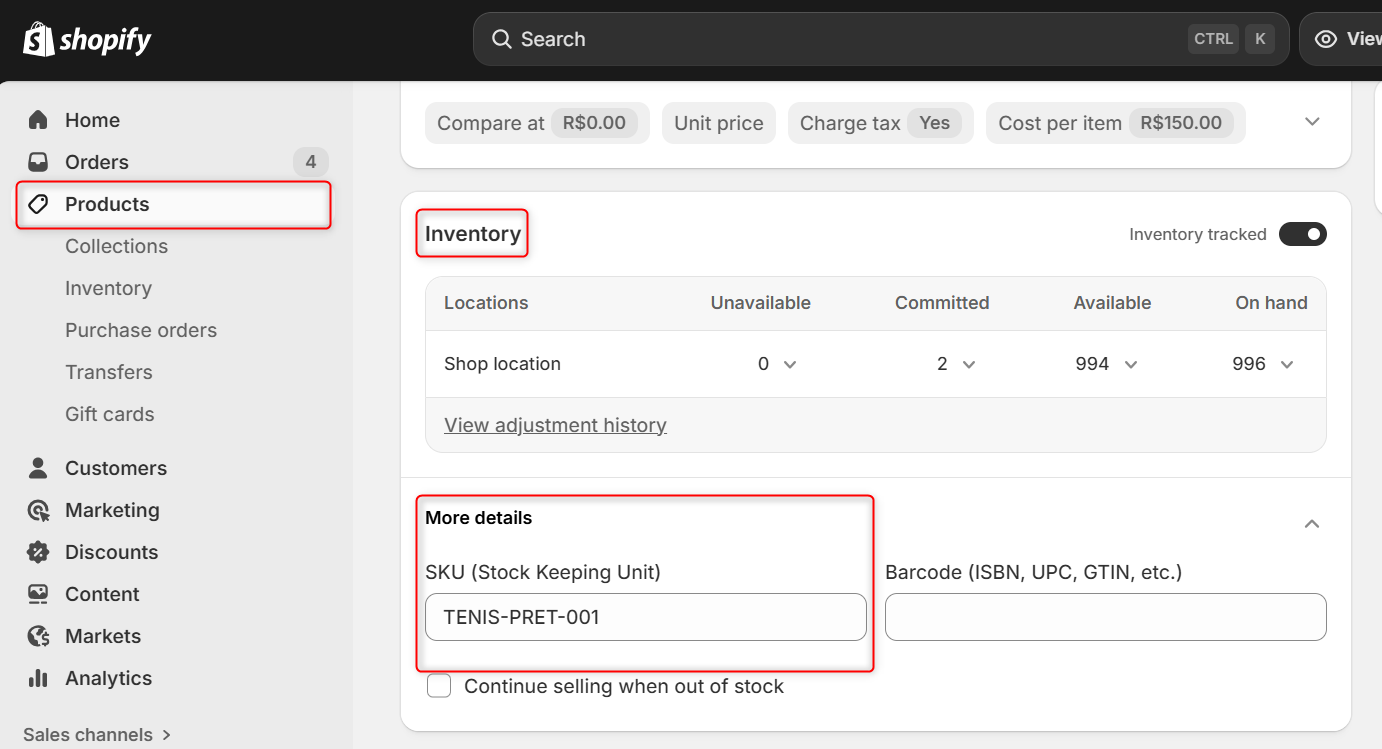
💡 The SKU (Stock Keeping Unit) is the product's stock reference. You can find it on Shopify in Products > access the product > Inventory section.
7. Click Send details to customer.
The customer will receive the product card with the chosen details directly on WhatsApp.
Agent View
After sending, the product details appear in the conversation.
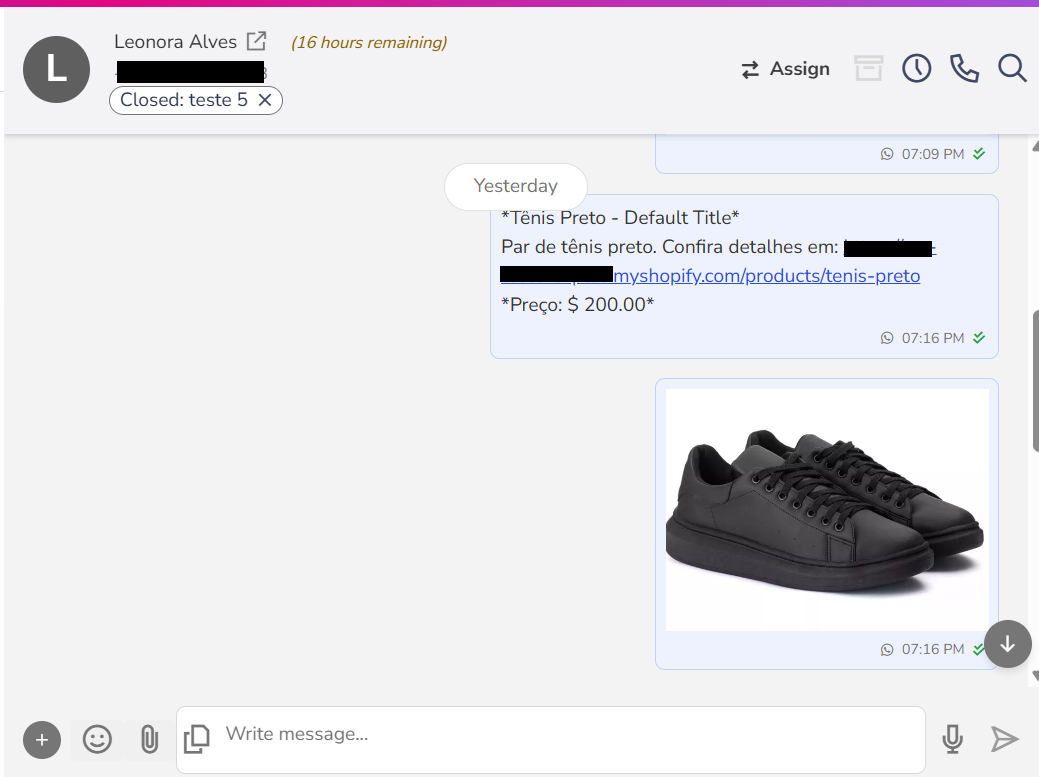
The customer receives a message with the product card, including the name, link, and the details (price and description) that were selected by the agent.
