Send bulk WhatsApp messages and keep the conversation going with your customers through human or automated support on Zenvia Customer Cloud. This ensures a continuous and seamless experience for your customers while increasing your chances of sales and conversion.
Specifications
Supported channel: WhatsApp.
Compatible plans: Specialist, Expert, Professional, and Enterprise.
Transfer WhatsApp Sending to Human Support
Learn how to configure WhatsApp sending in Zenvia Customer Cloud so that contacts who reply are automatically directed to human support.
Prerequisites
WhatsApp channel: Ensure that the channel is contracted and configured in Zenvia Customer Cloud.
Selection of support groups or agents (optional): If you choose to transfer to support groups or agents, the service will be directed according to the settings defined in the registered credential. That is, the groups or agents must be linked to the WhatsApp line in Settings > Channels > WhatsApp.
Configuration
Go to Message broadcast and select WhatsApp;
Give a name to the sending, select the registered WhatsApp line, and then choose a pre-approved template;
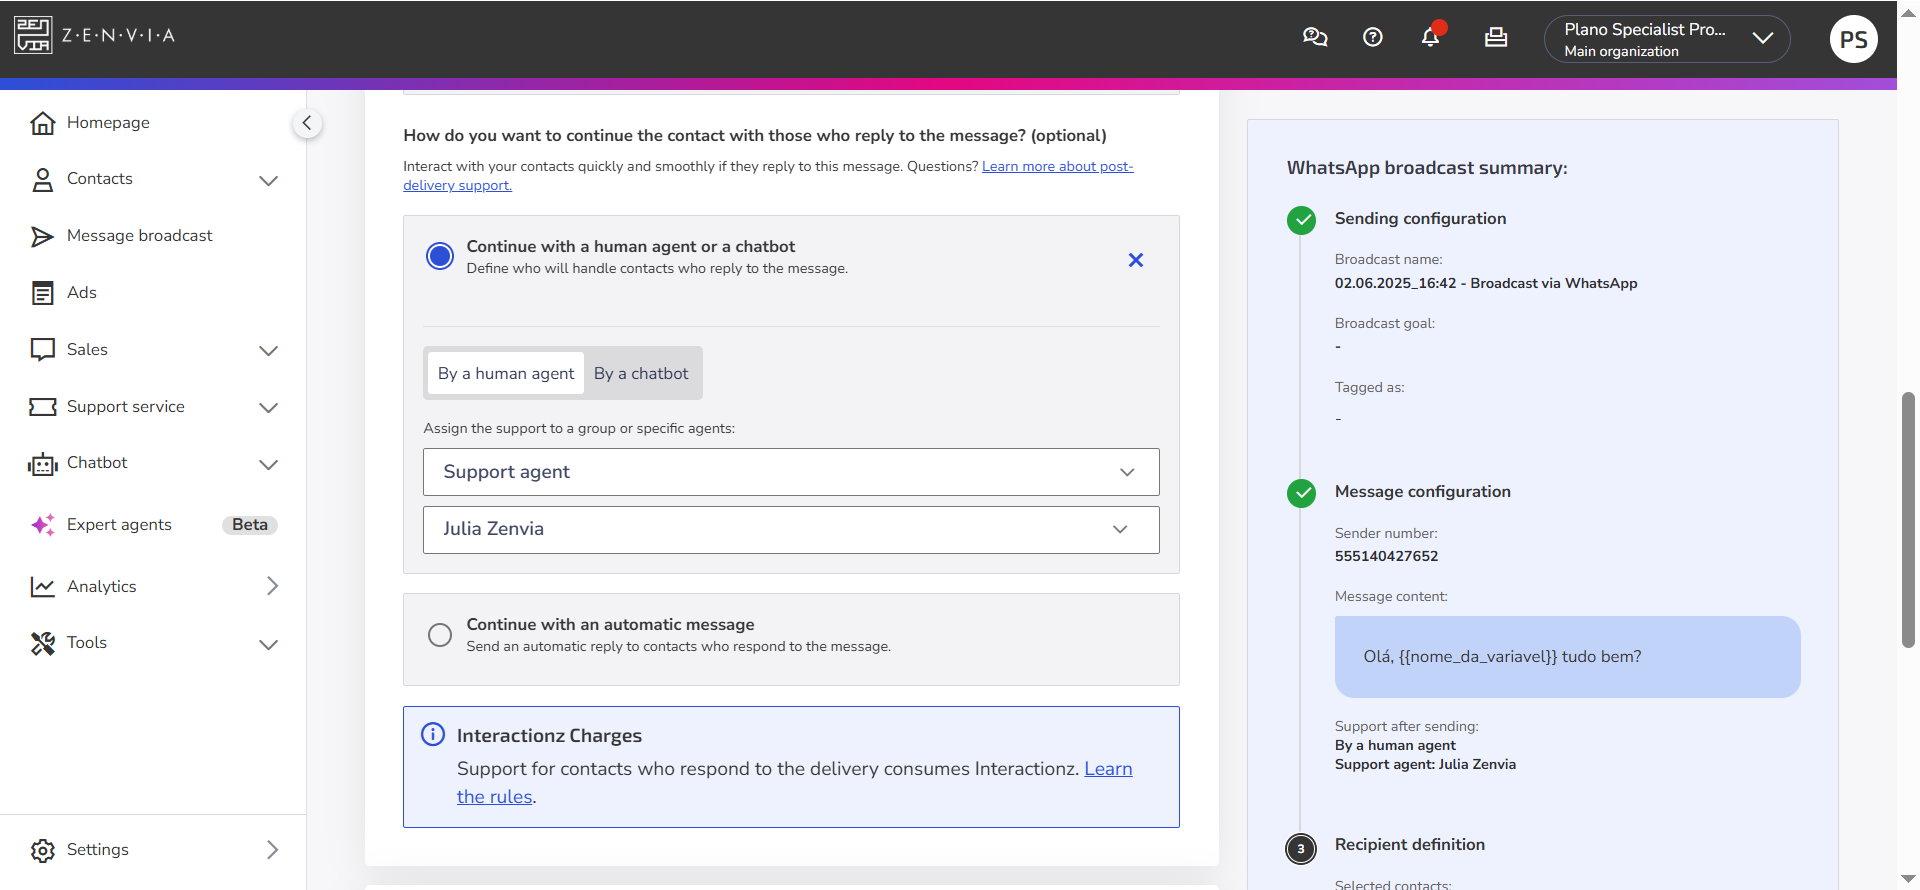
Then, check the option Continue with a human agent or a chatbot and select By a human agent;
Choose the responsible agent for the support;
Proceed with the next configuration steps for your WhatsApp sending.
💡 Tip: Learn more about contact assignment in WhatsApp sending.
Contacts who reply to your sending will appear in Commercial Support > Support Inbox of the chosen responsible agent. The information sent includes the message content, campaign ID, and contact response.
Transfer WhatsApp Sending to Automated Support
See how to configure WhatsApp sending in Zenvia Customer Cloud so that contacts who reply are automatically directed to automated chatbot support.
Prerequisites
WhatsApp Channel: Make sure the channel is contracted and configured in Zenvia Customer Cloud.
Chatbot linked to WhatsApp: Ensure a chatbot is linked to the same WhatsApp number that will send messages. If the number is already linked to a chatbot, it will be displayed automatically during configuration.
Configuration
Go to Message broadcast and select WhatsApp;
Give a name to the message sending, select the registered WhatsApp line, and choose a pre-approved message template;
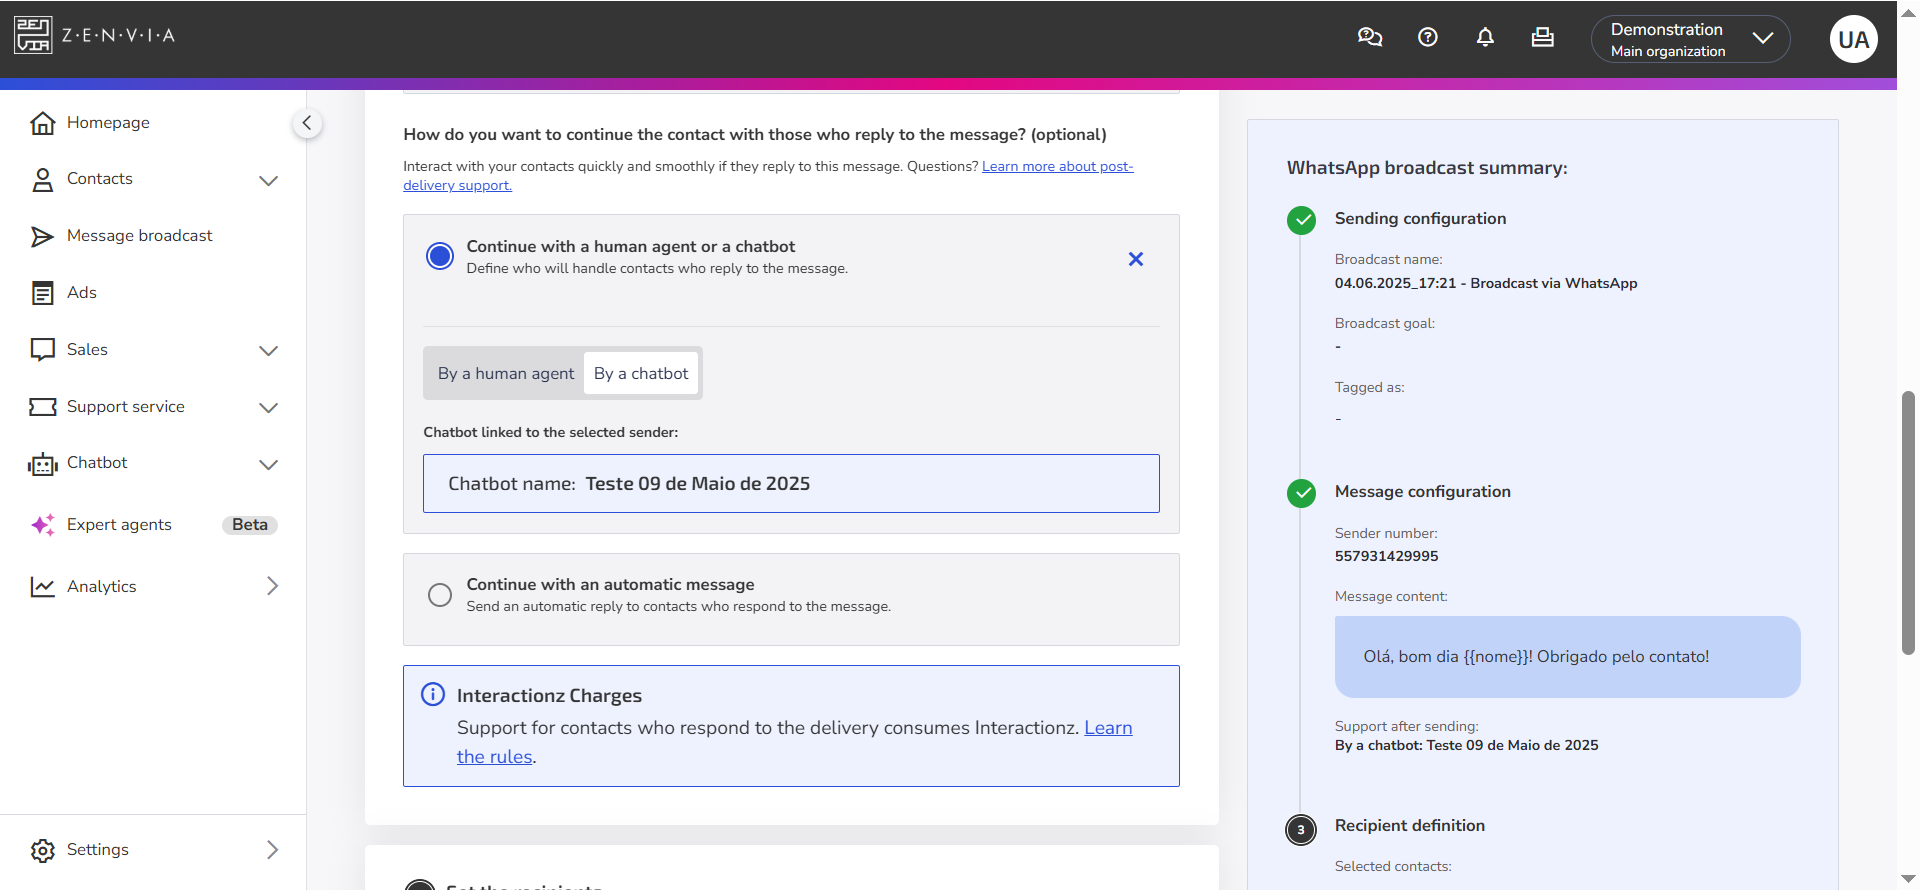
Then, check the option Continue with a human agent or chatbot and select By a chatbot;
If no chatbot is linked to the WhatsApp line: Choose a chatbot from the list to link it to the WhatsApp number.
If no chatbot is created and linked: You will need to create and publish a new chatbot before linking it to the WhatsApp channel.
Learn how to link a channel to a chatbot in Zenvia Customer Cloud.
Continue with the next steps for WhatsApp message sending configuration.
How automated service works after sending
After sending, all contacts who respond will be automatically directed to the chatbot configured for this WhatsApp number. This chatbot will continue the conversation and may transfer the service to a Commercial Service agent, as needed.
Example of practical use:
Imagine your e-commerce company has several WhatsApp numbers, each with different message templates configured. When sending mass messages, you can:
- Choose the WhatsApp number you want to use and select the template “Product Catalog.”
- Send the message to your contact base.
- After sending, all customers who respond will be automatically directed to your chatbot assistant, which will assist in the online purchase process.
The chatbot will guide the customer through some questions to better understand what they are looking for and, if necessary, transfer them to a Commercial Service agent, where they can complete the purchase with the support of an attendant.