
Sending bulk messages via WhatsApp allows your company to communicate directly with a large number of contacts. You can include images, videos, emojis, reply buttons, and links to direct recipients to a product or service.
Before you start
Make sure that:
- The WhatsApp channel is configured in Zenvia Customer Cloud under Settings > Channels.
- You have templates approved by Meta. If you don’t have them yet, create and submit the templates for approval under Settings > Message Templates.
- After that, go to Message broadcast and select the WhatsApp channel to start setting up the message.
Next, see the steps for setting up the message:
1. Set up the sending
- Define the name of the sending. If you prefer, click X to remove the suggestion and enter the desired name;
- Choose a goal for the sending. If in doubt, learn which goal is ideal for your sending;
- Select one or more tags to identify your messages. You can add or create new tags.
2. Set up the message
- Select the registered WhatsApp number that will be used to send the message.
- Message category: Select the type of message you want to send:
- Pre-approved Template: Start conversations and send proactive updates to customers. Requires selecting a pre-approved message template.
- Direct Send: Send notifications and updates without prior approval. Only Utility content is allowed. Marketing or Authentication messages may result in warnings, temporary restrictions, or the suspension of the phone number.
- Buttons (optional): Add up to three buttons.
- Button type: Quick Reply.
- Button text: Enter the button name.
- Payload: Enter the payload value.
- How do you want to continue the conversation with contacts who reply to the message? (Optional)
- Continue with a human agent or chatbot: Route replies to a specific team or agent (ideal for sales and support), or configure a chatbot to automatically respond after the message is sent (ideal for quick interactions).
- Continue with an automatic message: Set up a default reply for contacts who respond to the message (for example, a notice about business hours or instructions on the next steps).
💡 Tip Continuing the interaction with the contact can increase your chances of conversion. For example, after sending a promotional offer, you can keep the conversation active to clarify doubts or even send a payment link. Learn more about transferring contacts to a human agent or chatbot: Transfer contacts for assistance in WhatsApp sending. Where to find the contacts who responded to the sending?
|
3. Select contacts
⚠️ Attention If your message includes media files, the content must be sent at this stage. Check out:
|
Choose the recipients. You can send messages to contacts from your database, import from a .csv file, or add them manually.
Select from the contact database
Choose lists, specific contacts, or segmentation rules from your contact database:
- Click on Select contacts;
- Select the list, specific contacts, or segmentation rules;
- Once finished, click Select and continue.
Import contacts
Upload a .csv file with the contacts. Messages with variables must be sent via .csv. The file must:
- Be in .csv format, encoded in UTF-8.
- Have phone numbers in the first column.
- Include a header in the first row with the variables.
- Contain one contact per line, in the format country code + area code.
- Be up to 120 MB in size.
💡 Tip: See how to create .csv files correctly.
With the file configured:
- Click Import contacts;
- Drag and drop the file or select it manually;
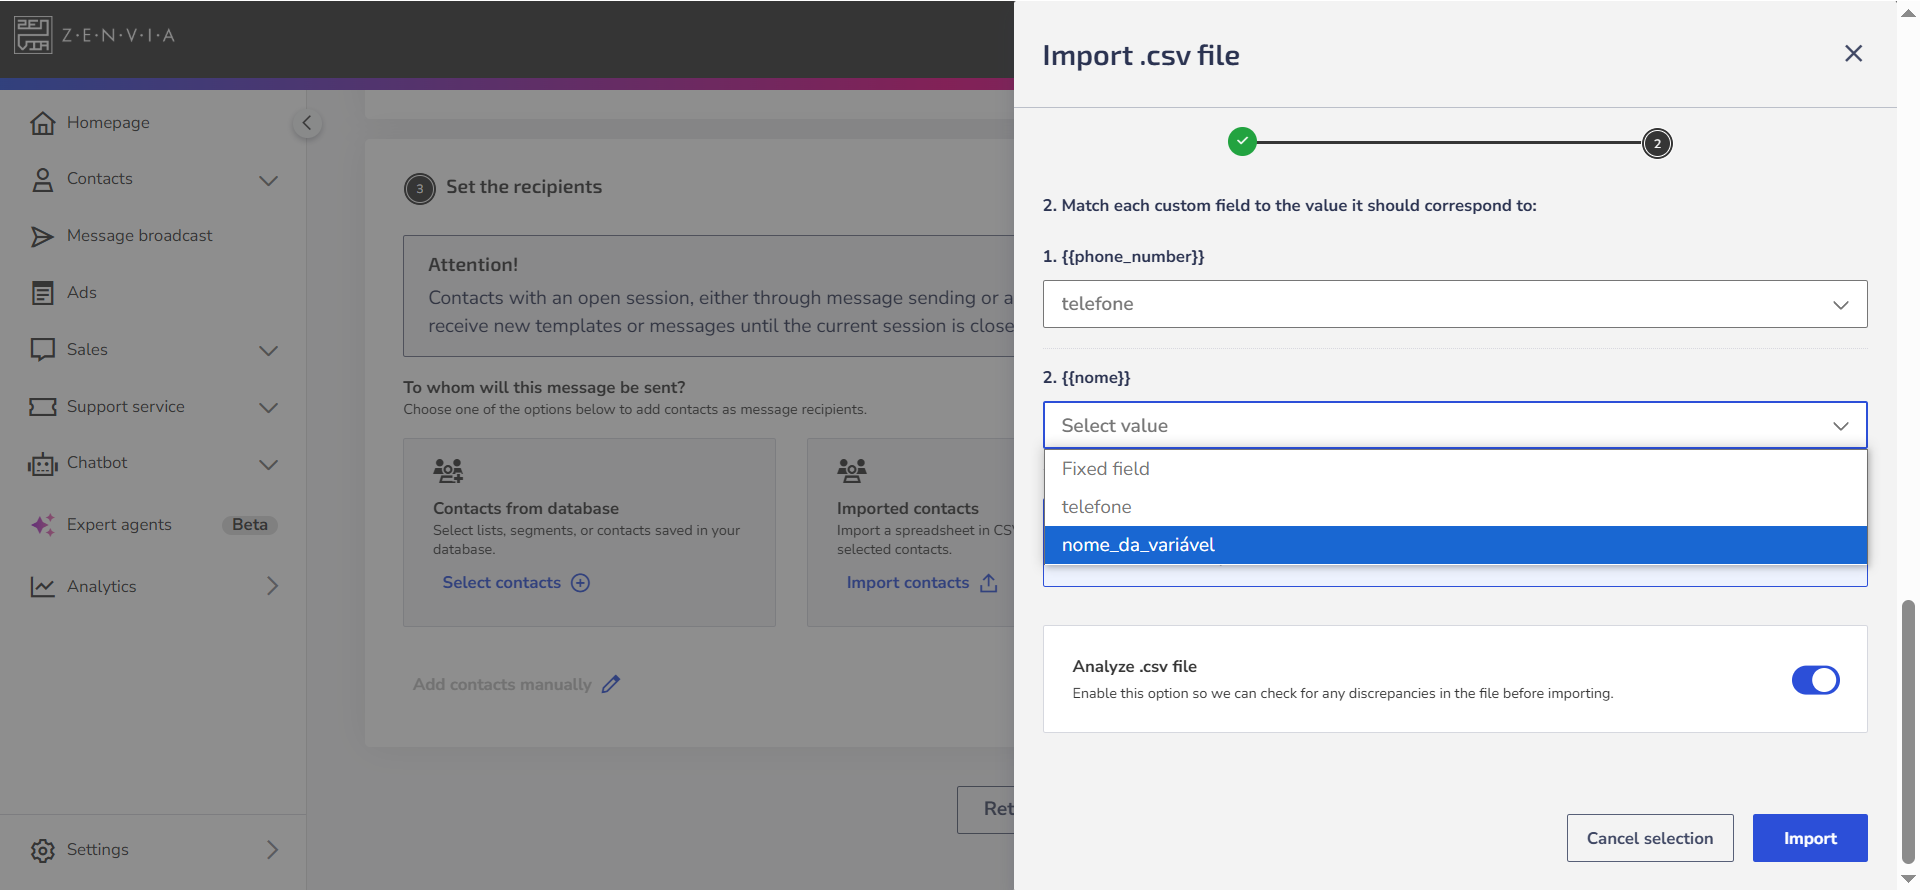
- Associate variable fields with their corresponding values, meaning indicate what each field in the imported spreadsheet represents;
- Enable the option Analyze .csv file to review your file and check if it is ready for use.
- When finished, click Continue sending.
Manually Adding Contacts
Enter numbers manually in the format Country Code + Area Code + 9-digit number, separated by a semicolon:
- Click Add manually
;
- Enter the phone numbers;
- Click Add contacts to complete the action;
Once the message content and recipients are set, click Continue to choose when the message will be sent.
Send or Schedule Sending
Select one of the sending options to complete the process:
- Send now for immediate delivery.
- Schedule sending to set a date and time.
- Best time to send to send messages when your contacts are most active.
💡 Tip: Split sending into batches, if necessary.
That's it! Now you know how to send WhatsApp messages on Zenvia Customer Cloud.