This article teaches you how to import contacts into lists by sending a file. This way, you send your entire contact base simply and quickly.
Accessing the feature
You can start the import in two ways:
1. In the left side menu, access Contacts > Contact database, click on Add contacts > Import from a file.
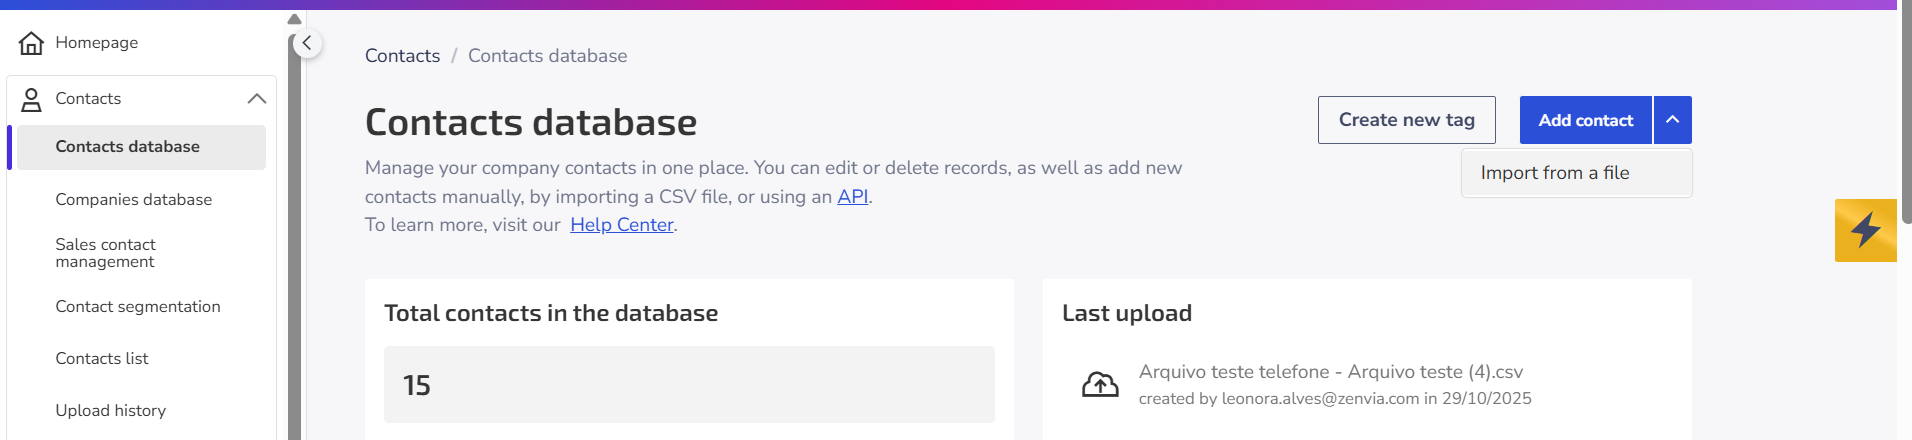
2. Or, in Contacts > Contact list, click on Add contacts > Import from a file.
Next, follow the detailed step-by-step for each stage.
Stage 1: Upload file
The system allows importing only one file at a time to ensure proper format processing and correct column reading.
If you do not yet have your CSV file ready, see the complete step-by-step in How to create CSV files for import in Zenvia Customer Cloud.
Before uploading, verify that the file was created correctly.
File specifications:
- Format: .csv
- The first column (column A) must contain phone numbers (for SMS, WhatsApp, and RCS) or email addresses (for emails).
- The first row must contain the header (variable names).
- Use comma (,) or semicolon (;) as a separator.
- Insert one contact per line.
- Phone in the format country code + area code + number (ex.:
5551999999999). - Maximum file size: 120 MB.
Ensure that the data is clean and free of spaces, hyphens, or special characters.
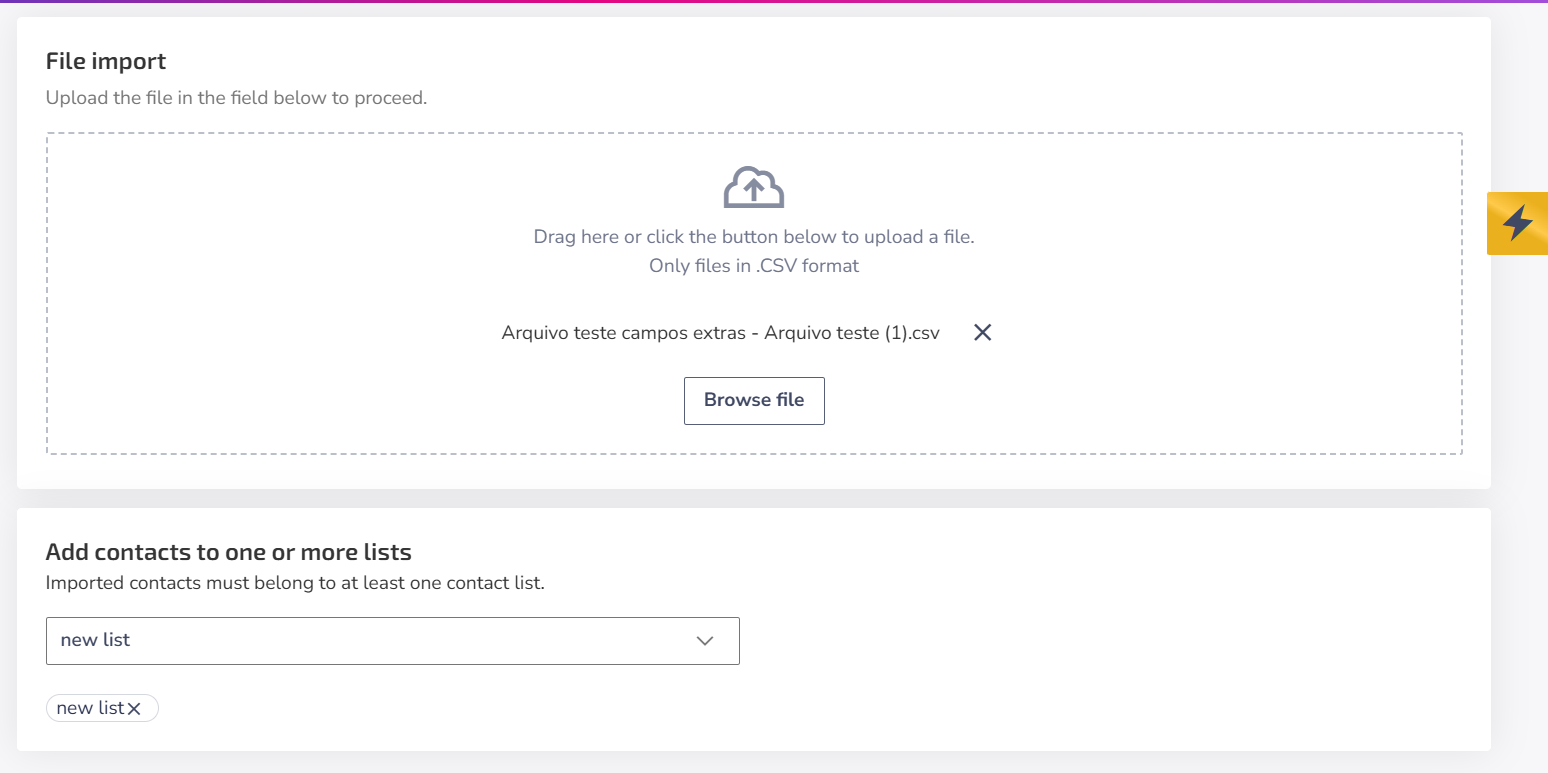
To upload:
1. Click on Browse file or drag it to the highlighted field.
2. It is optional to include the contacts in one or more lists. Just select them or create a new one - the chosen lists will appear as tags.
3. After that, click on Continue.
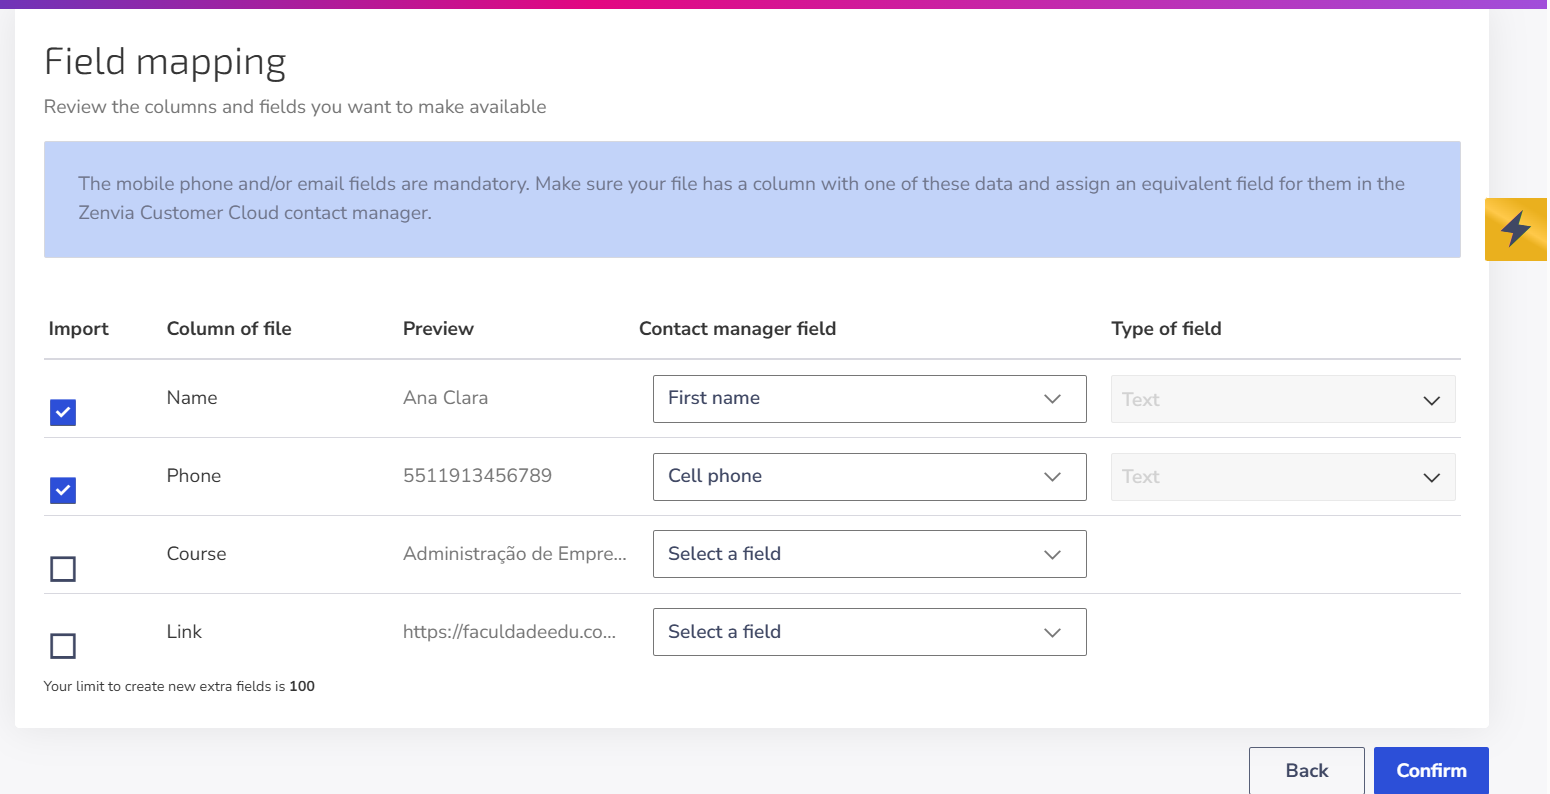
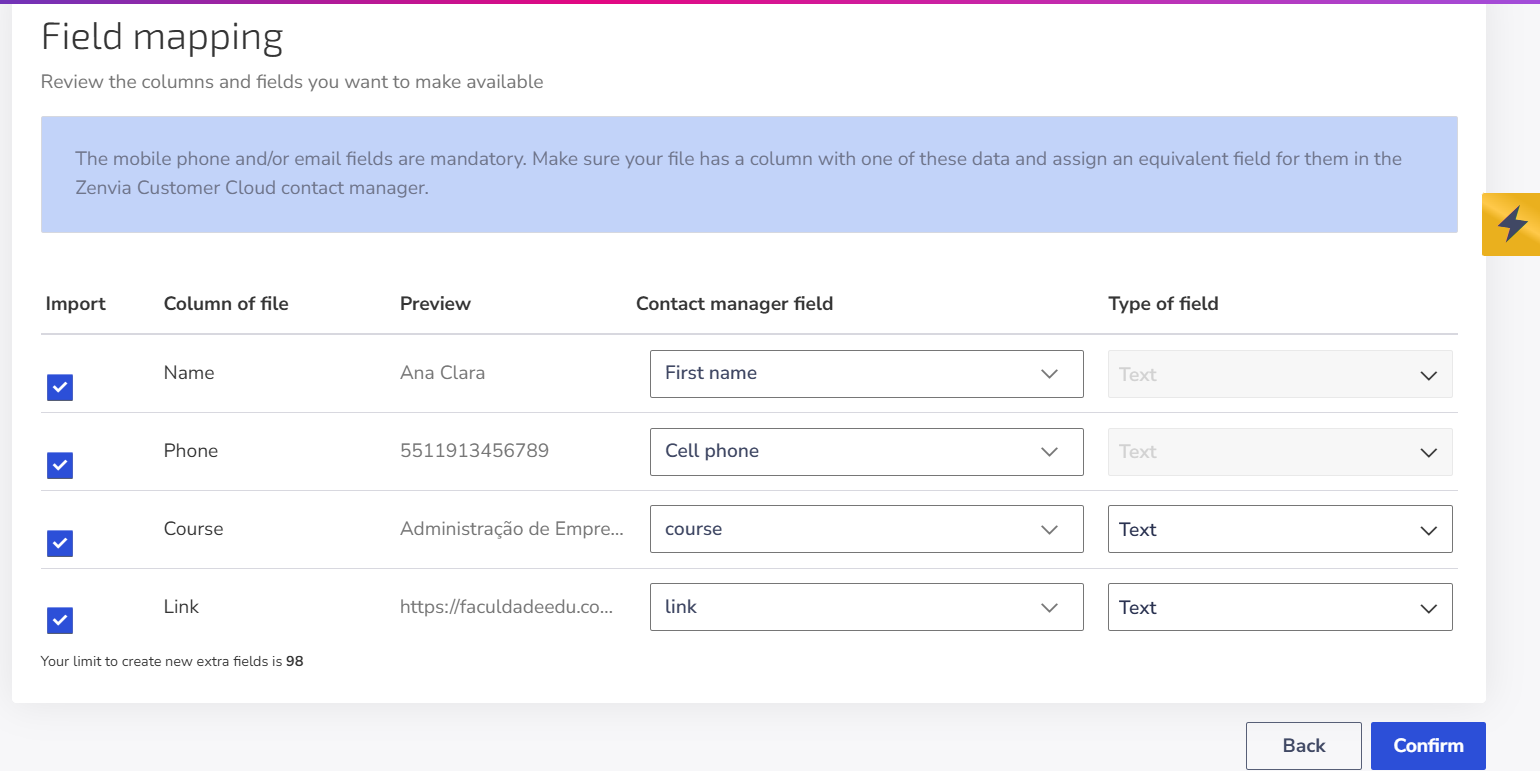
Stage 2: Field mapping
In this stage, the system displays a preview of your file columns.
In the Import column, you choose which fields will be used. If you uncheck a column, it will be ignored in the process.
In Contact manager field, you define what each column represents - for example, name, date, time, etc.
⚠️ Attention: It is mandatory to select the phone and/or email fields.
The standard behavior is to overwrite existing data, therefore, if a number already exists in the list, the system updates the data with the information from the new file.
Country codes for Latin American
Country | Country code |
Argentina | +54 - the number 9 must always be present between the country code and the area code. |
Bolivia | +591 |
Brazil | +55 |
Chile | +56 |
Colombia | +57 |
Costa Rica | +506 |
Cuba | +53 |
Ecuador | +593 |
El Salvador | +503 |
Guatemala | +502 |
Guyana | +592 |
French Guiana | +594 |
Haiti | +509 |
Honduras | +504 |
Mexico | +52 |
Nicaragua | +505 |
Panama | +507 |
Paraguay | +595 |
Peru | +51 |
Dominican Republic | +1 |
Uruguay | +598 |
Venezuela | +58 |
Extra fields
The creation of extra fields allows you to add personalized information to contacts during import, in addition to basic data (such as name, phone, or email).
These fields are useful for storing additional details that can be used in segmented campaigns or personalized messages - for example, area of interest, city, study shift, or registration link.
Practical example (educational sector)
Imagine your institution is running a campaign for those interested in different courses. You can import a file with the following columns:
| Name | Phone | Course_interest | Registration_link |
|---|---|---|---|
| Ana Clara | 55991234567 | Business Administration | https://faculdadeedu.com/administracao |
| Bruno Lima | 55997891234 | Digital Marketing | https://faculdadeedu.com/marketing-digital |
In that case, course and link are extra fields.
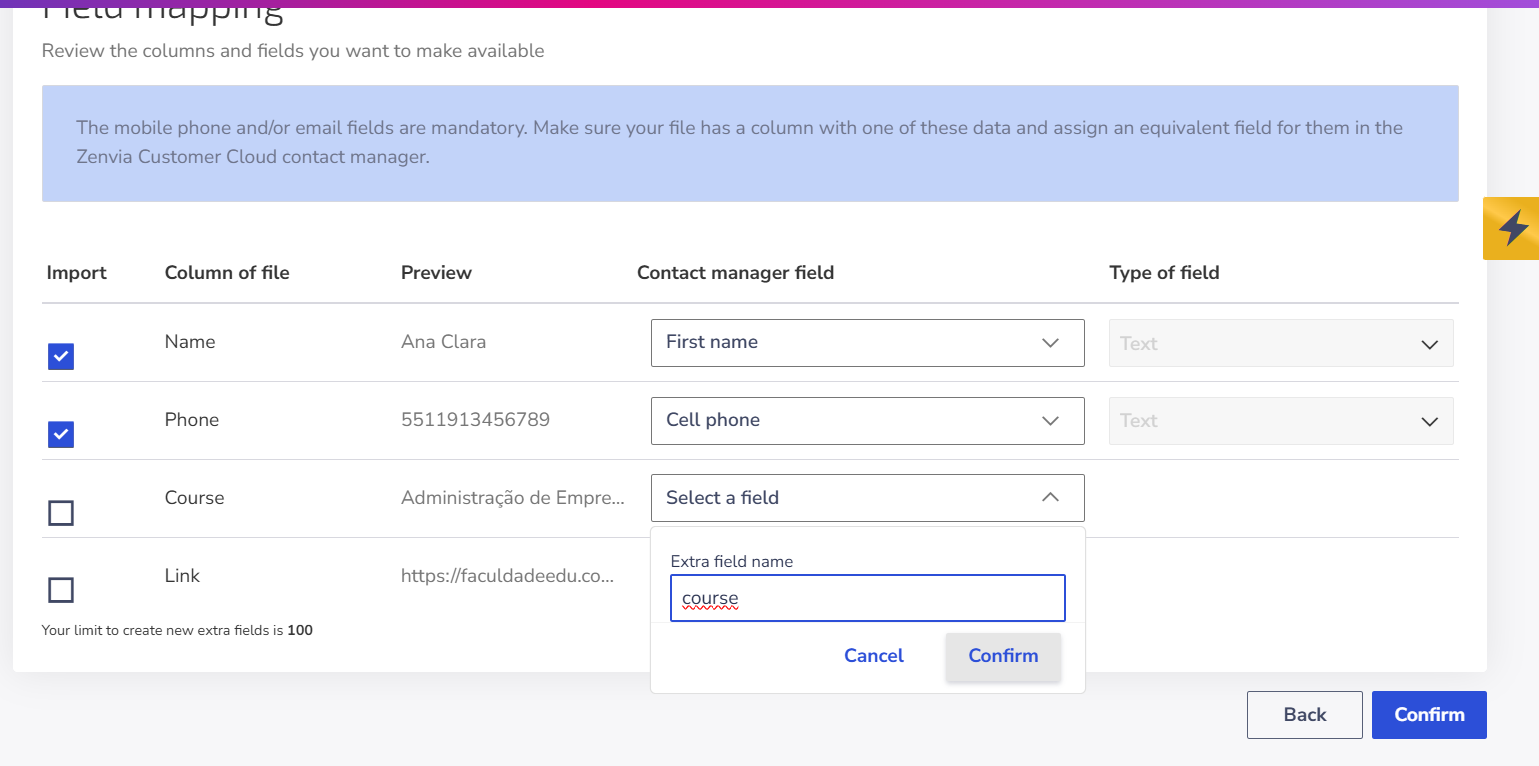
During import, just create these fields and define the data type:
- course → Text type (will store the name of the course of interest).
- link → Text type (will store the individual registration link).
Thus, when sending a personalized message, you can use variables like:
“Hello {{name}}! We saw that you showed interest in {{course}}. Guarantee your spot by accessing {{link}}.”
⚠️ Attention:
|
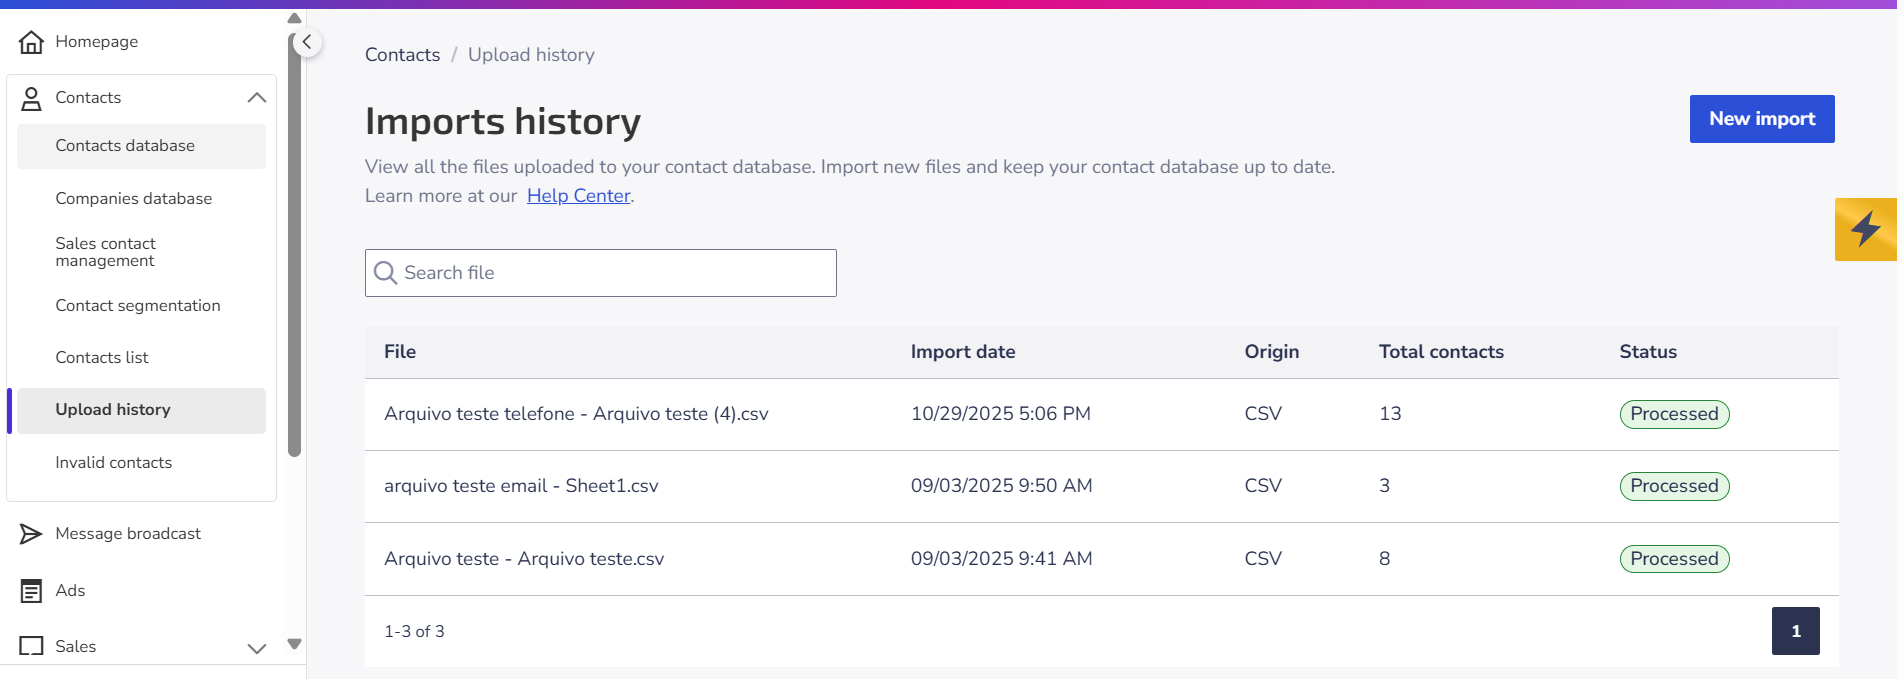
Stage 3: Confirmation and import history
After confirming, the system automatically processes the file. Click on Go to Imports to track the status.
In Upload history, it is possible to view the information of the imported files and the status of each one:
- Processed: The import was successfully completed and the contacts are already available in the selected lists.
- Processing: The import is still underway - this status is common for large files. Wait for the processing to finish before starting a new import.
- Error: A failure occurred during file processing. In this case, try performing a new import after a few minutes.
Need help with Zenvia Customer Cloud?
If you follow the instructions in this article and still have difficulties or questions related to Zenvia Customer Cloud, please contact our Support team directly. Check the step-by-step guide in the article: How to contact Zenvia Technical Support.