WhatsApp message templates allow you to send personalized messages to your customers, automating processes and optimizing communication. For example, you can create a template for a welcome campaign that is automatically sent whenever a new customer registers.
Message templates go through an approval process by Meta, which is responsible for evaluating the content. In this article, we’ll show you how to create new templates, edit existing ones, and ensure everything works correctly.
Prerequisites
Before you begin, make sure that the WhatsApp channel is integrated into your Zenvia Customer Cloud account.
To get started, go to Settings > Message Templates > WhatsApp.
Manage existing templates
1. Use the template list
The list displays all registered templates in a table format. Each row represents a template and shows the following information:
- Template ID: Unique code used in integrations and automations.
- Name: Template name for easy identification.
- Status: Indicates whether the template is approved, rejected, pending, or paused.
- Quality rating: Evaluation provided by Meta based on performance (high, medium, or low).
- Last update: Date of the last modification made to the template.
- Category: Template type (marketing, utility, or authentication).
How to interact with the list:
- Apply filters at the top of the table to quickly find templates by name, status, phone number, or category.
- View full content by clicking the template name.
- Copy the template ID by clicking the copy icon
in the Actions column — this ID will be needed for automated flows or API calls.
- Manage the template by accessing other options available in the three-dot menu
:
- Edit: Modify the template content.
- Copy JSON: Copy the structure of the template in JSON format.
- Delete: Remove the template from your account.
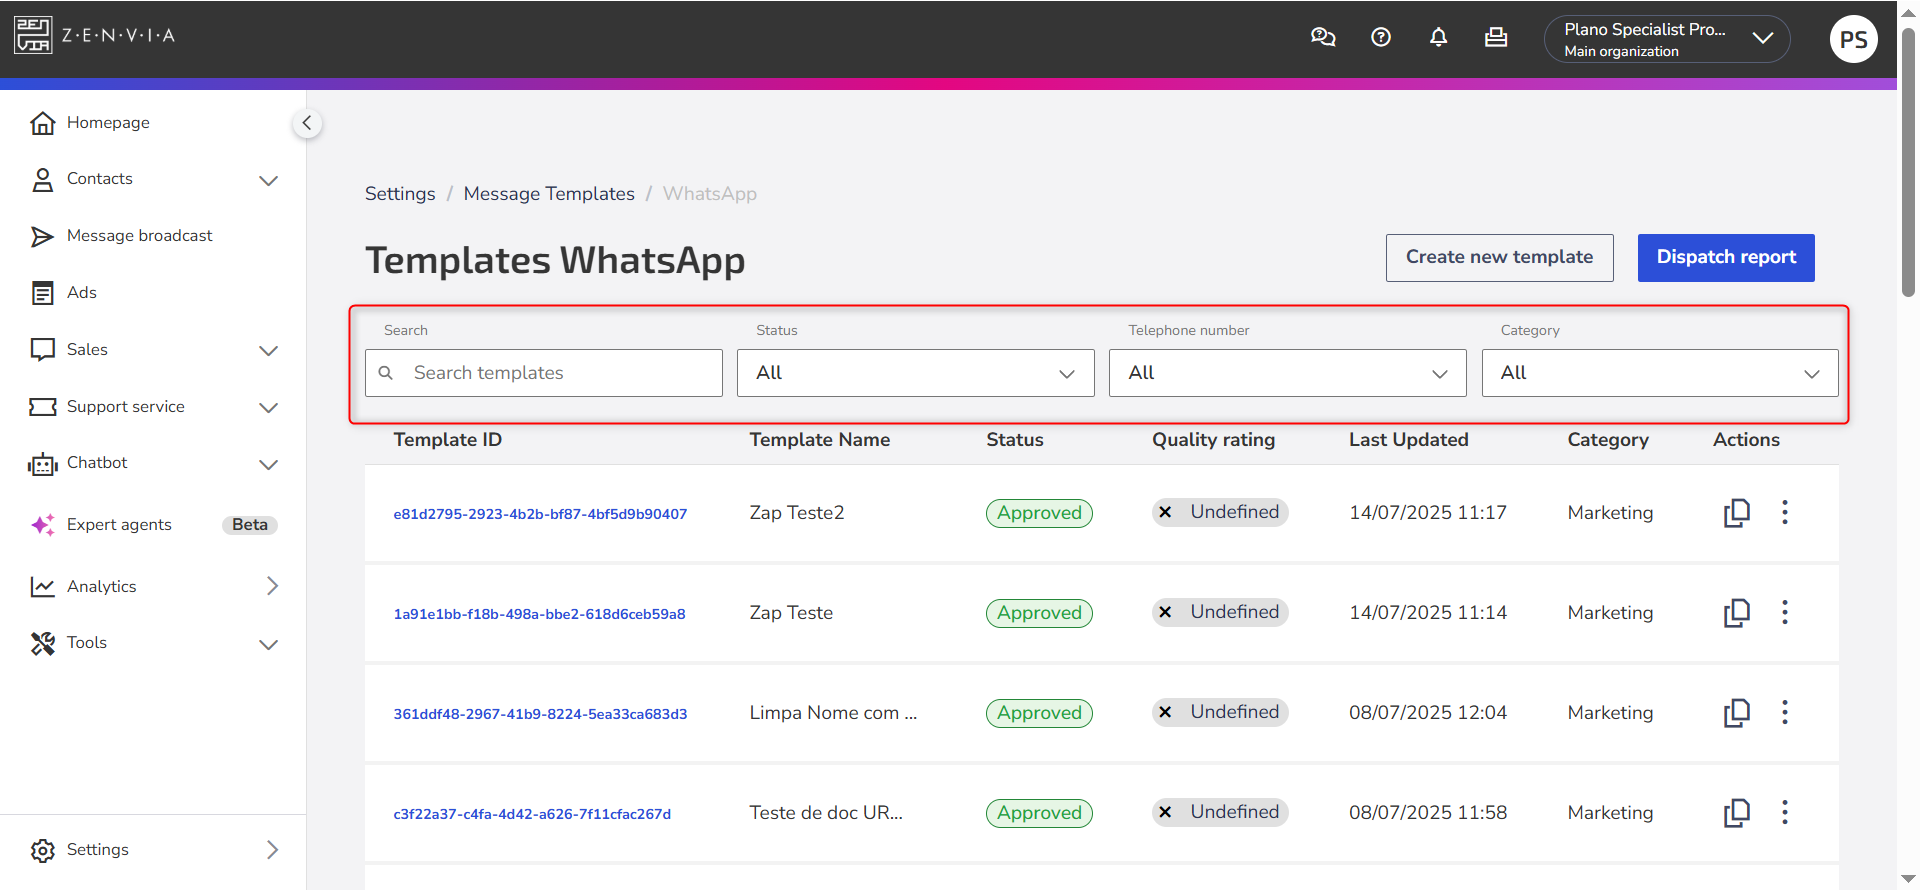
2. Generate a dispatch report
In the upper right corner of the screen, click Dispatch report to generate a report with the messages sent. You can select the current month or another desired month.
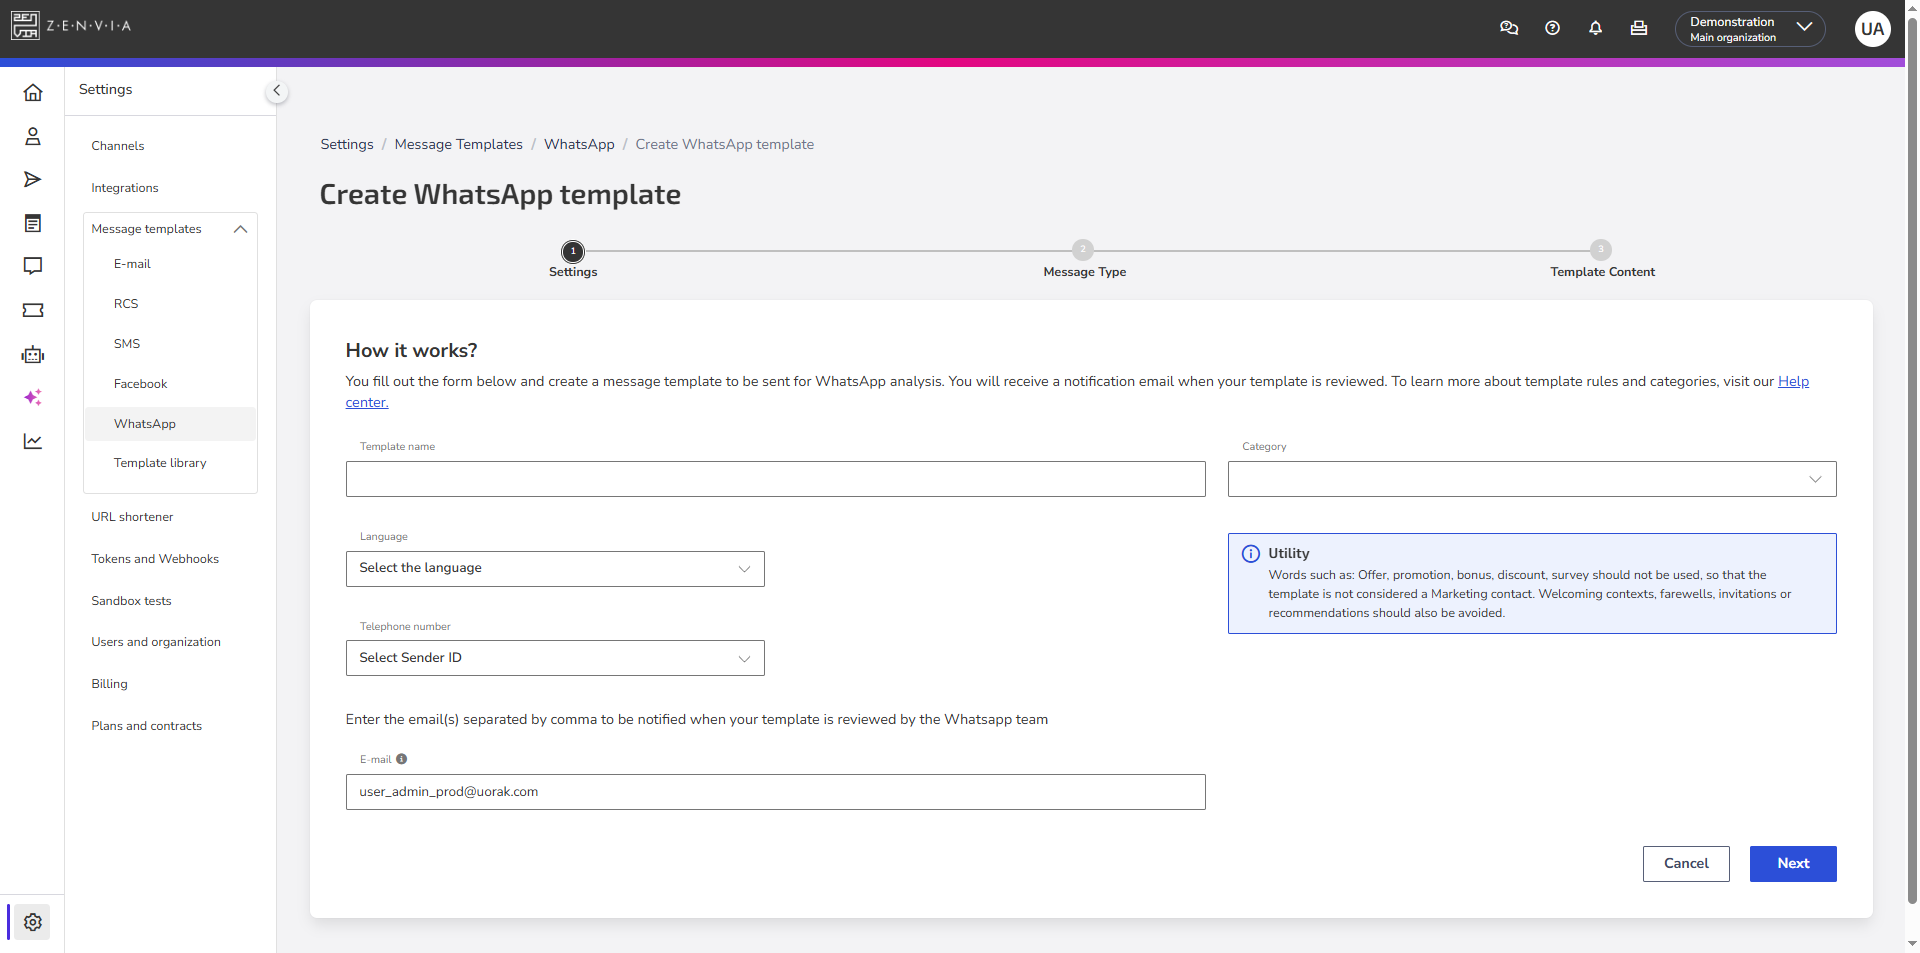
Create a new WhatsApp template
1. Settings
At this stage, fill in the following fields:
- Template name: Use a clear and identifiable name, such as
welcome,payment_update,delivery_status. Avoid special characters and numbers. - Language: Select the appropriate language for the message content. WhatsApp does not automatically translate texts — they must be written in the correct language from the start.
- Phone number: Choose the WhatsApp number that will be linked to the template. It will appear to the recipient.
- Email: Enter an email address to receive approval status notifications.
- Category: Choose between Authentication, Utility, or Marketing, depending on the message type (details below).
About message categories
The category informs Meta about your template’s purpose. It must reflect the actual content of the message — otherwise, the template may be rejected.
| Category | Description | Examples |
|---|---|---|
| Authentication | For messages with unique verification codes. Used for login, security, or account recovery. | - Your verification code is “123456”. - For your security, do not share this code. |
| Utility | For status updates, confirmations, reminders, transactions, or notifications. | - Your order has been shipped. - Appointment scheduled for Wednesday at 4 PM. - Your balance is low. |
| Marketing | For promotions, welcome messages, offers, invites, and promotional actions. | - Use the code SAVE10 and get 10% off. - Our store has moved to a new location. |
Meta evaluates your template’s category during the approval process. If you select “Utility” but Meta determines that the template is “Marketing,” it will be approved as “Marketing.” If you disagree with this change, you can request a review directly with Meta Support within 60 days of the update.
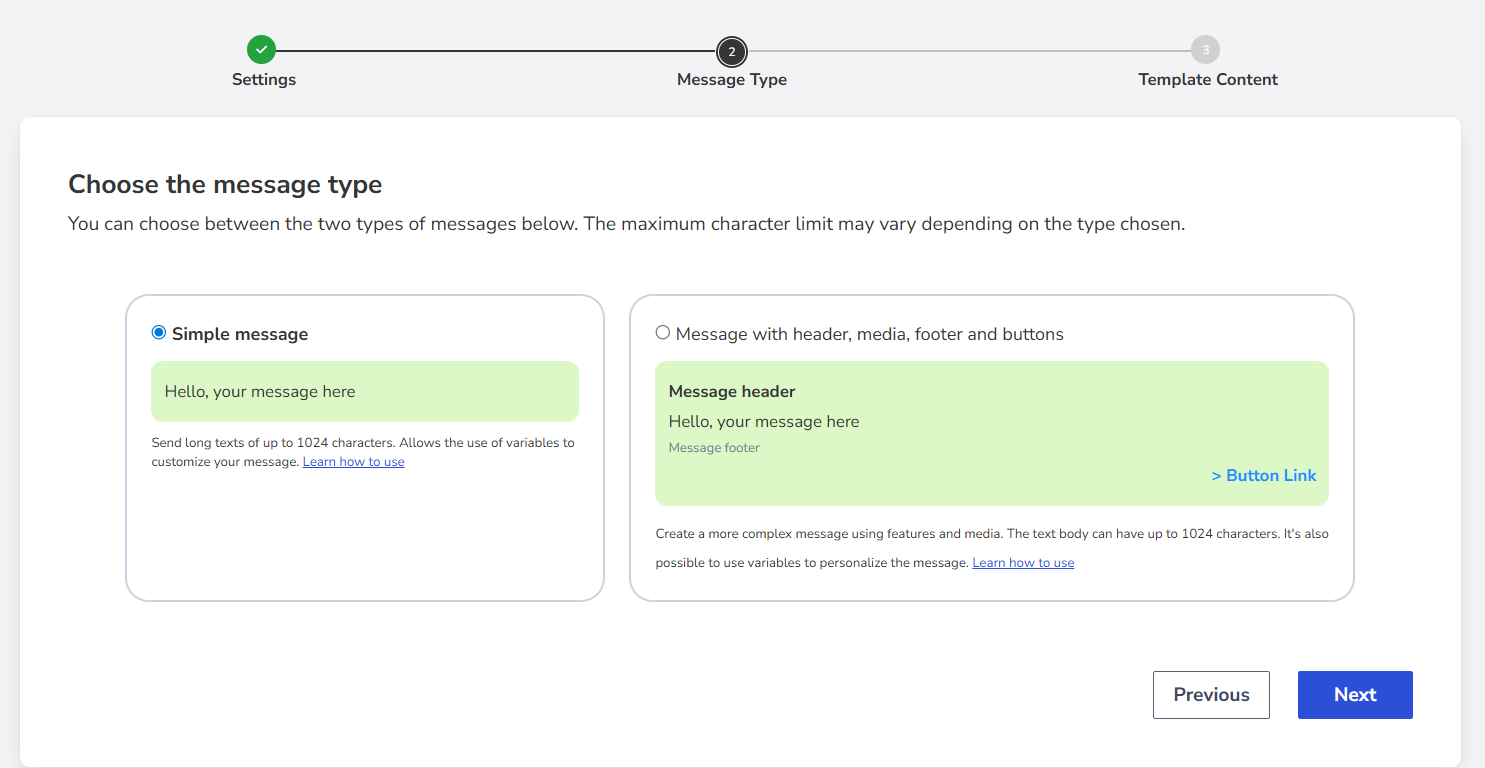
2. Message Type
In this step, choose the desired message type. This is an important point, as you must choose one of the two types:
- Simple message: The simple message can include variables and has a 1024-character limit.
- Message with header, media, footer, and buttons: Includes additional visual and interactive elements. The message body can contain up to 1,024 characters when no header or buttons are included, or up to 160 characters if these elements are present. Only 160 characters are allowed in the template body.
After choosing the message type, click Next.
3. Template Content
a. Simple message (body only)
You can:
- Insert only the message body.
- Include variables for personalization.
b. Message with Header, Footer, Media and Buttons
Use the following components:
| Component | Details |
|---|---|
| Header | Can be text, image, video, or document. Media is sent with the message. |
| Body | Main text (up to 1024 characters, or 160 if buttons/header are included). |
| Footer | Optional. Used for signatures and reminders. Does not support variables. |
| Buttons | Interactive. Can be either Call to Action or Quick Reply. ⚠️ The combination of buttons in a message template follows Meta’s specific rules. See allowed combinations and examples at Using buttons in WhatsApp message templates. |
Use of variables
Variables are personalized fields replaced at the time of sending (e.g., customer's name, delivery time, etc.).
Format for the Message Sending module (via Zenvia platform):
Hello, {{name}}. We received your message at {{hours}}.
Format for the Commercial Support module:
| Format | Description |
|---|---|
| {1} or {body_1} | Contact's name |
| {2} or {body_2} | Agent's name |
| {3} or {body_3} | Group name |
| {} | Generic variable |
Hello {1}. I am agent {2} from company {3}. We received your message at {}.
It is mandatory to provide examples for variables in Marketing category templates.
Template finalization
After setting up the template:
- Click Finish.
- The template will be submitted for WhatsApp review (it can take just 2 minutes).
- You will receive updates by email via Zenvia.
Common registration errors
| Error | Solution |
|---|---|
| “We couldn’t save your template” | Check if the name is unique and not duplicated. |
| Variables with invalid characters | Avoid: $, commas, spaces, hyphens, cedillas, %, etc. |