The Knowledge Base allows you to create, organize, and provide articles, guides, tutorials, and frequently asked questions to assist both the internal team and your customers.
It functions as a digital library, making quick access to solutions easier and promoting self-service, which increases efficiency in customer support.
⚠️Attention: Functionality available only for Operator and Admin profiles.
How it works
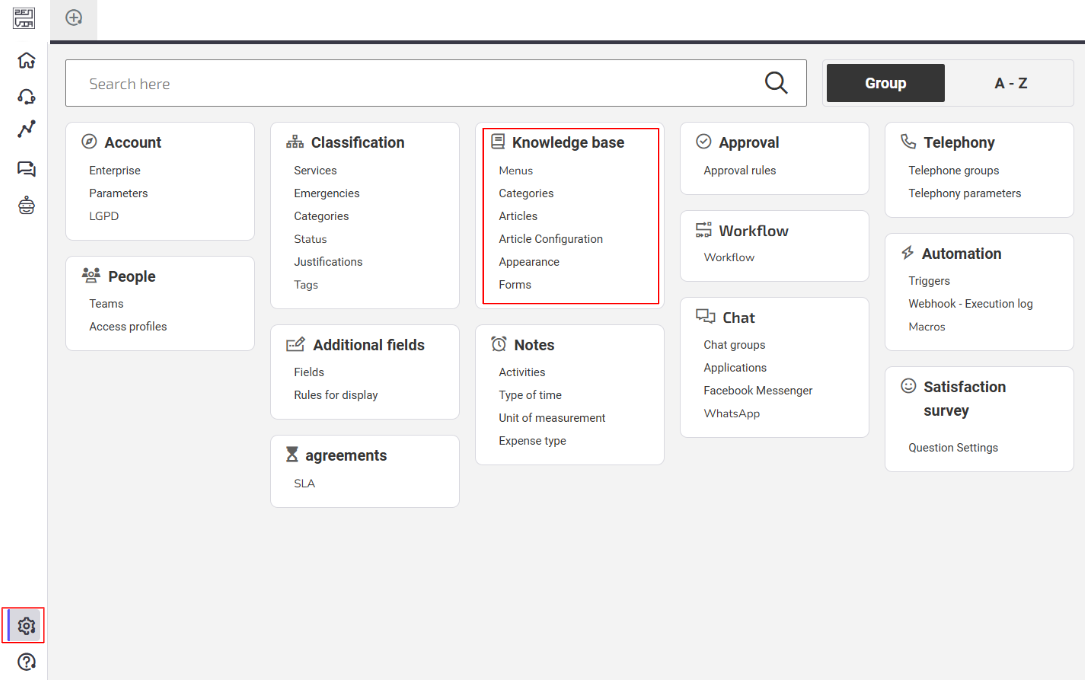
To set up and manage the Knowledge Base in your Zenvia Customer Cloud account, go to Support > Settings > Knowledge Base:
In Menus, you create and organize content hierarchically, allowing for more intuitive and easier navigation for users.
How to configure the Menus
To access this functionality, go to Support > Settings > Menus.
Create a Menu
1. Click on New;
2. Enter a name that defines the desired menu type;
3. In Fields, choose the type of content;
- Article: select the article;
- Category: add category, order, and sorting;
- Subtitle: write the subtitle;
- External link: enter the address, title, and whether it will open in a new tab;
- Line separator.
4. Save the information.
Done! The Menu has been created successfully.
Categories classify and group articles with related topics, making navigation and searching for specific information easier.
How to configure Categories
To access this functionality, go to Support > Settings > Categories.
Create a Category
1. Click on New;
2. Enter a name for your category, such as Frequently Asked Questions;
3. The Friendly URL will be automatically filled, but can be edited if needed;
⚠️Attention: The URL must be in lowercase and separated by hyphens (-).
4. In Description, add additional details about the category;
5. Save the information.
Done! The category has been successfully created.
In Articles, you can create and edit content that helps resolve problems or clarify user doubts.
How to use Articles
To access this functionality, go to Support > Settings > Articles.
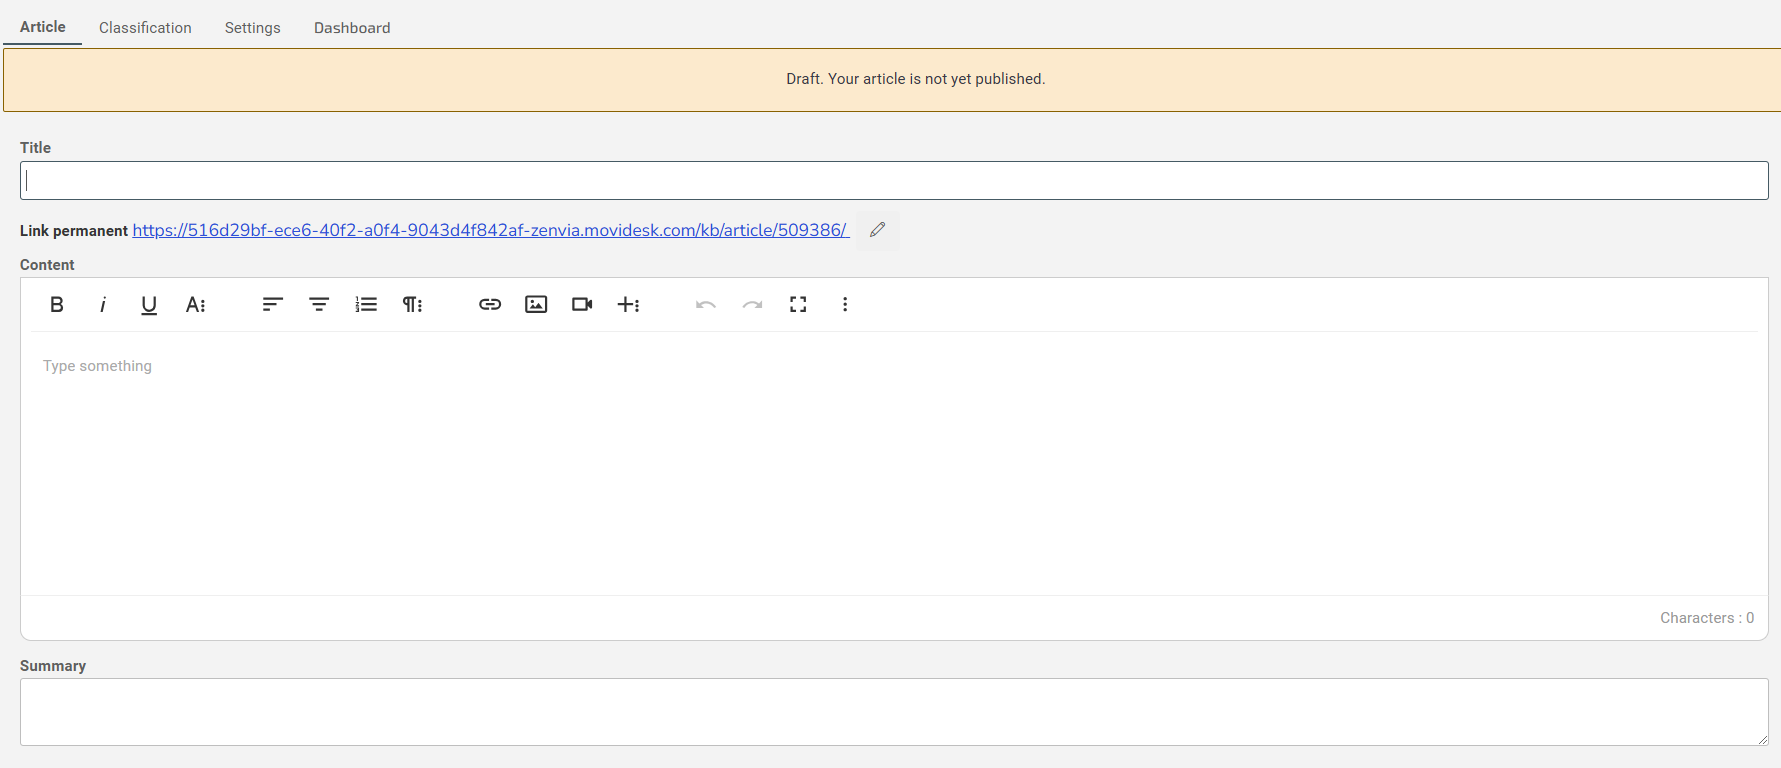
Create a new Article
1. Click on New;
2. Enter a title for your article;
3. The Permanent Link is generated automatically, but you can edit it by clicking on the pencil icon;
⚠️Attention: The link must be in lowercase and separated by hyphens (-).
4. In Content, write your article and use the text editor to format it;
💡Tip: Add links, images, GIFs, and videos to enrich the content.
5. The Summary is optional, but it can be useful to display a brief description of the article.
6. In the Classification tab, fill in the information about Menu, Categories, Tags, and Related Articles;
7. In Settings, set the permissions and whether the article can receive ratings;
8. Click on Publish.
The article has been successfully published!
💡Tip: In Dashboard, you can view engagement and other metrics for your published articles.
The Article Settings allow you to adjust aspects such as:
- SEO: Configure whether search engines can index public articles.
- Article Rating: Allow or disallow feedback from customers about the usefulness of the articles.
- Article Rating Model: Choose the format that will appear for the customer's rating.
- Article Rating Message: Select the initial message for your rating.
- Structured Article Feedback: Enable this option to get specific feedback on the articles.
- Feedback Fields: Define the response options for the feedback.
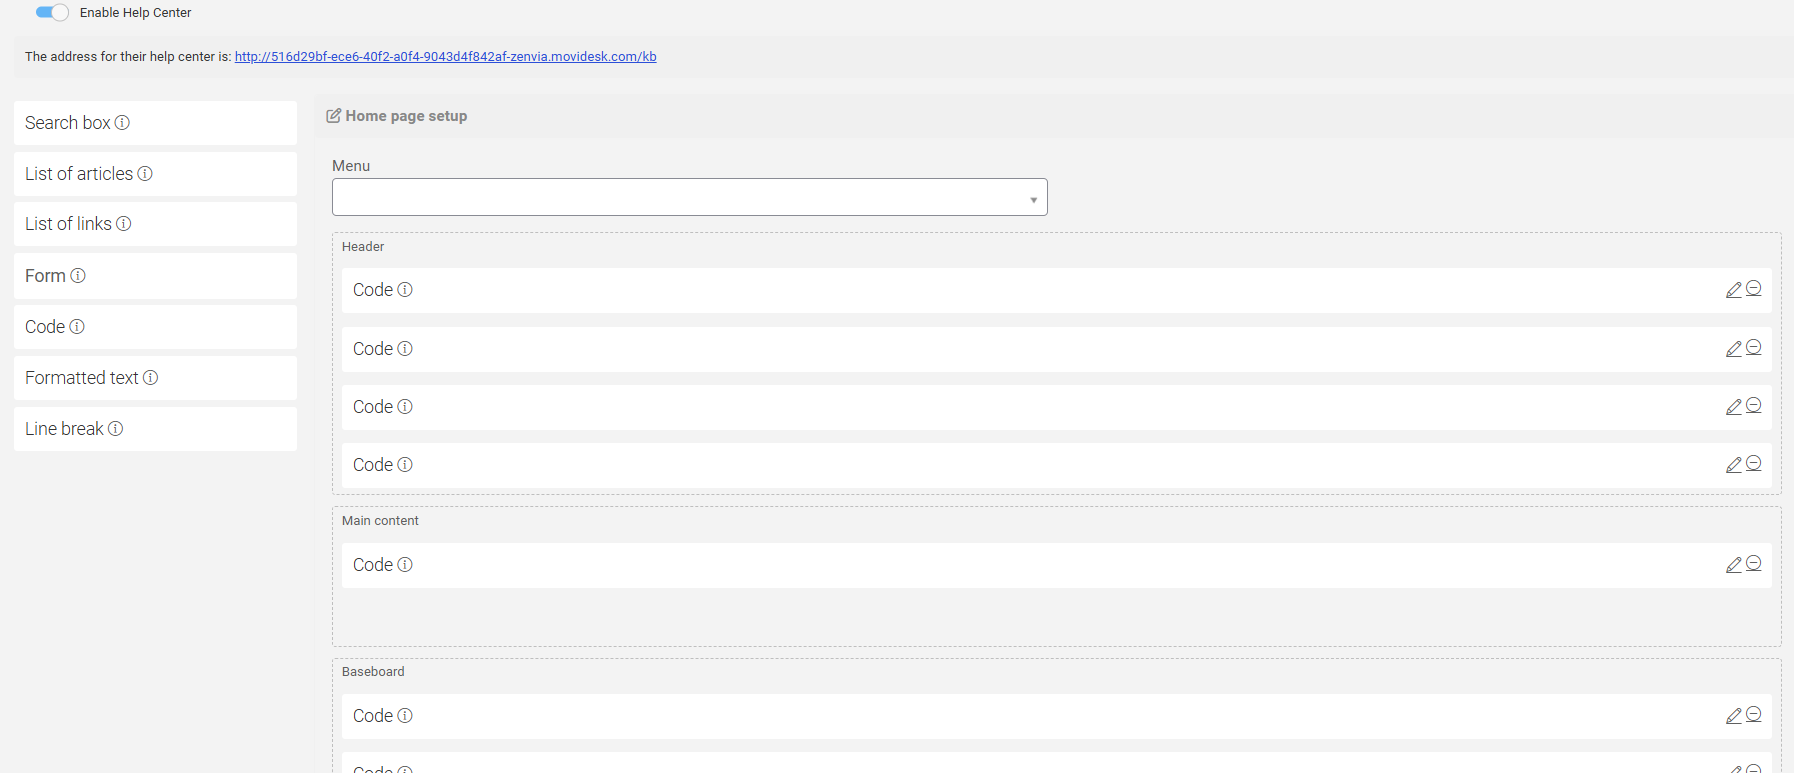
In Appearance, you can customize the homepage of your help center, adapting the design to align with your brand's identity.
To edit, click the pencil icon in the top-right corner. You can customize the header, main content, and footer with:
- Search box;
- Article list;
- Link list;
- Form;
- Code;
- Formatted text;
- Line break.
Forms are structured documents used to capture suggestions, feedback, questions, or other information. They can be customized to suit the company's needs.
How to Configure Forms
To access the functionality, go to Support > Settings > Forms.
Create New Form
1. Click the New button;
2. Enter the Name of the form;
3. Under Fields, select the fields the form should contain:
- Name;
- Email;
- Description;
- Article suggestion.
4. Define which fields will be required;
5. Save the information.
Done! Form successfully created!


