In this article, learn how to configure the integration between WBuy and Zenvia Customer Cloud.
💡 Tip: To better understand what WBuy is and how it works with Zenvia Customer Cloud, access the article Overview of WBuy. To see practical examples of how the integration is used, see the article WBuy Use Cases.
Step 1: Generate the API token in WBuy
Follow the steps below to generate an authentication key (token) that will be used to connect WBuy to Zenvia Customer Cloud:
1. Access your WBuy account (account with administrator permissions).
2. Find the API option. To do this, go to the side menu Platform > API and Webhooks > REST API Integration (Plataforma > API e webhooks > Integração REST API).
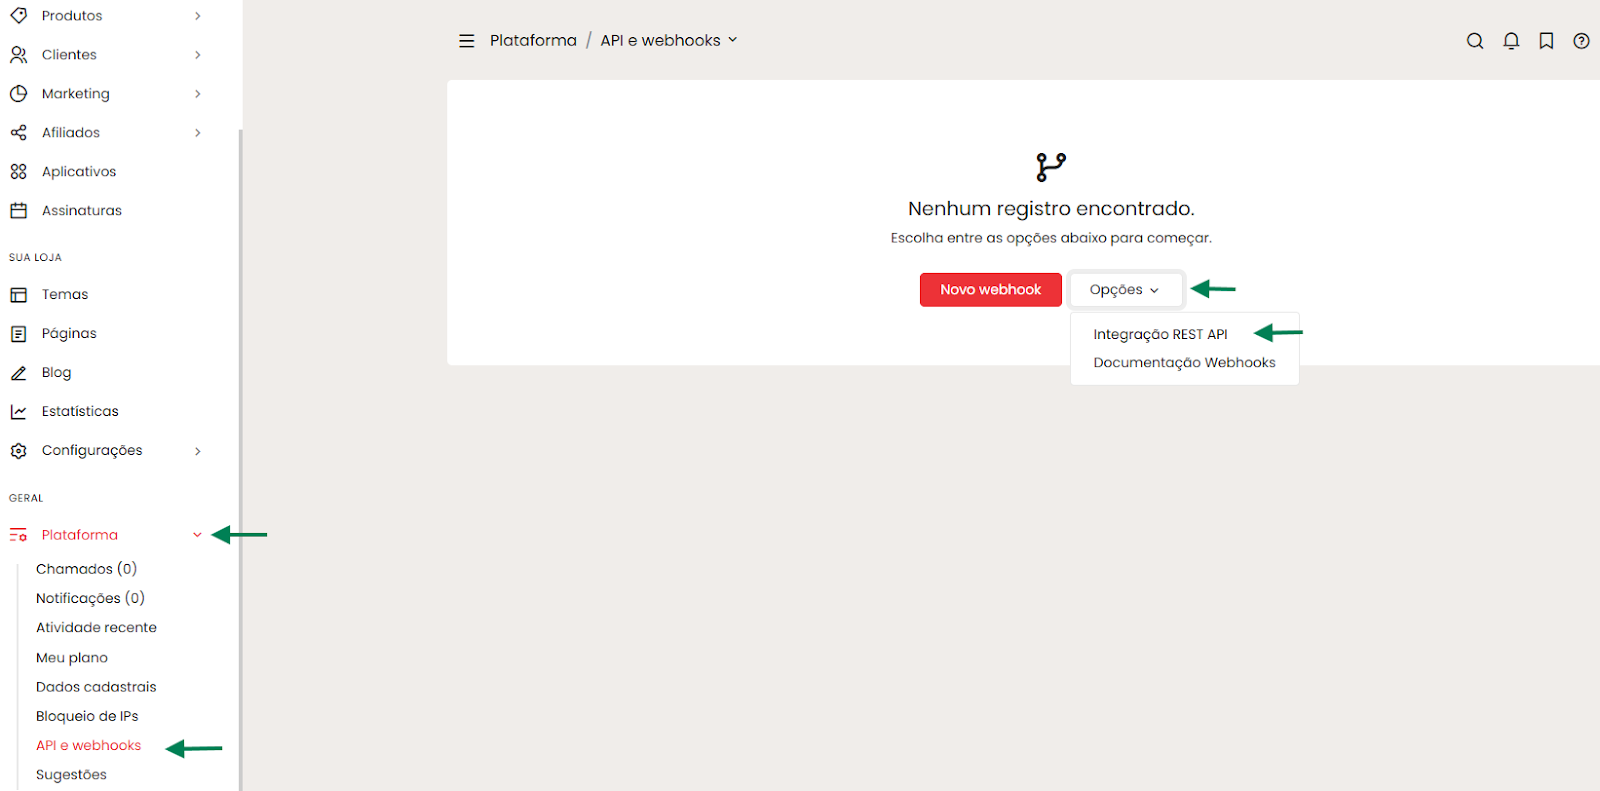
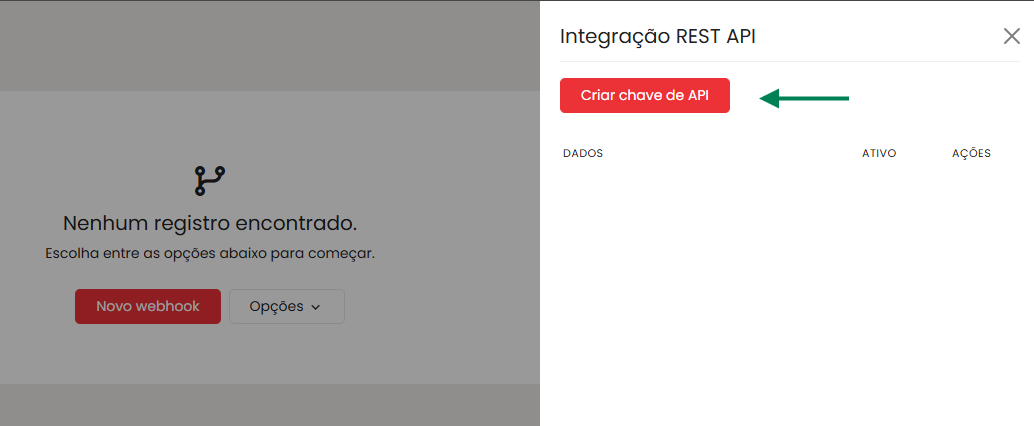
3. Click Create API key (Criar chave de API).
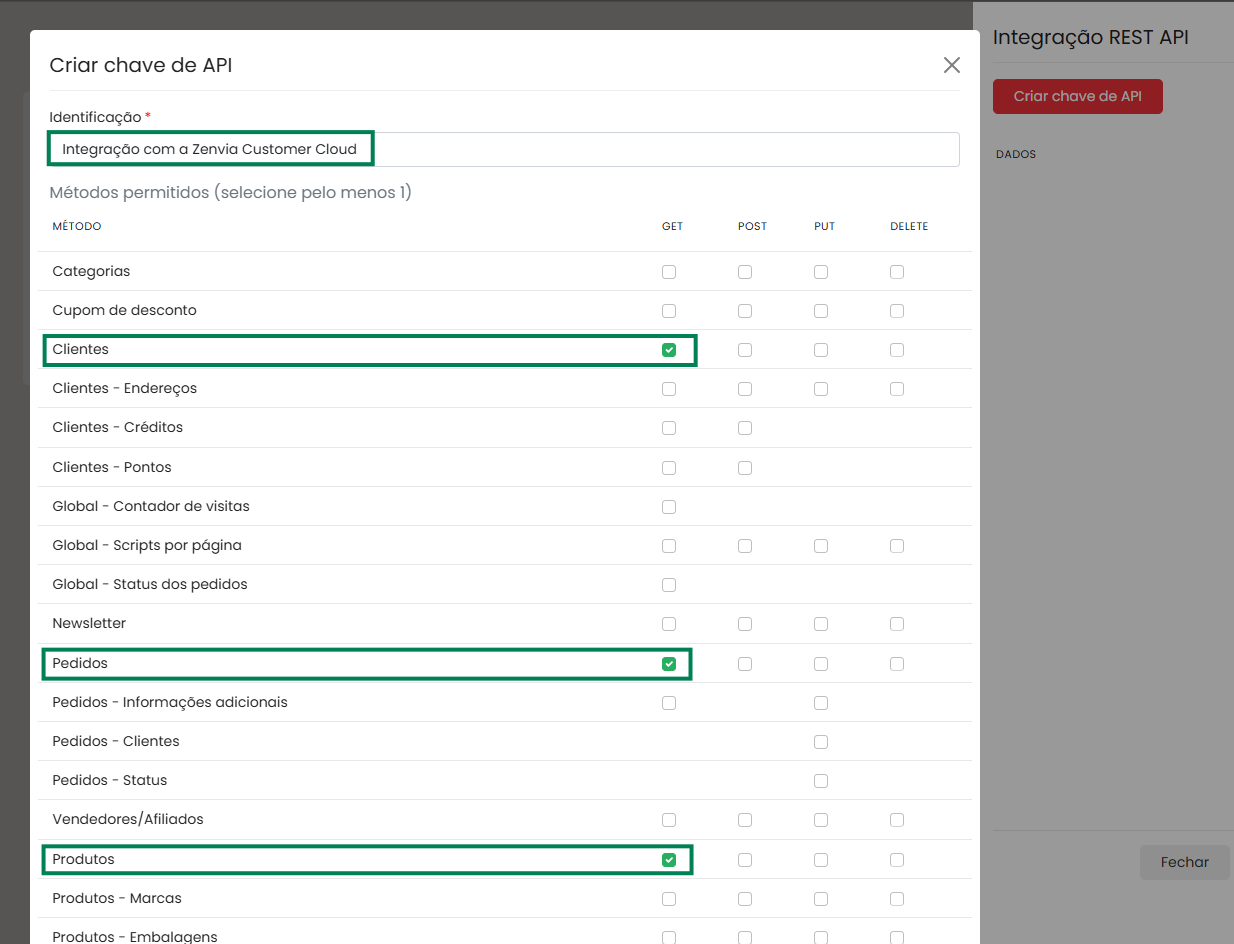
4. Enter a name to identify the key (e.g., "Integration with Zenvia Customer Cloud").
5. Set the necessary access permissions. Enable the GET method for the following data:
- Customers
- Orders
- Products
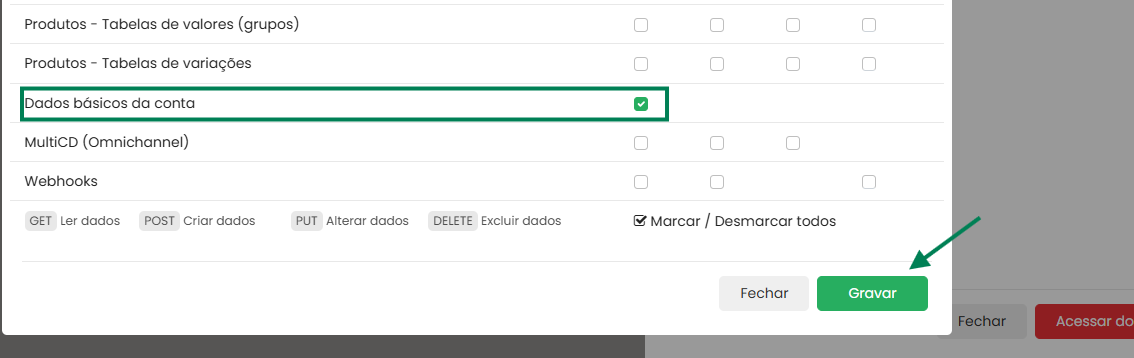
- Basic account information. This permission is only used to validate the access key provided.
⚠️ Attention: Even if you already have other API keys, we recommend creating a new key exclusively for the integration with Zenvia Customer Cloud. Changing or removing permissions from an existing key may affect the integration.
6. After filling in the details, click Record (Gravar) to store the new key.
7. Then click View (Visualizar) to access the key details.
⚠️ Attention: Keep the key active! Make sure the key status is set to “ACTIVE: YES” (ATIVO: SIM). An inactive key will prevent synchronization between platforms.
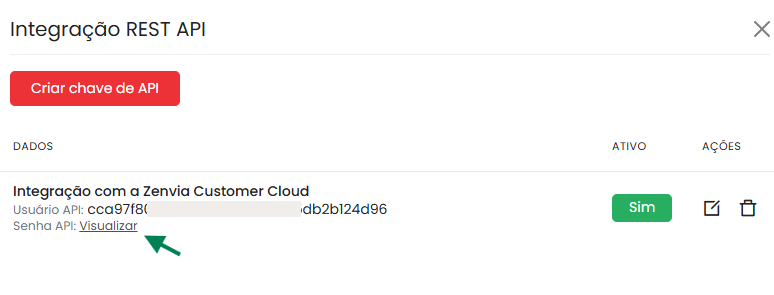
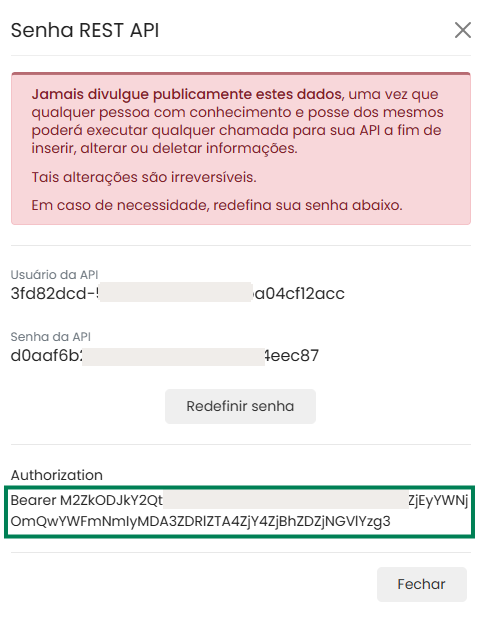
8. Copy the value from the "Authorization" field. This is the token you will paste into Zenvia Customer Cloud to authenticate the integration.
- Use only the data from the Authorization field. It is not necessary to use the "API User" and "API Password" fields, as "Authorization" already contains the encoded information.
Step 2: Set up the integration in Zenvia Customer Cloud
1. Log in to Zenvia Customer Cloud.
2. In the side menu, click on Integrations.
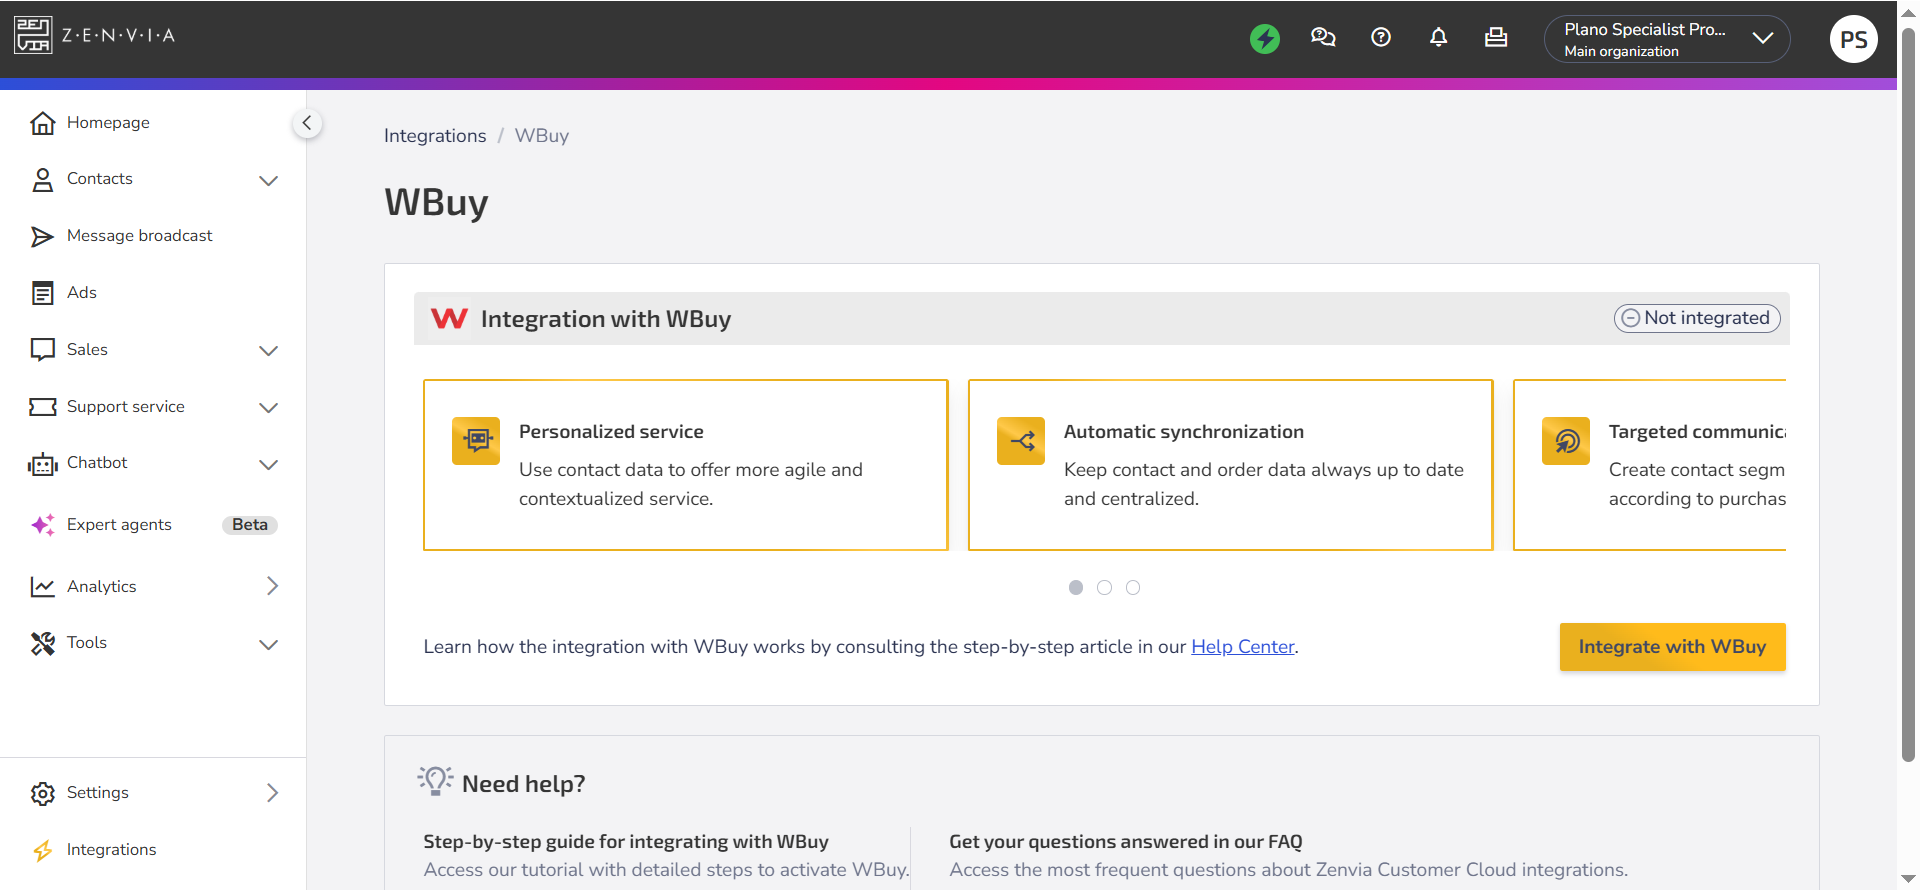
3. Search for WBuy and click on Integrate.
4. Click on Integrate with WBuy.
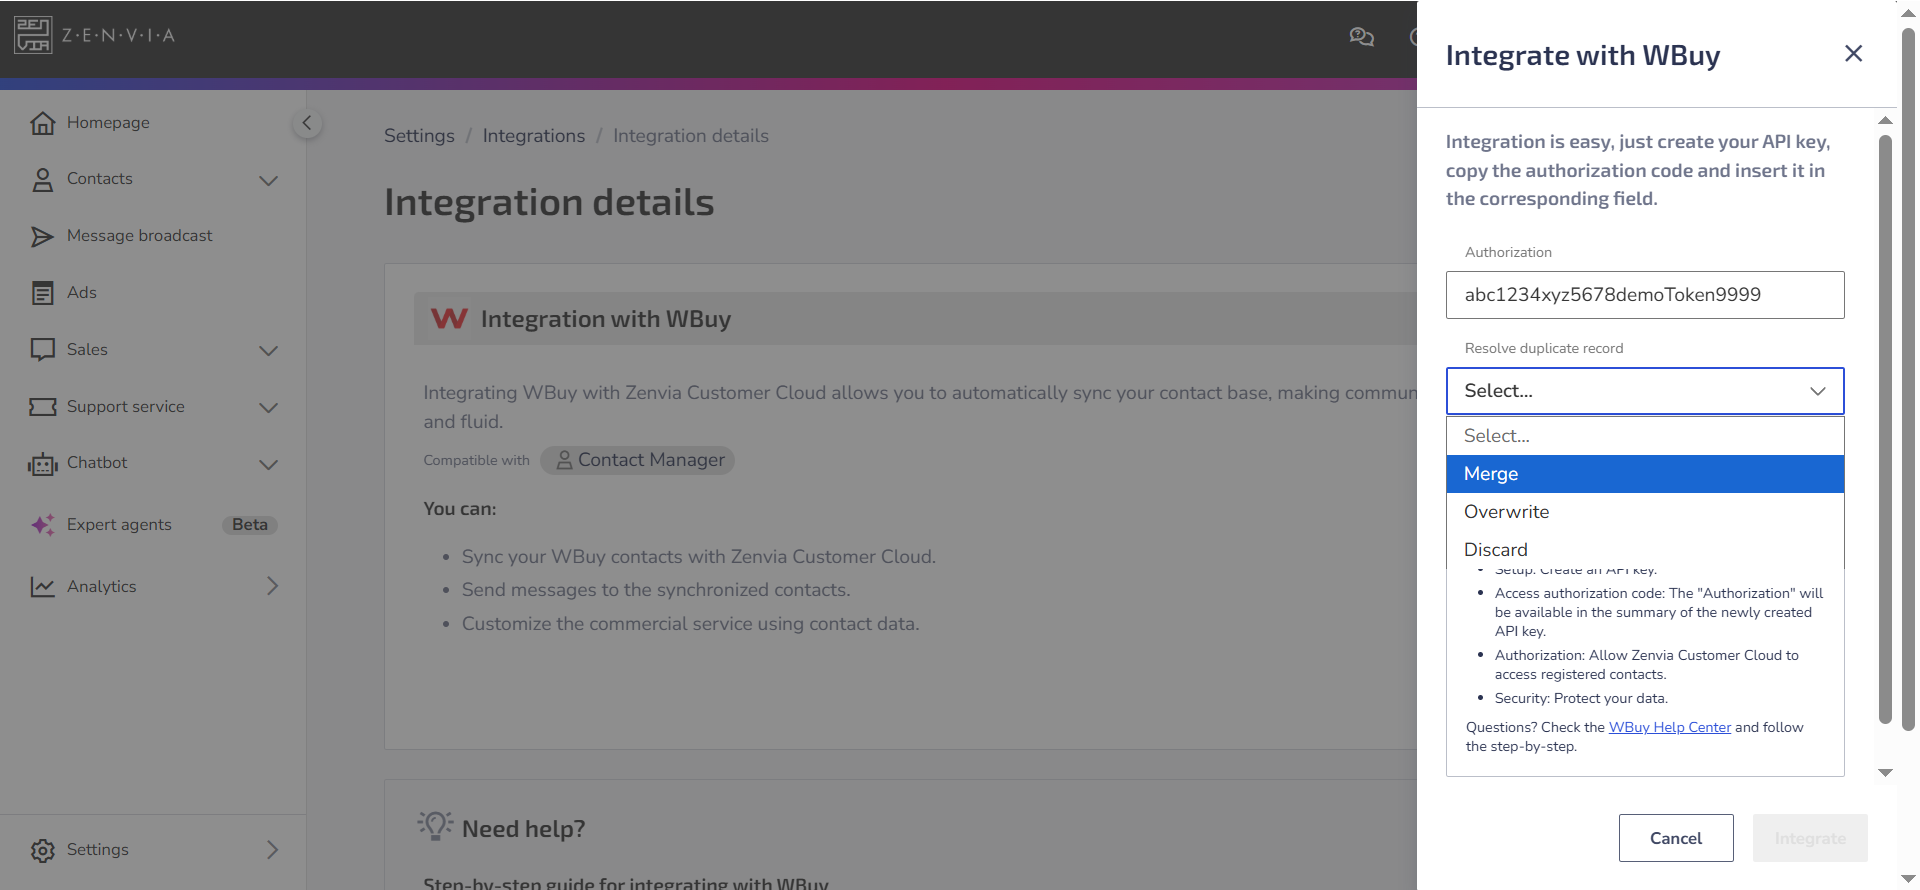
5. Paste the copied value from the WBuy Authorization field into the corresponding field in Zenvia Customer Cloud.
6. Choose how the data should be updated when there is a conflict between your ERP information and the contacts already existing in Zenvia Customer Cloud. The available options are:
a. Merge: Combines the data from both contacts, keeping the best of each.
b. Overwrite: Replaces all information from the current contact with the data received from the ERP.
c. Discard: Keeps the current contact and ignores the one coming from the ERP.
A contact will be considered a duplicate if the mobile phone, landline, or email matches any contact already existing in the database.
💡 Tip: See in practice how to resolve contact duplicates in system integrations.
7. Click on Integrate to validate the credential and complete the setup.
The integration between WBuy and Zenvia Customer Cloud is now complete!
If you have questions or encounter issues during the process, please contact Zenvia support.
Next Steps
Learn how to analyze and apply your data to optimize sales and operations in How to Use Your Management System Data in Zenvia Customer Cloud.
Learn more!
Deepen your knowledge with complementary materials:
- Understand the platform’s features and benefits in the article WBuy Overview.
- See practical examples of WBuy data application in WBuy Use Cases.