Whenever a ticket is updated, the system checks if any support specialist agent has conditions configured for that scenario. If so, the actions linked to that agent are executed automatically.
This is the final step of the agent configuration, where you define the success actions to be taken, such as automatically sending messages.
How to configure an action
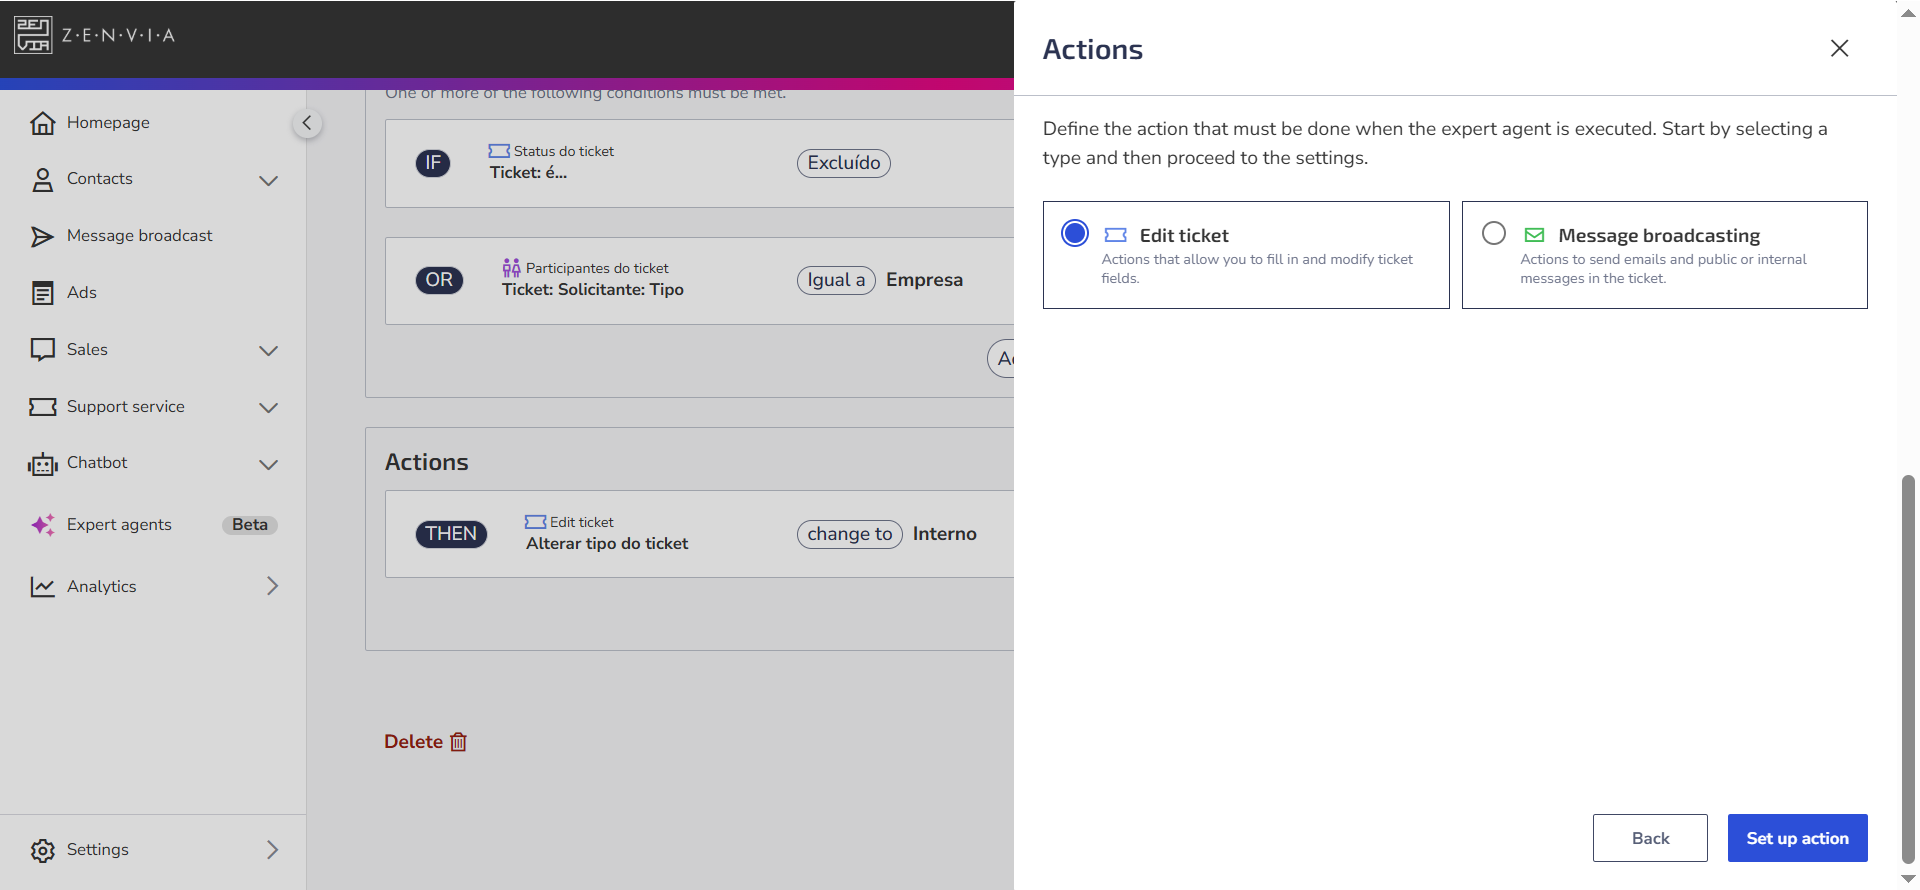
- Click the Add action button using the Then variant.
- Select one of the available action groupings:
- Edit ticket
- Message broadcasting
- Webhook
- Click Set up action.
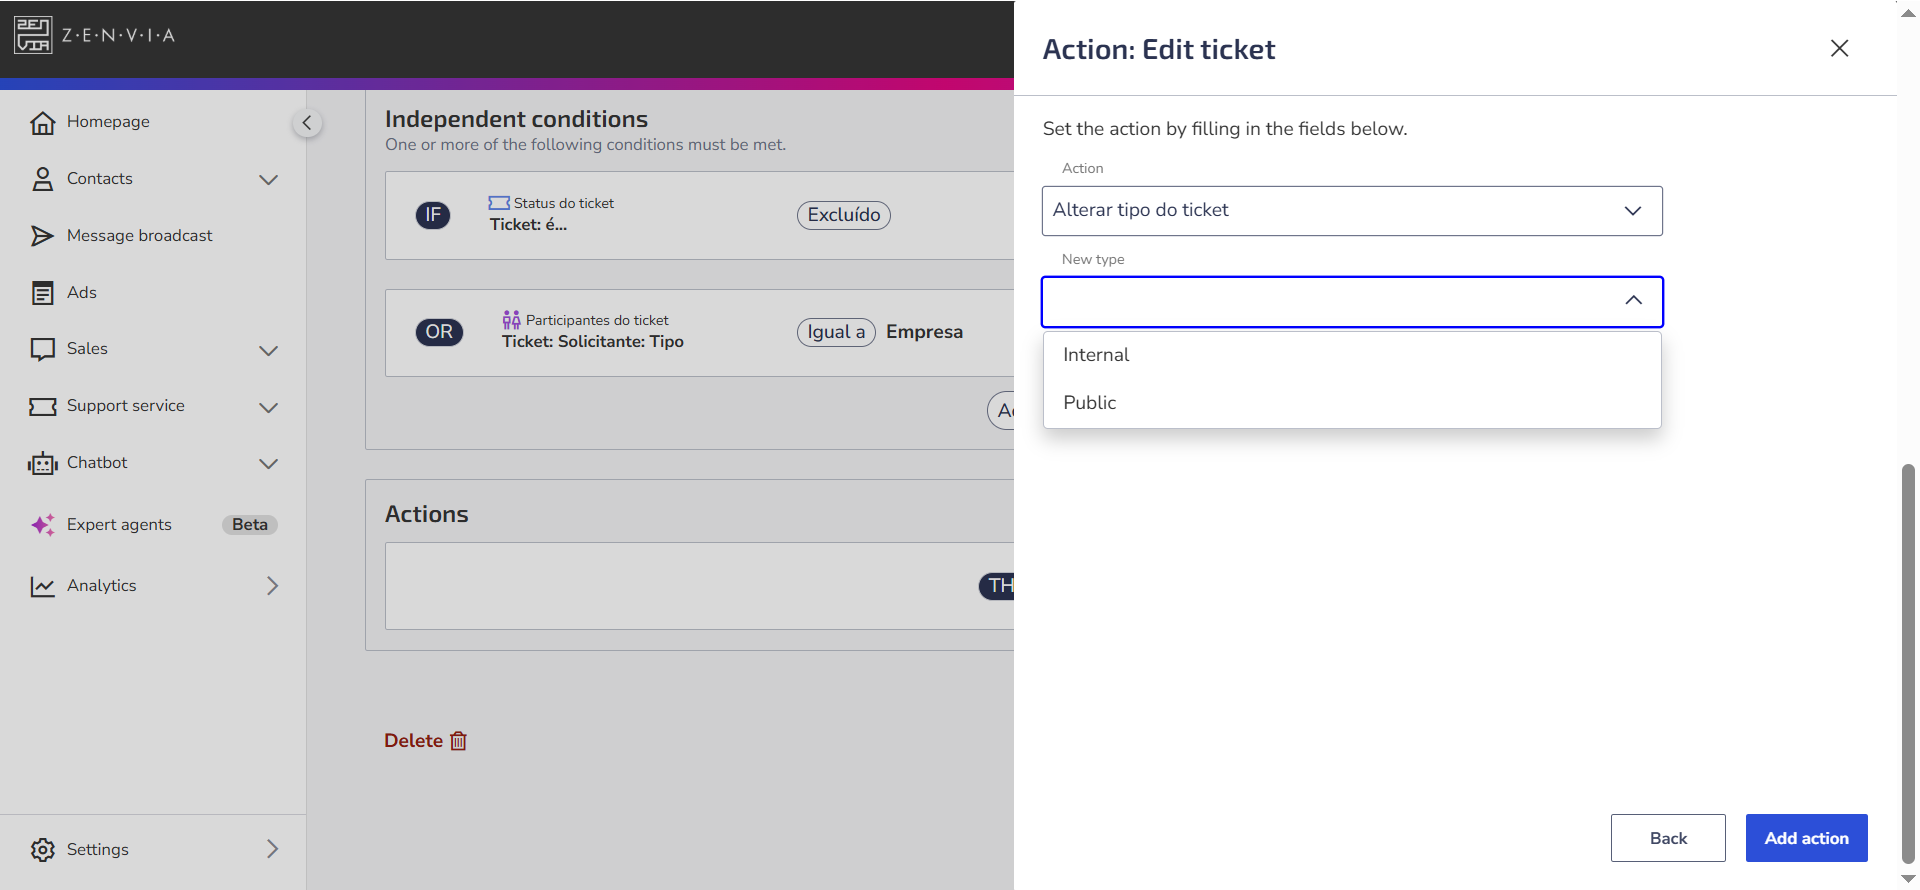
a. Edit ticket
You can automate structural changes to tickets with the following actions:
- Change ticket type
- Change ticket customer
- Change status
- Change parent ticket status
- Change service
- Change category
- Change priority
- Change assignee
- Set subject
- Add tags
- Set tags
- Remove tags
- Remove specific tags
- Create new child ticket
- Change action type
- Change additional field value
💡 Tip: When selecting one of these options, the system will ask for specific details. For example, if you choose Change ticket customer, you must select the new customer. |
Click Add actions when finished.
b. Send message
This type of action allows the agent to send messages whenever the conditions are met – either in the ticket itself or by email.
Channel: Action in the ticket
Allows you to log messages directly in the conversation. Define:
- Who sends the message (i.e., the responsible for the action):
- Ticket customers
- Ticket assignee
- Ticket creator
- System registered
- Specific user
- The type of message. It can be:
- Internal: visible only to agents
- Public: visible also to the customer
- Message content: It can be personalized and supports dynamic variables.
Channel: Email
Allows automatic email sending based on actions from the support specialist agent. Define:
- The sender (sending account), which can be the system default, the one that received the original message, or other available accounts in your operation.
- The recipients, who can be:
- Specific recipient
- Ticket CC
- Ticket customers
- Ticket creator
- Ticket participants
- Ticket assignee
- Parent ticket assignee
Optional: Enable the option Do not send the email to the user who triggered the automation if you want only the configured recipients to receive the email. |
The subject of the email
The message content: Can be personalized and supports dynamic variables.
⚠️ Attention: To use the email channel, at least one sender must be configured. See how to register domains and email addresses.
How to Customize Messages
When sending the same content to multiple customers without personalization, communication loses impact and becomes generic. With personalized fields — also known as variables — you make each message more relevant by automating the insertion of specific information into the text.
These variables are fields that automatically adapt to ticket, customer, or agent data, allowing for a more personalized experience.
Practical Example
Imagine a specialist agent using the email sending action. Instead of writing:
"Hello, your ticket has been reopened."
You can use variables to automatically generate:
Hello {ticket.assignedAgent.name},
Your ticket number {ticket.id} has been reopened by the customer.

So even when using a standard template, each customer receives a unique and contextualized message.
How to Insert Variables
To insert a personalized field into the message, type { or click Add custom field. The system will display the available options for your application (such as tickets or emails).
You can also search directly for the variable's function, for example:
- Type { and start writing "ticket number" to find {ticket.id}
- Or type "customer name" to locate {ticket.requester}
⚠️ Attention: Use {email.zenvia.info} when sending emails This variable is essential for the system to recognize the origin of the message. It allows the customer's reply to be automatically linked to the original ticket. |
c. Webhook
This action is used when the agent needs to **automatically send information to another system based on a specific event** — for example, the creation or update of a ticket.
When configured, the system will send the **ticket data** to the **URL defined in the webhook**, according to the settings configured on the Tokens & Webhooks screen.
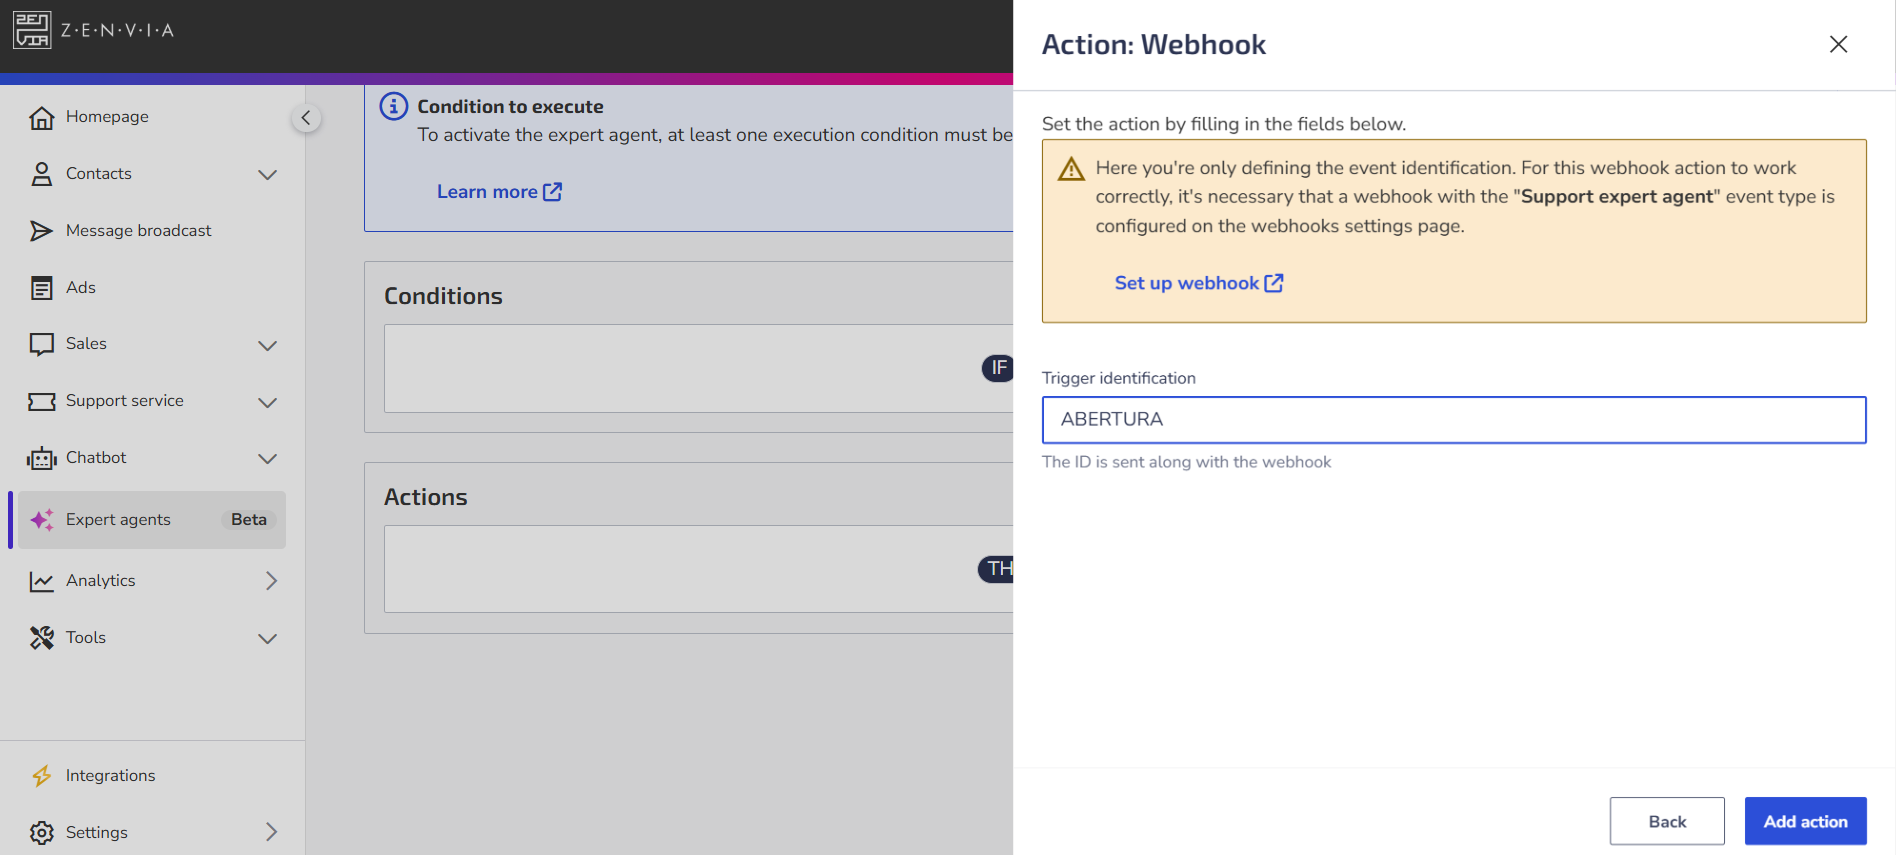
Prerequisite
For this action to work correctly, a webhook configured with the event type "Support Expert Agent" must exist. This webhook is responsible for receiving the data sent by the agent.

How to configure the action
- In Support Expert Agents, add a new action of the type Webhook.
- Insert an identification for the trigger — this identifier will be sent along with the webhook to facilitate tracking.
- Click Add action to save.
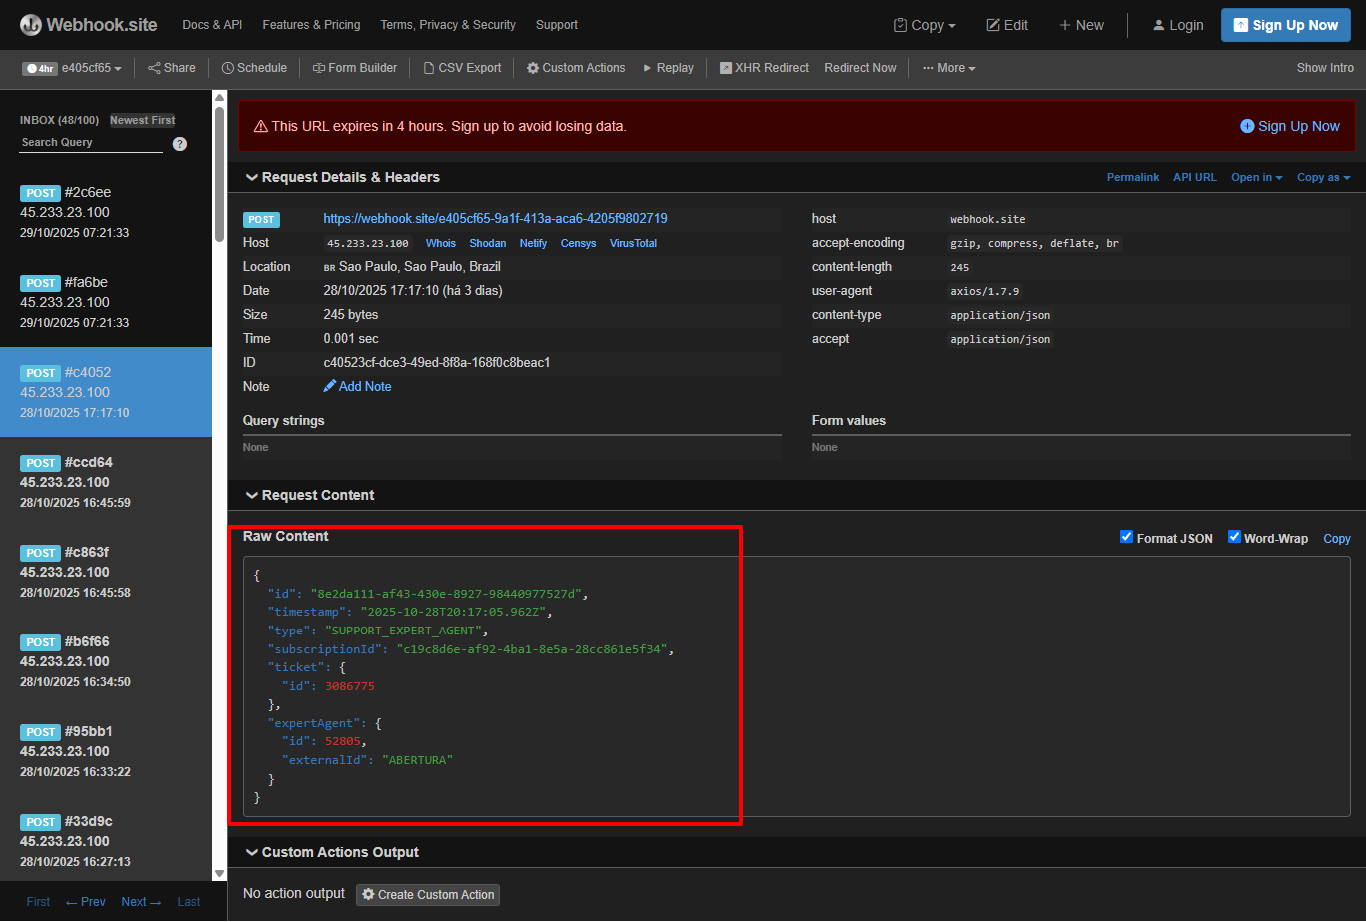
Practical example
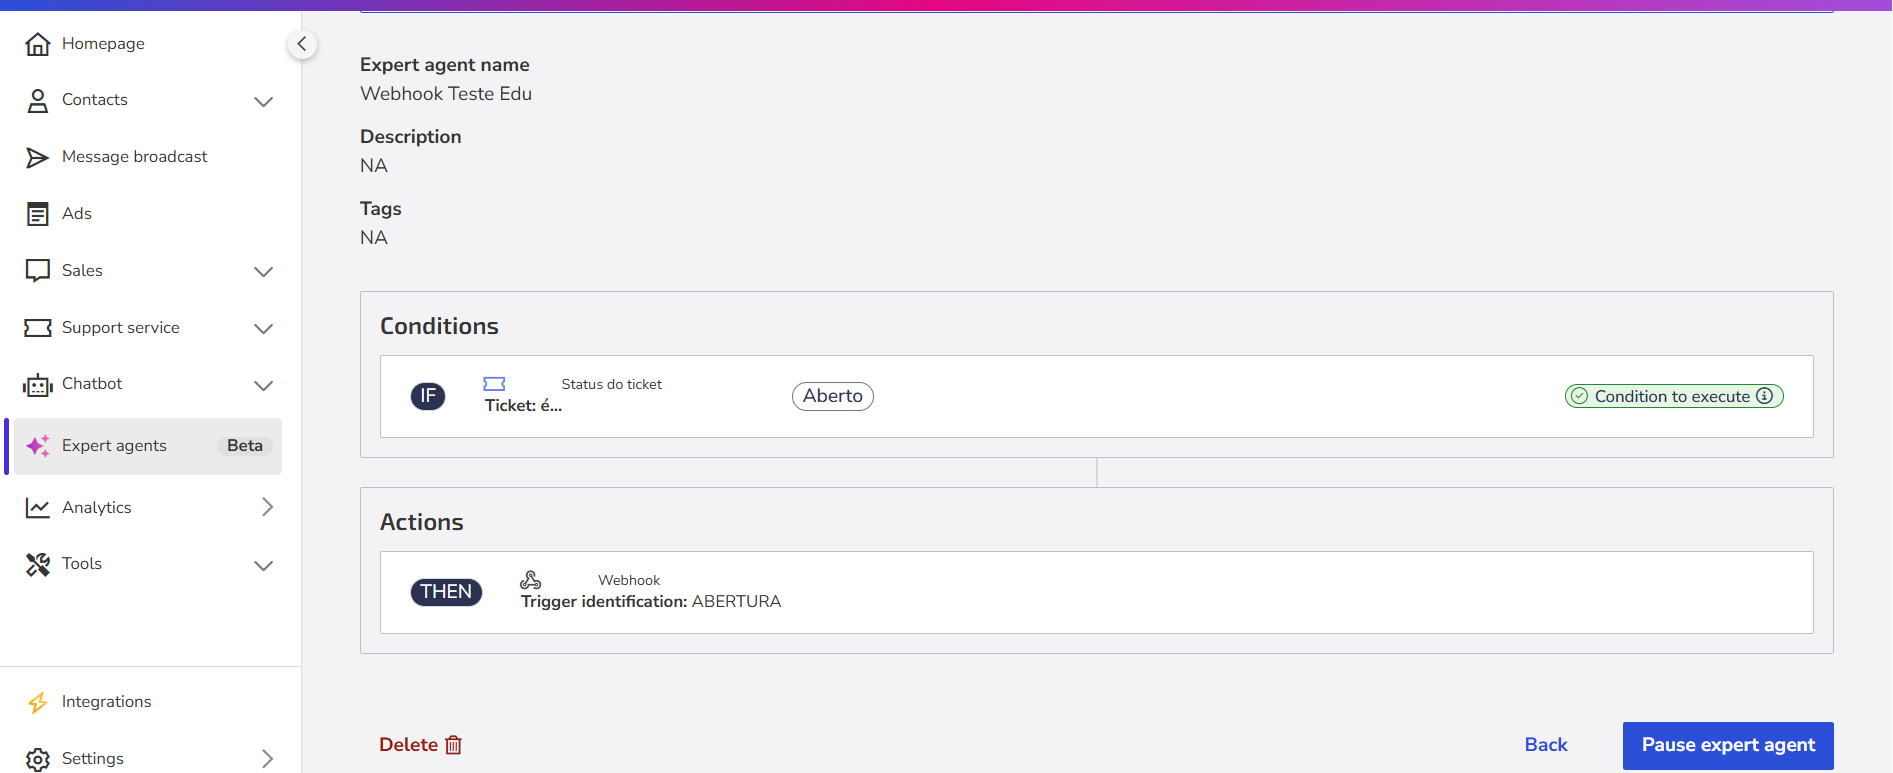
In the example below, the expert agent was configured with the condition Ticket Status > Ticket Is > Open and the associated action is the webhook sending. Thus, whenever a ticket is opened, the webhook is automatically triggered to the configured URL.
After execution, the webhook sending is recorded in the Change History of the ticket.
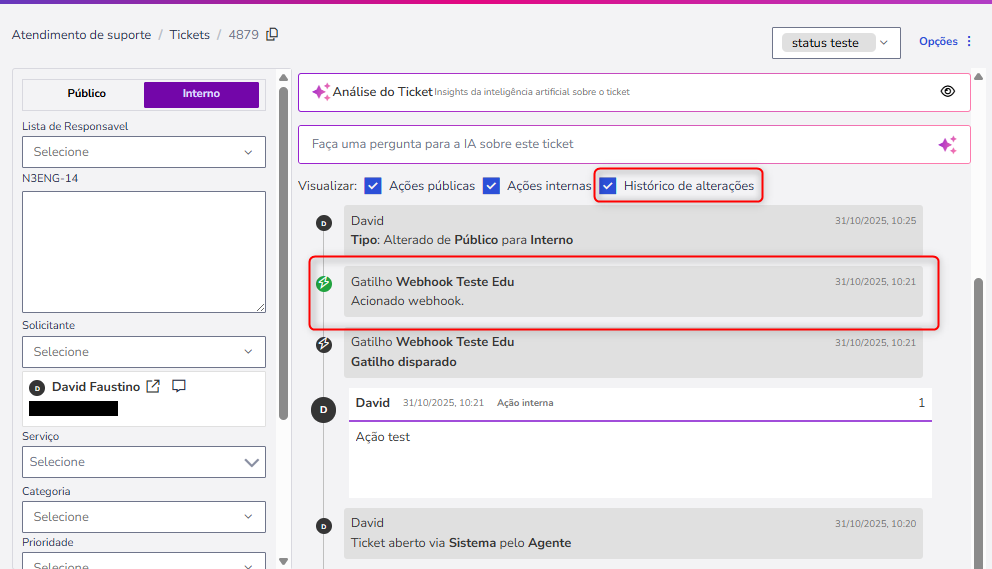
The call return (status and server response) can be checked in the system that received the webhook.